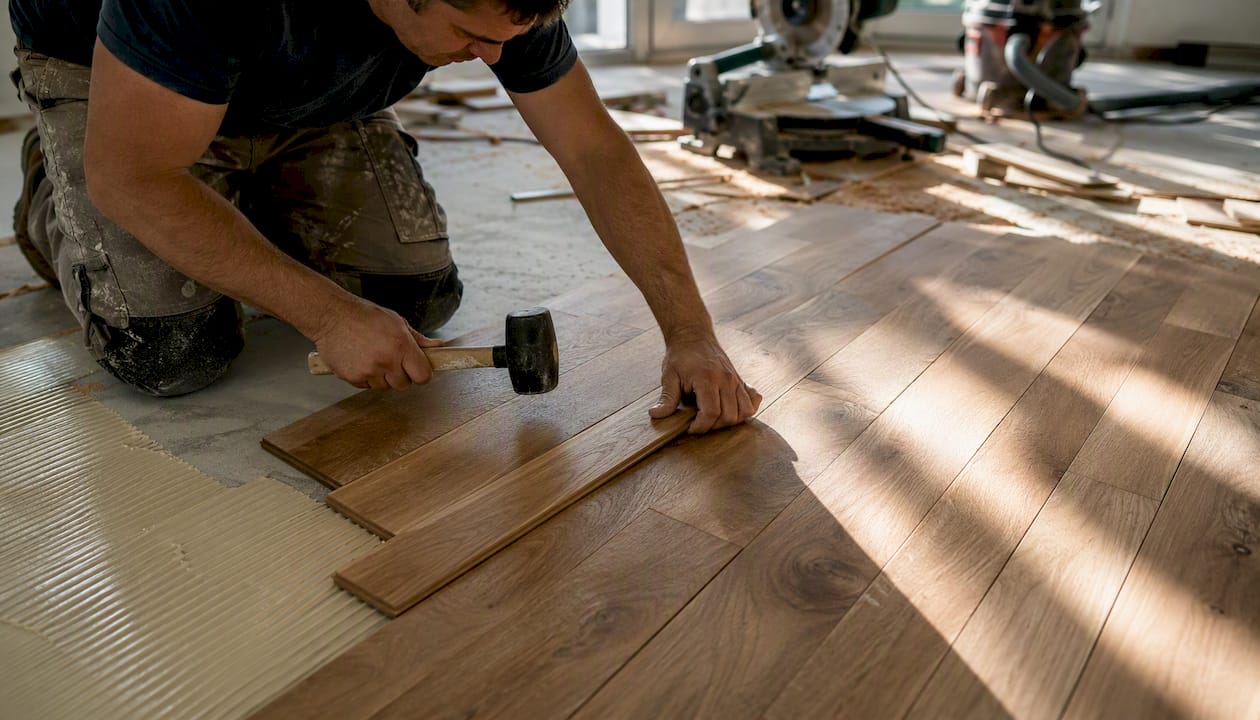
You have to stagger hardwood rows because aligned end joints create a visible seam pattern and a structural weak line that leads to gaps, ticking noises, and joints that fail years before they should. Staggering spreads that stress across the whole floor instead of stacking it in one column.
A few rules keep you out of trouble from the first row:
- Keep end joints at least 6 inches apart row to row, more for wider planks.
- Confirm flooring moisture is within about 2% of the subfloor before you cut a single board.
- Leave roughly a 3/4 inch expansion gap at the perimeter.
- Before fastening anything, dry-lay your first several rows and vary starter lengths so you’re not repeating the same cut over and over.
The National Wood Flooring Association backs these as standard racking practice, and pros who skip them almost always regret it by the third season.
Key Takeaways
Staggering hardwood rows works because it converts a straight line of structural weak points into hundreds of individually supported joints spread across the floor.
| Point | Details |
|---|---|
| Minimum offset | Keep end joints at least 6 inches apart row to row, more for wider planks. |
| Moisture tolerance | Confirm flooring moisture is within about 2% of the subfloor before installing. |
| Expansion gap | Leave roughly 3/4 inch around the perimeter for seasonal movement. |
| Avoid H-joints | Dry-lay several rows first and vary starter lengths to prevent aligned seams. |
| Material sourcing | Quality Hardwoods of Michigan, Inc supplies mixed-length hardwood, LVP, and laminate suited to proper stagger planning. |
Table of Contents
- Why Hardwood Flooring Rows Need Staggering: What “Staggered” Actually Means
- What Are the Real Benefits of Staggering a Hardwood Floor?
- What Are the Different Hardwood Stagger Patterns?
- How Do You Plan Stagger Before You Start Installing?
- What Site Conditions Affect How You Stagger a Floor?
- What Are Common Hardwood Staggering Mistakes?
- What Field-Tested Rules Do Professional Installers Follow?
- Why Good Staggering Separates Pro Work From Amateur Work
- How Quality Hardwoods of Michigan Can Help With Your Layout
- Sources
- FAQ
Why Hardwood Flooring Rows Need Staggering: What “Staggered” Actually Means
Staggering means offsetting the end joints of each row so they never line up vertically with the joints in the row next to it. Picture two rows of brick: if every seam in row two sits directly above a seam in row one, you get a continuous vertical line running through the wall. Wood flooring works the same way, just horizontally along the floor.
When two or more end joints stack up in a straight line across adjacent rows, installers call that an H-joint, named for the shape it makes when you look at just those few boards. It’s the single most obvious visual tell of a rushed or careless install, and it also happens to be a structural liability, which we’ll get to in the next section.
A few terms worth knowing before you start racking boards:
- H-joint: two or more end seams aligned closely enough to form a visible H shape.
- Stair-step pattern: a repeating diagonal line created when every row’s offset increases or decreases by the same fixed amount.
- Fixed stagger: a pattern where the offset between rows follows a set repeating measurement (like exactly 12 inches every time).
- Random stagger: an offset that varies row to row with no repeating interval, which is what most manufacturers and installers recommend as the default.
If you want to check your own layout before nailing or gluing anything down, sketch a quick top-down view of four or five rows on paper. Draw the seams as short perpendicular lines. If any of those lines fall within a few inches of each other across adjacent rows, you’ve got a joint cluster worth fixing before you commit.
What Are the Real Benefits of Staggering a Hardwood Floor?
The payoff splits into two categories, and most people only think about one of them.
Aesthetically, a staggered layout avoids the repeating lines that make a floor look mass-produced instead of installed with intention. The human eye is remarkably good at picking out patterns, even ones you didn’t consciously plan. A repeating seam interval, even a subtle one, reads as a grid rather than a natural wood surface, and it pulls attention away from the grain and color variation you paid for. Random stagger breaks that repetition and lets the floor read the way natural materials are supposed to: varied, with depth, without an obvious template underneath it.
Structurally, staggering distributes end-joint stress instead of concentrating it. Aligned joints create a continuous line of relatively weak points running across the floor. In floating floors and click-lock systems especially, that concentrated line is where movement, clicking noises, and eventual joint failure tend to show up first. Spread those same joints across the field of the floor, and each one is individually supported by solid, uninterrupted board on both sides in the neighboring rows.

Over time, that difference compounds. A floor with clustered joints wears unevenly under foot traffic and tends to develop gaps at exactly those weak points as the seasons cycle through humidity swings. A properly staggered floor spreads that seasonal movement across hundreds of individual joints instead of a handful of stress lines, which is a meaningful part of why some installs still look tight after fifteen years while others start gapping in year three.
Pro Tip: It’s tempting to use every cutoff to save material, but resist the urge to grab whatever piece is closest just because it’s efficient. A floor built entirely from leftover scraps often ends up with short pieces clustered in one corner of the room. Save the smallest cutoffs for closets, under-appliance areas, or trim transitions where nobody’s looking closely.
What Are the Different Hardwood Stagger Patterns?
Not every room calls for the same approach, and picking the wrong one for your plank length or room size is a common source of regret.
Random stagger is the default most installers reach for, and for good reason. There’s no fixed interval, so the eye never catches a repeating rhythm. It works in almost any room size and with almost any plank length, provided you respect the minimum offset.
Half (1/2) stagger offsets each row by roughly half the plank length. It’s simple to plan and works reasonably well with uniform-length planks, but because the interval repeats exactly, you can end up with a very faint stair-step effect in long, narrow rooms where sightlines run the length of the room.
Third (1/3) stagger offsets each row by about a third of the plank length, cycling through three positions before repeating. This spreads seams more evenly than a half stagger and is a common recommendation when plank length is fixed and you can’t rely on natural length variation to break up the pattern.
Fixed or step patterns use a set, repeating offset measurement. They’re predictable and easy to plan for a crew, but a rigid fixed interval is exactly what creates the diagonal stair-step lines you’re trying to avoid. Use them sparingly, and only when you’ve confirmed the interval doesn’t create a visible repeat given your room’s sightlines.
| Pattern | Best For | Watch Out For |
|---|---|---|
| Random stagger | Most rooms, mixed-length boxes | Requires active planning to avoid accidental clusters |
| Half (1/2) stagger | Uniform-length planks, smaller rooms | Faint stair-step in long sightlines |
| Third (1/3) stagger | Fixed plank lengths, medium to large rooms | Still repeats every three rows |
| Fixed/step pattern | Small rooms, budget installs with limited material | Highest risk of visible diagonal lines |
If your room is small enough that sightlines are short, a fixed or half pattern often looks fine because there’s not enough floor for the repeat to become obvious. In a great room or an open-concept main floor, random stagger earns its reputation as the safer default.
How Do You Plan Stagger Before You Start Installing?
Getting this right starts before you ever pick up a nailer, and skipping the planning stage is where most DIY installs go sideways.
- Let the material acclimate to the room for the manufacturer’s recommended period, then confirm with a moisture meter that the flooring reads within about 2% of the subfloor before cutting anything.
- Open several boxes at once rather than working through one box at a time. Boxes often ship with similar length distributions, and pulling from just one will bias your stagger toward repeating patterns.
- Measure the room and calculate roughly how many starter pieces you’ll need, then plan starter lengths so no two adjacent rows begin with the same cut.
- Dry-lay the first three or four rows without fastening anything, checking end-joint spacing against your minimum offset before committing.
- Rack ahead as you work, physically laying out boards for the next several rows before nailing the current one, so you can spot a developing cluster while it’s still easy to fix.
- Check row alignment every four to five rows by measuring across that span; if you’ve drifted more than about 1/8 inch, correct the angle over the next couple of rows rather than trying to fix it all at once.
Pro Tip: When you cut the last piece off a row, that offcut can usually start the next row, as long as it’s not so short it creates a weak sliver next to the wall. A commonly used floor for this is around 8 inches; anything shorter gets set aside for a closet or a spot where a small piece won’t stand out.
What Site Conditions Affect How You Stagger a Floor?
The rules above assume ideal conditions. Real jobsites rarely offer those, and a few site-specific factors change how much flexibility you have.
Moisture and acclimation come first because they affect everything downstream. Flooring that hasn’t equalized with the room’s humidity will expand or contract after installation regardless of how well you staggered the joints. A moisture meter reading within roughly 2% of the subfloor is the benchmark This Old House and most manufacturers point to before you start cutting.
Expansion gaps matter just as much as the stagger pattern itself. Leaving about 3/4 inch around the perimeter gives the whole floor room to expand and contract seasonally without buckling. Skip this and even a perfectly staggered floor can develop pressure ridges.
Subfloor flatness amplifies or hides seam visibility more than most people expect. An uneven subfloor can cause boards to rock slightly at their joints, which makes even a well-planned stagger pattern show up as visible movement or noise underfoot. Checking subfloor flatness before installation isn’t a separate task from staggering; it’s a prerequisite for the stagger plan to actually hold up.
Product format changes the numbers slightly. Solid hardwood, engineered hardwood, and click-lock LVP or laminate each carry their own manufacturer guidance on minimum offset, and click systems in particular treat stagger as load-bearing for the locking mechanism itself, not just a visual choice.
| Factor | Target/Guidance | Why It Matters |
|---|---|---|
| Moisture difference | Within ~2% of subfloor | Prevents post-install expansion or gapping |
| Expansion gap | ~3/4 inch perimeter | Allows seasonal movement without buckling |
| Minimum end-joint offset | 6 inches (more for wide planks) | Prevents stress concentration and H-joints |
| Row-drift tolerance | Correct if drift exceeds 1/8 inch over 4–5 rows | Keeps rows square across the room |

What Are Common Hardwood Staggering Mistakes?
Most staggering problems trace back to a handful of repeat offenders, and nearly all of them are avoidable with a five-minute dry-lay before fastening.
- Too-small end pieces: a sliver of board less than a few inches long next to a wall looks cheap and can pop loose. Reserve short offcuts for closets or under cabinetry instead.
- Repeating starter lengths: starting every row with the same length cut creates an accidental fixed stagger. Vary your starters deliberately, or pull from a mixed pile of offcuts.
- H-joints: two or more seams landing within a few inches of each other across rows. Catch these during dry-lay, not after the glue sets.
- Stair-step diagonals: a fixed offset repeated too many times in a row creates a visible diagonal line running across the floor. Break it up by inserting a randomly-sized board every few rows.
- Clusters of short boards: using offcuts without tracking where they land can bunch several short pieces in one area, weakening that section and drawing the eye. Spread short pieces out and keep a running mental map as you rack.
Some of these are fixable after the fact. A single H-joint discovered a few rows back can often be corrected by lifting and re-racking just that section, especially with click-lock or floating floors. Widespread stair-stepping or clustered short boards across a large area usually means pulling up more material than anyone wants to, which is exactly why the dry-lay step in the planning section earns its place. If you’re dealing with gaps that have already appeared from a stagger issue, there are practical fixes short of a full tear-out.
What Field-Tested Rules Do Professional Installers Follow?
Experienced installers treat stagger discipline as a checklist, not a judgment call made row by row. Here’s roughly what that checklist looks like on a real jobsite:
- Document moisture readings for both the flooring and subfloor before the first board goes down, confirming the reading falls within the 2% tolerance.
- Open four or more boxes simultaneously at the start of the job and keep pulling from all of them throughout, not just at the beginning.
- Rack three to four rows ahead at all times, adjusting upcoming board placement the moment a joint cluster starts to form.
- Measure row-to-row alignment every four to five rows, correcting for drift greater than 1/8 inch before it compounds further down the room.
- Handle the last row carefully, ripping boards to fit and face-nailing where required since a nail gun often can’t reach that tight against the wall.
- Preserve the expansion gap right up until trim and shoe molding go on, resisting the temptation to snug the last row up against the wall for a cleaner look.
Pro Tip: Step back and look down the length of the room every ten rows or so, not just at the section you’re currently working on. Seam patterns that look fine up close sometimes reveal a repeating rhythm only visible from across the room.
Why Good Staggering Separates Pro Work From Amateur Work
I’ve seen premium white oak, the kind that costs real money per square foot, get installed with a repeating stair-step pattern that made the whole room look like a big-box laminate job. The material wasn’t the problem. The layout was. Nobody notices good staggering, which is exactly the point. What people do notice is bad staggering, and once they see it, they can’t unsee it.
The judgment that separates an experienced installer from someone on their first floor isn’t really about knowing the 6-inch minimum offset rule, though that matters. It’s the habit of physically stepping back every so often, looking down the length of a room instead of just at the section under the nailer, and catching a developing pattern before it becomes ten rows of stair-stepping that requires ripping everything back up. That’s a visual skill built from doing it wrong a few times early on, and it’s the same instinct behind the rack-three-rows-ahead habit pros rely on.
Homeowners and DIYers can build that same instinct fast by simply dry-laying more rows than feels necessary before committing to fasteners. It costs you twenty extra minutes. It saves you from tearing up flooring you already paid to have delivered to your door.
How Quality Hardwoods of Michigan Can Help With Your Layout
Getting the stagger right starts with having the right mix of board lengths in your hands, not just a good plan on paper. Quality Hardwoods of Michigan, Inc stocks unfinished and prefinished hardwood, engineered options, and luxury vinyl plank in a range of widths and lengths specifically so you’re not stuck racking an entire room from one narrow length distribution.

Our showroom team can walk you through which plank widths call for a wider minimum offset and which product lines, hardwood, LVP, or laminate, have their own manufacturer-specific stagger requirements before you buy. If you’re planning a new-construction install or a full room replacement, our new construction flooring services team can help you calculate material needs so you’re not short a box halfway through racking, or stuck with only enough for a repeating pattern you didn’t intend. Stop by the showroom, call for a quote, or browse the full product catalog online to get the right mix of lengths for your next install.
Sources
- National Wood Flooring Association (NWFA)
- How to install hardwood floors - This Old House
- How To Stagger Wood Floor Planks - Hunker
- Staggered Flooring: Pros, Cons, and Buying Guide - D and G Flooring
- How to Stagger Wood Flooring: Patterns, Tips and Visual Examples - Wood & Beyond
- Hardwood Floor Seam Staggering: The Pro Layout Rule - HighProTools
FAQ
What is the rule of 3 for flooring?
It’s a common shorthand for maintaining variation across three or more rows so no seam pattern repeats too soon, often paired with a minimum offset of 6 inches or roughly a third of the plank length between adjacent end joints.
Do you have to stagger floor boards?
Yes. Aligning end joints creates a structural weak line and a visible repeating pattern, so staggering is standard practice for solid hardwood, engineered wood, laminate, and click-lock LVP alike.
What is a staggered hardwood floor pattern?
It’s a layout where each row’s end joints are offset from the joints in the rows next to it, typically by at least 6 inches, so no two seams line up vertically across the floor.
How should you stagger flooring?
Dry-lay your first several rows, keep end joints at least 6 inches apart, mix boards from multiple boxes to vary lengths, and check for drift every four to five rows, correcting anything over 1/8 inch.
Can I fix a floor that wasn’t staggered correctly?
A localized H-joint or short cluster can often be corrected by lifting and re-racking just that section, especially with click-lock floors, though widespread stair-stepping across a large area usually means pulling up more material.
Recommended
- Wood Floor Installation Sequence: A Step-by-Step Guide — Quality Hardwoods of Michigan
- Pattern Flooring Layouts: Examples for Homeowners & Designers — Quality Hardwoods of Michigan
- Hardwood Flooring Subfloor Requirements: A Complete Guide — Quality Hardwoods of Michigan
- How to Choose the Best Hardwood Flooring for Your Home | Quality Hardwoods of Michigan