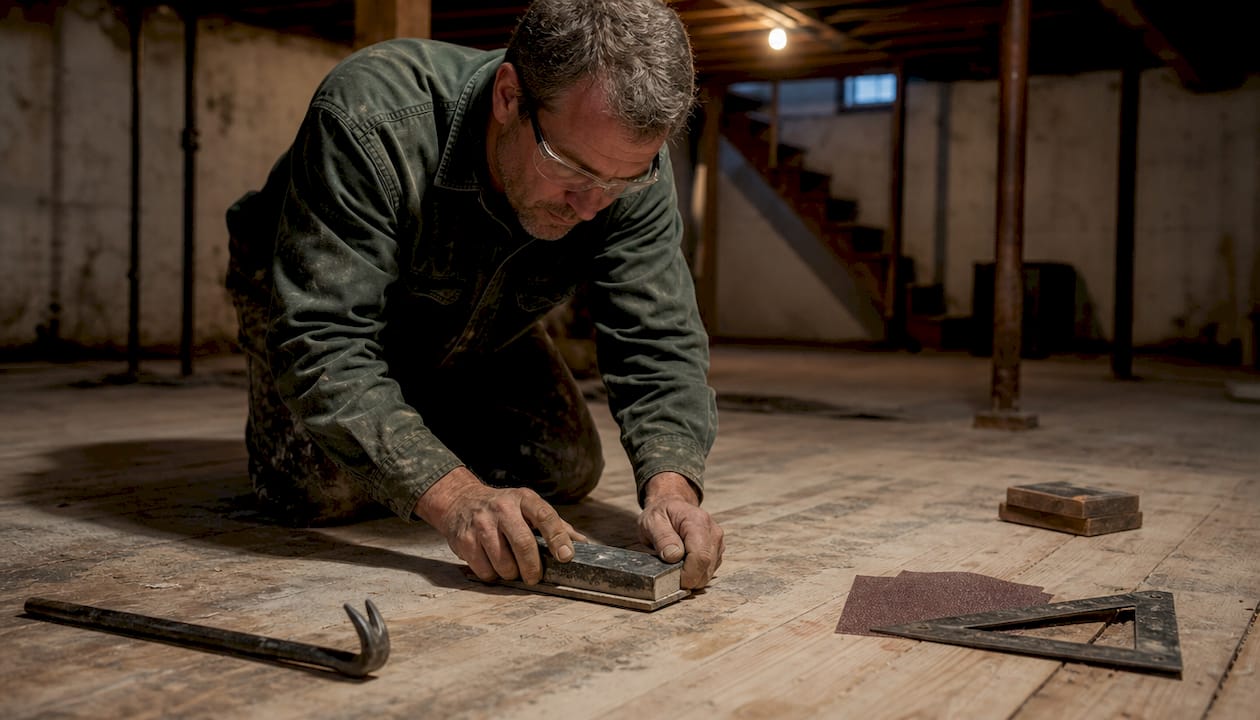
Subfloor preparation is defined as the process of creating a flat, dry, and structurally sound base before any finished flooring goes down. Skip it, and even the most expensive hardwood or luxury vinyl plank will fail ahead of schedule. According to the National Wood Flooring Association, up to 70%–80% of premature flooring failures trace back to improper subfloor preparation, not product defects. That single statistic reframes the entire flooring conversation. The subfloor is the invisible foundation that controls how your finished floor looks, performs, and lasts, whether you are installing hardwood, engineered wood, LVP, laminate, or tile.
Why subfloor preparation matters for flooring quality
The flooring industry uses the term “substrate preparation” interchangeably with subfloor preparation. Both refer to the same mandatory process: getting the base layer clean, solid, flat, and dry before installation begins. A subfloor that meets these four criteria provides structural support and prevents the deterioration that causes cupping, gapping, squeaking, and joint failure.
Professional installers treat subfloor prep as a non-negotiable step. Homeowners, by contrast, often treat it as optional, especially when they are eager to see the finished result. That gap in priority is exactly where most flooring problems begin. The good news is that the standards are measurable, the tests are affordable, and the fixes are well within reach for a motivated DIYer.

What are the critical standards for subfloor readiness?
Two measurements define a ready subfloor: flatness and moisture. Both have specific thresholds that the flooring industry enforces through manufacturer warranties and installation guidelines.
Flatness tolerances
The standard flatness tolerance is 3/16 inch over 10 feet. For glue-down LVP and engineered hardwood, the tolerance tightens to 1/8 inch over 6 feet. These numbers matter because thin, rigid flooring systems have no flex to compensate for high or low spots. A ridge as small as a quarter-inch under a plank creates a stress point that cracks adhesive bonds and causes joint failure over time.
Moisture thresholds
Moisture is the single most destructive force acting on a subfloor. Concrete subfloors must read below 75% relative humidity (RH). Wood subfloors must measure below 12% moisture content (MC). Exceeding either threshold causes wood to swell, adhesives to fail, and mold to grow beneath the finished floor.
| Subfloor type | Moisture limit | Flatness tolerance |
|---|---|---|
| Concrete | ≤75% RH | 3/16 in. over 10 ft. |
| Wood (nail-down) | <12% MC | 3/16 in. over 10 ft. |
| Concrete (glue-down LVP) | ≤75% RH | 1/8 in. over 6 ft. |
| Engineered hardwood | <12% MC | 1/8 in. over 6 ft. |

Pro Tip: A poly-film tape test costs roughly $4 and detects moisture vapor on concrete slabs. Tape a 2-foot square of plastic sheeting to the slab, seal the edges, and wait 24 hours. Condensation under the film means moisture levels are too high to install.
Beyond flatness and moisture, check for soft spots, squeaks, and visible damage. Walk the entire subfloor and press down firmly in each corner of every 4-foot section. Any movement or sound signals a structural problem that leveling compound will not fix.
How does poor subfloor prep affect different flooring types?
The consequences of skipping subfloor preparation show up differently depending on the flooring material, but the root cause is always the same.
- Hardwood flooring cups and crowns when moisture moves unevenly through the wood. A subfloor with high moisture content transfers that moisture directly into solid planks, causing the edges to rise or the center to dome.
- Engineered hardwood tolerates more moisture than solid wood but still requires a flat base. High spots cause the locking joints to separate, creating visible gaps within the first heating season.
- Luxury vinyl plank (LVP) and SPC flooring are less forgiving of subfloor imperfections than older, thicker flooring systems. Their rigidity means any bump or dip telegraphs directly to the surface, cracking the locking mechanism under foot traffic.
- Laminate flooring develops hollow spots and a spongy feel when installed over an uneven base. The foam underlayment compresses unevenly, and the click-lock joints eventually separate.
- Tile and stone crack at the grout lines when the subfloor flexes. Tile requires a deflection-resistant base, and any movement in the subfloor transfers directly to the brittle grout.
Flooring inspectors consistently find that homeowners and even some contractors misattribute subfloor failures to product defects. The floor gets blamed. The subfloor gets ignored. The replacement floor fails for the same reason as the first one.
Understanding this pattern is the first step toward breaking it. If your previous floor failed within a few years, the subfloor is the first place to investigate, not the product you chose. For a closer look at how newer flooring materials respond to subfloor conditions, the sensitivity gap between old and new products is significant.
What practical steps can homeowners take to prepare their subfloor?
Assessing and preparing a subfloor is a process, not a single task. Work through these steps before any flooring goes down.
- Test for moisture on concrete. Use the poly-film tape test described above, or rent a professional moisture meter. Seasonal humidity changes affect readings, so test during the season closest to when you plan to install. A reading taken in dry winter air may not reflect summer conditions.
- Test wood subfloor moisture content. A pin-type or pinless moisture meter gives you a reading in seconds. Take readings in multiple spots across the room, not just one corner.
- Check flatness with a long straightedge. A 10-foot level or a long board works well. Slide it across the subfloor in multiple directions and mark any gaps greater than 3/16 inch with chalk. These are your problem areas.
- Repair soft spots and squeaks. Screw down any loose panels with deck screws every 6 inches along the joists. Replace any panels with rot, water damage, or delamination. No amount of leveling compound fixes a structurally weak panel.
- Remove surface laitance from concrete. New concrete screeds develop a weak surface layer called laitance. Removing laitance before applying self-leveling underlayment is critical. Failing to do so causes the underlayment to bond to the weak layer instead of the solid slab, and the whole system eventually separates.
- Fill low spots with self-leveling compound. Mix and pour according to the manufacturer’s instructions. Allow full cure time before installing flooring on top.
- Clean the surface completely. Sweep, vacuum, and remove any adhesive residue, paint, or debris. Contaminants prevent adhesives and underlayments from bonding correctly.
Pro Tip: If you find moisture readings above the threshold on a concrete slab, do not proceed with installation. Apply a moisture mitigation membrane rated for your specific RH level before laying any flooring. Skipping this step voids most manufacturer warranties immediately.
When in doubt about moisture mitigation or significant leveling work, call a professional. The cost of a consultation is far less than the cost of a failed floor. You can also review the subfloor requirements guide from Quality Hardwoods of Michigan, Inc for product-specific thresholds.
What are the economic and warranty implications of skipping prep?
The financial case for proper subfloor preparation is straightforward. Subfloor diagnosis and basic fixes cost around $200. Replacing a failed floor costs thousands, and that figure does not include the labor to remove the old material or address the underlying subfloor problem that caused the failure in the first place.
Skipping subfloor prep risks voiding manufacturer warranties and typically leads to failures within 2–5 years. Most flooring warranties include explicit language requiring the subfloor to meet flatness and moisture standards at the time of installation. If you cannot document that those standards were met, the manufacturer has no obligation to cover the claim.
| Scenario | Estimated cost |
|---|---|
| Subfloor prep before installation | ~$200 |
| Flooring replacement after failure | $3,000–$10,000+ |
| Warranty claim without documentation | $0 coverage |
| Professional moisture mitigation membrane | $500–$1,500 |
Documentation protects you. Keep your moisture test results, photos of the subfloor before installation, and any receipts for leveling compound or repairs. If a warranty dispute arises, that paper trail is your strongest argument. Regional climate also plays a role. Homes in Michigan experience significant seasonal humidity swings, which means a single moisture test taken in march may not reflect conditions in july. Test at least twice, in different seasons, before committing to installation.
The invisible foundation: what 40 years of flooring experience taught me
I have seen beautiful floors fail within a year, and I have seen budget floors last decades. The difference almost never comes down to the product. It comes down to what was done before the first plank went down.
The flooring industry has a quiet problem: homeowners blame the floor, and manufacturers point to installation errors, and nobody talks about the subfloor sitting underneath all of it. Flooring inspectors consistently find that subfloor problems are misread as product defects. I have watched homeowners spend thousands on a second floor that fails for the exact same reason as the first, because nobody fixed the actual problem.
Modern flooring materials have made this worse, not better. SPC and LVP are marketed as durable and waterproof, which they are. But that rigidity means they have zero tolerance for a subfloor that is not perfectly flat. Older carpet and vinyl sheet goods could hide a multitude of subfloor sins. Today’s click-lock systems cannot. The common flooring mistakes I see most often all trace back to this one skipped step.
My honest advice: treat subfloor prep as the most important part of your flooring project, not the part you rush through to get to the fun stuff. If you are a DIYer, do the moisture tests, check the flatness, and fix what you find. If the numbers are outside the acceptable range, bring in a professional before you install anything. The floor you see every day is only as good as the foundation you cannot see.
— Mike Solomich
Quality Hardwoods of Michigan, Inc has the products and guidance you need
Whether you are installing hardwood, laminate, or luxury vinyl, the right flooring starts with the right foundation.

Quality Hardwoods of Michigan, Inc carries an extensive selection of vinyl flooring options including LVP, LVT, and sheet vinyl, along with laminate flooring built for Michigan’s climate demands. The team has over 40 years of experience helping homeowners and contractors choose products that match their subfloor conditions. Before you buy, ask about the specific flatness and moisture requirements for each product. Getting that match right from the start is what separates a floor that lasts from one that fails. Visit the showroom or browse the full flooring product catalog to find the right fit for your project.
FAQ
What is subfloor preparation?
Subfloor preparation is the process of making a base layer clean, flat, dry, and structurally sound before installing finished flooring. A properly prepared subfloor prevents cupping, gapping, squeaking, and premature failure.
How flat does a subfloor need to be?
The standard tolerance is 3/16 inch over 10 feet for most flooring types. Glue-down LVP and engineered hardwood require a tighter 1/8 inch over 6 feet due to their rigid, unforgiving construction.
How do I test my subfloor for moisture?
Tape a plastic sheet to the concrete slab, seal the edges, and check for condensation after 24 hours. For wood subfloors, use a moisture meter and confirm the reading stays below 12% MC before installing any flooring.
Can I install flooring without preparing the subfloor?
Installing flooring over an unprepared subfloor risks voiding the manufacturer warranty and typically leads to failures within 2–5 years. The cost of skipping prep far exceeds the roughly $200 investment to do it correctly.
Does subfloor preparation matter for LVP specifically?
LVP and SPC flooring are particularly sensitive to subfloor flatness because their rigid core cannot flex over high or low spots. Even minor imperfections cause joint failure and surface cracking under normal foot traffic.
Key takeaways
Proper subfloor preparation is the single most effective way to prevent premature flooring failure and protect your installation investment.
| Point | Details |
|---|---|
| Subfloor failures are common | Up to 70%–80% of premature flooring failures stem from poor subfloor prep, not product defects. |
| Flatness standards are strict | Most floors require 3/16 in. over 10 ft.; glue-down LVP and engineered hardwood need 1/8 in. over 6 ft. |
| Moisture limits are non-negotiable | Concrete must read ≤75% RH and wood subfloors must stay below 12% MC before installation. |
| Prep saves money | Basic subfloor fixes cost around $200; a failed floor replacement can run $3,000–$10,000 or more. |
| Documentation protects your warranty | Keep moisture test results and photos to support any future manufacturer warranty claim. |