
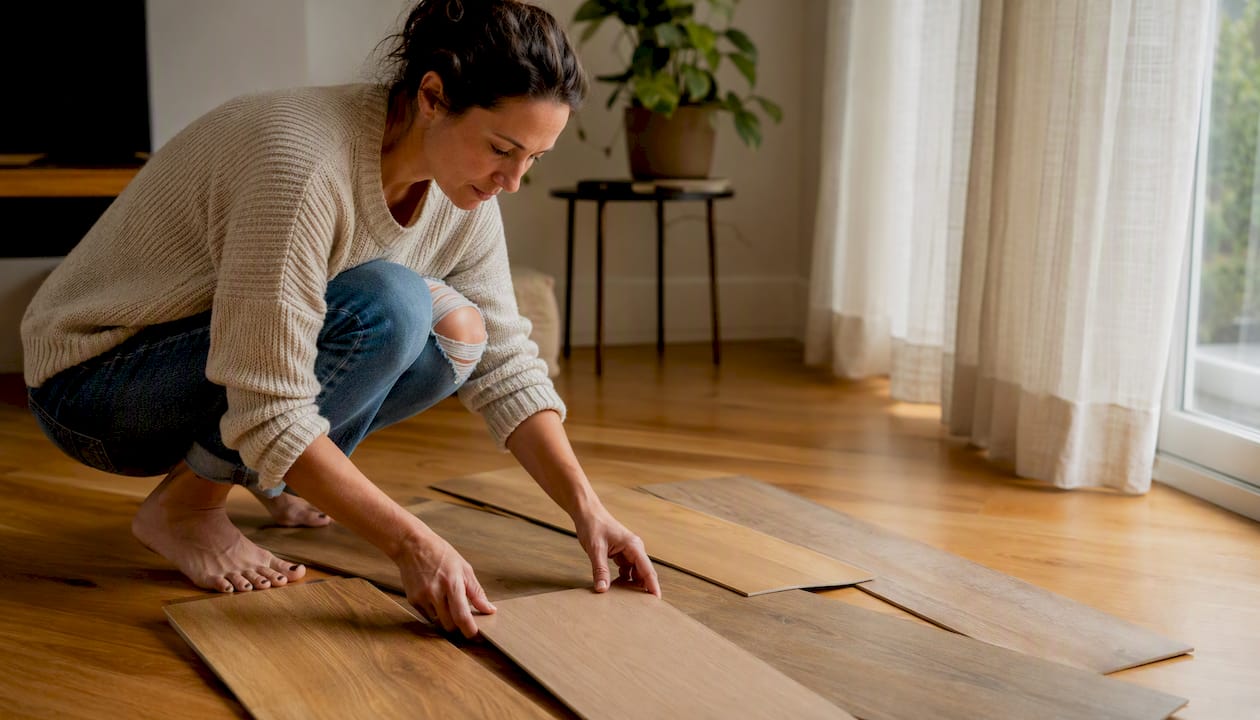
Match new flooring to existing decor by focusing on undertone and visual flow, not an exact color match. Here is your action plan: identify the undertone of your existing floors and walls, pick materials by room function, test large samples in-place for 24–48 hours, then finalize your purchase from a single dye lot with a modest percentage extra ordered.
Start today:
- Pull a sample of your existing floor and hold it against a white sheet of paper to reveal its undertone (warm, cool, or neutral)
- Photograph each room in daylight and again under your evening lamps
- Limit your home to a small number of flooring materials for visual cohesion
- Visit the Quality Hardwoods of Michigan, Inc showroom with your photos and a piece of your existing floor
Key Takeaways
Matching new flooring to existing decor comes down to undertone alignment, a disciplined material count, and testing samples in the actual room before you buy.
| Point | Details |
|---|---|
| Prioritize undertone over color | Use the white-paper test to identify warm, cool, or neutral undertones and match temperature across floors, walls, and furniture. |
| Limit to 2–3 materials | The Three-Material Rule keeps your home visually cohesive; a fourth material type signals unplanned renovations. |
| Test samples for 24–48 hours | Place large samples in the room and observe them across morning, afternoon, and evening light before deciding. |
| Buy one dye lot, order a modest amount of extra material to allow for cuts, waste, and future repairs | Dye-lot variance between batches is visible; extra material from the same lot covers cuts and future repairs. |
| Quality Hardwoods of Michigan, Inc | Offers unfinished and prefinished hardwood, LVP, laminate, stains, and take-home samples for in-room testing at their Michigan showroom. |
Table of Contents
- 1. Why exact color matching between new and existing floors often fails
- 2. Which flooring material works best in each room?
- 3. How to identify and match undertones between floors, walls, and furnishings
- 4. How to test flooring samples in your home before committing
- 5. How to create visual flow and where to use transitions
- 6. Limit materials and phase your project with the Three-Material Rule
- 7. When to refinish existing hardwood vs. replace it
- 8. Final procurement checklist before you buy or schedule installation
- 9. Troubleshooting common mismatches and practical fixes
- What professionals actually prioritize when matching and planning floors
- Quality Hardwoods of Michigan, Inc makes the sample and procurement process straightforward
- Sources
- FAQ
1. Why exact color matching between new and existing floors often fails
Chasing a perfect color match is the most common mistake homeowners make, and the science of why it fails is worth understanding before you shop.
Existing floors change over years. Sun exposure bleaches warm tones out of oak and pine, shifting them toward gray or silver. Finish layers wear unevenly, and the original sheen disappears in high-traffic paths while staying glossy near walls. When you bring home a new board of the same species, it looks nothing like the floor you have lived on for a decade.
Production variance makes it worse. Even boards from the same manufacturer and the same species carry dye-lot differences from batch to batch. A floor milled in one production run can read noticeably redder or cooler than one milled six months later, even under the same product name.
The real goal is not to match your floor. It is to harmonize with it. Undertone alignment and a deliberate contrast of two to three shades will read as intentional design. An imperfect color match will read as a mistake.
Finish differences compound the problem. A matte finish absorbs light and reads darker; a high-gloss finish reflects it and reads lighter. Two boards of identical color can look like different species once their finishes diverge. Factor finish sheen into your comparison from the start, not as an afterthought.
2. Which flooring material works best in each room?
Room function should drive material choice before color or style enters the conversation. A beautiful wide-plank white oak floor in a basement bathroom will fail within two years regardless of how well it matches your decor.
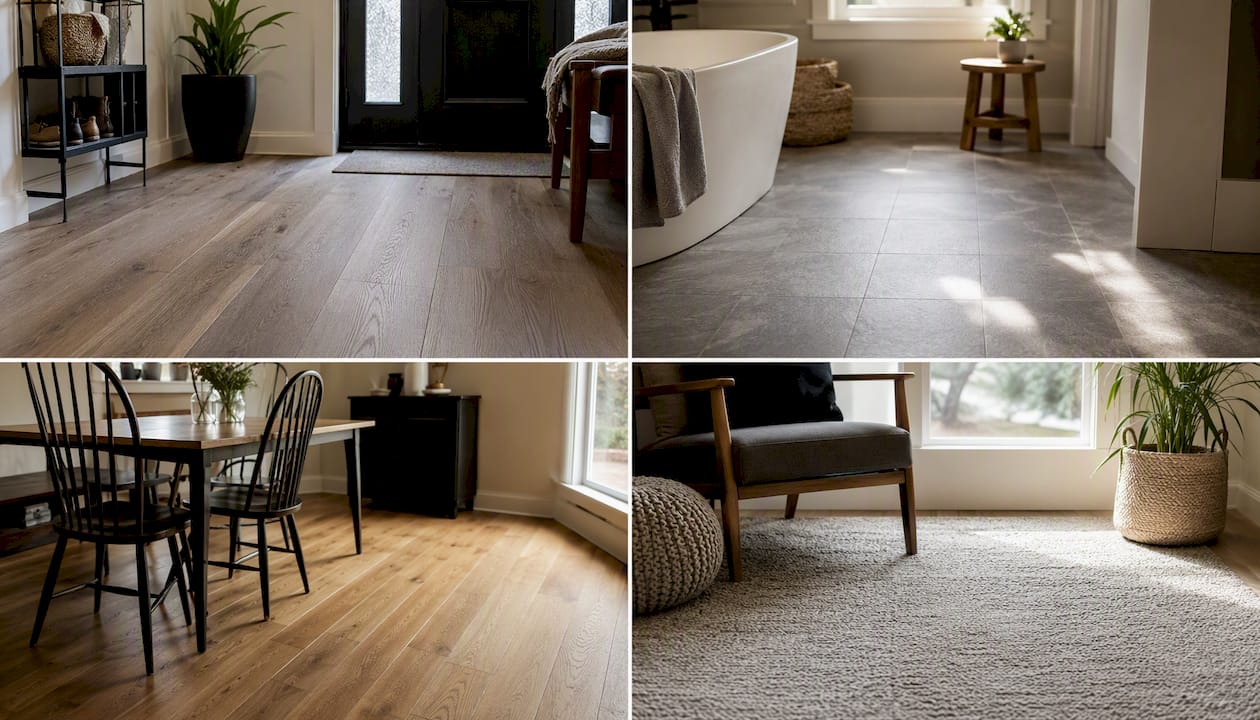
| Room | Best Material | Why |
|---|---|---|
| Entry / mudroom | Porcelain tile or LVP | High traffic, moisture, grit; needs waterproof and scratch-resistant surface |
| Kitchen | LVP or porcelain tile | Spills, standing water, dropped items; waterproof core required |
| Bathrooms | Porcelain tile or LVP | Constant moisture; solid hardwood will warp |
| Living / dining room | Solid or engineered hardwood | Warmth, durability, refinishable; low moisture exposure |
| Bedrooms | Engineered hardwood or carpet | Comfort underfoot; lower traffic and moisture risk |
| Laundry room | Porcelain tile or LVP | Water exposure from appliances |
| Basement | Engineered hardwood or LVP | Subfloor moisture; floating installation preferred |
| Stairs | Hardwood treads or LVP stair nosing | Durability; coordinate with adjacent floor material |
The Consumer Reports flooring buying guide confirms this breakdown: porcelain tile suits wet, busy rooms; solid and engineered hardwood add warmth for living areas and bedrooms; luxury vinyl is waterproof and resilient for kitchens and family spaces.
For a deeper look at how laminate and LVP compare room by room, the laminate vs. luxury vinyl guide from Quality Hardwoods of Michigan, Inc walks through the tradeoffs in plain terms. Brands like Urbanfloor offer engineered hardwood lines well-suited to living rooms and bedrooms, with a range of undertones that coordinate with both warm and cool wall palettes.
3. How to identify and match undertones between floors, walls, and furnishings
Undertones are the secondary hues hiding inside a color. A floor that looks beige in the store may read pink or green once it is in your home next to your walls. Getting undertone right is the single highest-leverage decision in flooring color coordination.
The three undertone families:
- Warm: amber, honey, red, orange, yellow. Pairs well with cream, ivory, warm white, and earthy greens.
- Cool: gray, blue, silver, ash. Pairs with cool whites, blue-grays, and charcoal.
- Neutral: true beige, greige, or brown with no strong lean. The most flexible and forgiving.
The white-paper test: Hold a plain white sheet of paper next to your existing floor. The floor’s undertone becomes visible immediately against the neutral reference. Do the same with your wall color and your largest furniture piece. If all three share a temperature (all warm or all cool), you have an easy path. If they mix, you need a floor that bridges them, typically a neutral or a mid-tone that leans toward the dominant temperature in the room.
Flooring undertones determine harmony with walls and furniture more than visible color. Warm floors pair with creams and beiges; cool gray floors pair with cool whites and blue-grays; mid-tones are the most flexible.
Aim for a contrast of two to three shades between your floor and your walls. Floors and walls that are too close in value flatten a room. Too far apart, and the room feels disjointed.
Pro Tip: North-facing rooms receive cool, indirect light all day, which amplifies cool undertones and can make a warm floor read muddy. South-facing rooms flood with warm light that intensifies amber and honey tones. Test your sample in the actual room, not in a south-facing showroom when your room faces north.
4. How to test flooring samples in your home before committing
The 24–48 hour in-room test is not optional. Natural light changes undertones and can reveal clashes you will never see in a store. A sample that looked perfect under fluorescent showroom lighting can read orange or green once it sits next to your sofa on a Tuesday morning.
- Get large samples. Request samples at least 12 inches by 12 inches, ideally a full plank length. Small chips hide pattern repeats and grain variation.
- Place samples in multiple spots. Lay them near the baseboard, in the center of the room, and in the highest-traffic path. Undertones shift depending on what surrounds them.
- Observe across three lighting windows. Morning with natural light, afternoon with direct sun (if applicable), and evening under your actual lamps. Note whether the sample reads warmer or cooler at each time.
- Photograph everything. Your phone camera will catch undertone shifts you might miss with the naked eye. Compare photos side by side.
- Check against your largest fixed elements. Hold the sample next to your cabinetry, trim, and the dominant furniture piece. These are the elements you cannot change, so they set the standard.
- Evaluate finish sheen. A matte sample next to a glossy existing floor will look mismatched even if the color is right. Confirm you are comparing the same finish level.
- Discard anything that clashes at two or more lighting conditions. One bad reading might be a fluke. Two means the undertone is genuinely incompatible.
Lighting is the final tie-breaker. Testing samples over multiple times of day is not perfectionism; it is the only way to see what you are actually buying.
5. How to create visual flow and where to use transitions
Running one floor through connected open spaces is the single most effective way to make a home feel larger and more cohesive. An open-plan kitchen, dining room, and living room that share the same floor reads as one generous space. Break it up with three different materials and each zone shrinks visually.
Where to run one material through:
- Connected open-plan spaces with no doorway break
- Hallways that feed directly into a main living area
- Stairways that land into a room using the same material
Where to change materials:
- At a doorway threshold between rooms with different functions (kitchen to living room is a natural break)
- Where moisture risk changes (dry living area to bathroom)
- Where a design style shift is intentional (tile foyer to hardwood living room)
Transition types and when to use them:
- T-molding: connects two floors of equal height; standard choice for doorway transitions
- Reducer: steps down from a thicker floor to a thinner one (hardwood to tile)
- Metal inlay or decorative border: used when a design-forward transition is the goal, not just a functional one
- Threshold strip: used at exterior doors and room entries where height differences are significant
Stair treads are the most overlooked transition point in a home. A stair that connects a hardwood living room to a carpeted upper floor should use hardwood treads with a carpet runner, not a full carpet that stops abruptly at the bottom step. Coordinate the tread species and stain to the adjacent floor, not the upstairs carpet.
Area rugs are a non-permanent transition strategy worth using before committing to a new floor. Designers recommend rugs to bridge visual differences between floors and decor, adding texture and softening strong color contrasts without touching the subfloor. If a rug solves the problem, you may not need new flooring at all.
When coordinating floors with doors and trim, the One Day Doors & Closets guide on matching interior doors to your home’s style offers practical guidance on keeping the full palette cohesive.
6. Limit materials and phase your project with the Three-Material Rule
Designers recommend limiting a home to no more than two to three flooring materials. The most common professional trio is hardwood in shared living spaces, tile or stone in wet zones, and carpet or rugs for comfort in bedrooms. That combination covers every functional need without fragmenting the visual palette.
The Three-Material Rule is not about restriction. It is about making every material choice feel deliberate. A fourth or fifth material type signals that rooms were renovated independently without a plan.
Phasing a multi-room project in the right order:
- Wet and utility rooms first (bathrooms, laundry, mudroom). These rooms are isolated, have the highest moisture risk, and their material choice rarely affects the rest of the home’s palette.
- High-traffic main areas next (kitchen, entry, hallways). These set the dominant visual tone and connect to everything else.
- Connected open spaces together (living room, dining room, open kitchen). Install these in one run to avoid dye-lot breaks and ensure seamless transitions.
- Bedrooms and private rooms last. Lower traffic, lower stakes, and you will have a clearer sense of the full palette by the time you get here.
This sequence, supported by FlooringExplorer’s room-by-room phasing guidance, minimizes rework and keeps disruption manageable. Doing bedrooms first and kitchens last is the most common sequencing mistake homeowners make.
7. When to refinish existing hardwood vs. replace it
This decision comes down to board thickness, damage extent, and whether you want to change direction.
Refinish when:
- The existing boards have enough thickness for at least one more sanding (solid hardwood typically allows three to five refinishes over its life)
- Damage is localized, not structural
- The species and board width match what you want to keep
- You want to change the stain color but not the floor itself
Replace when:
- Boards are cupped, buckled, or showing subfloor moisture damage
- The species or width no longer fits your design direction
- You want a significantly different plank width or texture
- Subfloor problems require access anyway
When you must match existing hardwood and cannot find a prefinished board that blends, installing unfinished hardwood and refinishing in place is the best route to achieve a close visual match. Prefinished boards are sanded and coated at the factory under controlled conditions; unfinished boards installed and finished on-site can be stained to match the existing floor’s exact tone and sheen.
Pro Tip: Bring a sample of your existing floor, a photo of the room, and the board width measurement to the Quality Hardwoods of Michigan, Inc showroom. The team can pull unfinished board options and stain samples side by side so you can see the blend before you buy.
For a broader look at how vinyl, engineered wood, and hardwood compare on refinishability and durability, the vinyl, engineered, and hardwood comparison guide from Quality Hardwoods of Michigan, Inc covers the tradeoffs clearly.
8. Final procurement checklist before you buy or schedule installation
Getting the material right and then buying it wrong is a surprisingly common outcome. These steps prevent the most expensive mistakes.
| Procurement Step | What to Do | Why It Matters |
|---|---|---|
| Confirm dye lot | Buy all flooring from one dye lot | Boards from different lots can vary visibly in color and grain |
| Order extra | Add 7–10% to your measured square footage | Covers cuts, waste, and future repairs from the same batch |
| Acclimate the material | Leave flooring in the room for 24–48 hours before installation | Wood and LVP expand and contract; skipping this causes gaps or buckling |
| Prep the subfloor | Check for level, moisture, and structural integrity | A poor subfloor telegraphs through any finished floor |
| Document SKU and lot numbers | Photograph packaging before installation | Essential for warranty claims and future matching |
Installation coordination steps:
- Confirm plank direction with your installer before the first board goes down. Running planks parallel to the longest wall or toward the main light source are the two standard approaches.
- Shuffle boards between boxes as you install. Factory stacking concentrates similar grain patterns; shuffling distributes them naturally.
- Mark transition locations on a floor plan before installation starts. Moving a T-molding after the fact means pulling boards.
- Collect all installation instructions and keep them with your warranty documentation.
The Consumer Reports flooring buying guide backs the 7–10% overage rule and the acclimation requirement as standard practice across material types. Subfloor preparation is equally critical: even the best flooring will fail on a subfloor that is not level, dry, and structurally sound.
9. Troubleshooting common mismatches and practical fixes
Post-install problems fall into a few predictable categories, and most have a fix that does not require pulling up the floor.
Quick fixes that work:
- Area rugs: the fastest way to soften a color clash or cover a transition that reads awkward. A well-placed rug also adds texture that makes two different floors feel intentional rather than accidental.
- Paint or trim adjustments: changing wall color or trim paint to a tone that bridges the floor and existing decor is often cheaper than replacing flooring.
- Lighting adjustments: swapping bulb color temperature (from cool white to warm white, or vice versa) shifts how a floor reads in the evening. A 2700K bulb warms amber tones; a 4000K bulb brings out gray and ash tones.
When a fix is not enough:
- Stair riser and tread mismatches that are visible from the main living area usually need to be addressed with matching treads, not a rug.
- Severe fading on existing floors that makes new flooring look jarring is a refinish problem, not a new-floor problem. Refinishing the existing floor to a fresh stain brings both surfaces back to a common baseline.
- Dye-lot variance discovered after installation: contact your supplier immediately with the SKU and lot numbers from the packaging. Reputable suppliers can often source replacement boxes from the same lot or provide a documented path to a warranty claim.
When to hire a professional:
- Structural subfloor problems discovered mid-install
- Complex transitions involving three or more materials meeting at a single point
- Full-home matching jobs where continuity across six or more rooms is required
What professionals actually prioritize when matching and planning floors
Experienced installers and designers tend to flip that ratio, and the results show.
Installers care most about three things before color enters the conversation: a stable, level subfloor; correct acclimation time for the material; and a clear transition plan documented before the first board is cut. A floor installed over a damp or uneven subfloor will fail regardless of how well the color matches the sofa. Acclimation skipped to meet a deadline leads to gaps in winter and buckling in summer.
Designers, on the other hand, focus on undertone alignment and palette discipline. The professionals who produce the most cohesive results keep the material count at two or three, use rugs as a flexible tool to introduce texture or warmth without committing to a fourth material, and treat lighting as part of the flooring decision rather than an afterthought.
The practical shortcuts both groups share: photograph the dye-lot number on every box before installation, keep at least three to five spare boards from the original lot, and ask your supplier specifically about unfinished board options when a refinish-to-match job is on the table. These habits take five minutes and prevent problems that can cost thousands to fix.
The gap between a cohesive floor plan and a disjointed one is rarely about budget. It is almost always about sequencing decisions, undertone discipline, and the willingness to test before committing.
Quality Hardwoods of Michigan, Inc makes the sample and procurement process straightforward
Forty-plus years of supplying Michigan contractors and homeowners means the team at Quality Hardwoods of Michigan, Inc has seen every matching problem in this guide, and stocked the materials to solve most of them.

Bring your room photos, a piece of your existing floor, and your board-width measurement to the showroom. The inventory covers unfinished and prefinished hardwood, luxury vinyl plank, laminate, stains, finishes, and abrasives. Brands like Armstrong, Pergo, Tarkett, LL Flooring, and Urbanfloor are represented, giving you a wide range of undertones, widths, and price points to compare in one place. Large take-home samples are available so you can run the 24–48 hour in-room test before committing. For new construction or bulk procurement, the hardwood supply page covers unfinished board options and volume ordering. Installation is referred to trusted local partners; Quality Hardwoods of Michigan, Inc focuses on getting you the right materials and the right guidance. Call or visit the showroom to request sample packs or get a procurement quote.
Sources
- Flooring buying guide (Consumer Reports)
- Designers Swear By the “Three-Material Rule” for a Cohesive Home Style
- How to Match Flooring with Walls, Furniture & Natural Light
- How to Match Wall Color with Wood Floor: A Complete Guide
FAQ
How do you match new flooring with existing flooring?
Focus on undertone, not exact color. Use the white-paper test to identify whether your existing floor reads warm, cool, or neutral, then choose new flooring in the same temperature family with a contrast of two to three shades.
What is the Rule of 3 for flooring?
The Three-Material Rule is a designer guideline recommending no more than two to three flooring materials in a single home. A common combination is hardwood for shared living spaces, tile for wet zones, and carpet or rugs for bedrooms.
Is there an app to match flooring?
No app reliably replicates how a floor reads in your specific room under your specific lighting. The 24–48 hour in-room sample test, recommended by flooring professionals, is more accurate than any digital tool because it accounts for your actual light conditions and existing decor.
Should your flooring be lighter or darker than your walls?
Flooring is typically two to three shades darker than the walls, which grounds the room visually. Floors lighter than the walls can work in small or dark rooms to open the space, but the undertone temperature should still align between floor and wall.