
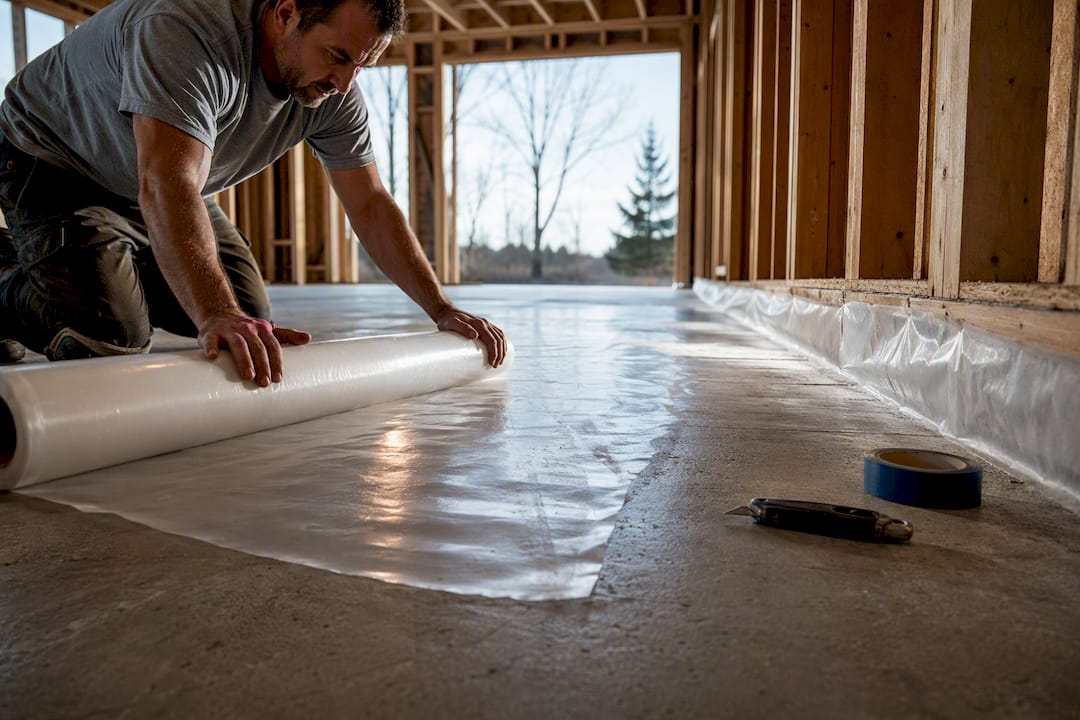
If your hardwood sits over concrete, test the slab first and plan on a vapor barrier. If it sits over a dry, above-grade wood subfloor with normal humidity, you likely don’t need one at all. The right call depends entirely on what’s under the floor, not on a blanket rule.
TL;DR:
- Vapor barriers are essential over concrete slabs unless moisture testing confirms safe humidity levels, especially in on-grade or basement slabs.
- The most common barrier, 6-mil polyethylene film, is impermeable and suitable for concrete but unsuitable for high-RH slabs or glue-down installations.
- Testing techniques like ASTM F2170 and F1869 provide reliable moisture assessments before installing hardwood floors over concrete.
- Over dry, above-grade wood subfloors with low humidity, a vapor barrier is often unnecessary, but a semi-permeable retarder like Aquabar can still be beneficial.
- Proper seam sealing, sealing around penetrations, and following product-specific installation guidelines are vital to prevent moisture problems in vapor barrier implementation.
Table of Contents
- Do You Need a Vapor Barrier for Hardwood? A Decision Checklist
- Which Vapor Barrier Materials Work Best for Hardwood?
- How Do You Test a Subfloor for Moisture Before Installing Hardwood?
- Vapor Barrier Installation Best Practices for Hardwood Floors
- What Perm Rating and Standards Should You Check Before Buying?
- What Installers Learn the Hard Way About Vapor Protection
- Our Take: Test First, Trust the Manual Second
- Get the Right Materials Before You Install
- Sources
- FAQ
Do You Need a Vapor Barrier for Hardwood? A Decision Checklist
The subfloor material decides most of this before you ever pick a product. Concrete holds and releases moisture constantly, even years after the pour, so a moisture barrier for hardwood floors over slab is the default position unless testing proves otherwise.
- Concrete slab on or below grade: Install a barrier unless in-slab relative humidity testing confirms safe readings. On-grade slabs and basement slabs are the highest-risk category.
- Crawl spaces: Ground moisture rises through unconditioned crawl spaces, so these floors usually need a barrier plus proper crawl space ventilation or a ground vapor barrier below the joists.
- Above-grade wood subfloors: If moisture readings and humidity levels check out, a semi-permeable retarder or no barrier at all is often fine.
- Radiant heat systems: Heat cycling changes how moisture moves through the assembly, so manufacturer-specific guidance for that particular radiant setup overrides general rules.
High ambient humidity, coastal climates, and homes without consistent HVAC operation all push the decision toward adding protection, even over wood subfloors that would otherwise pass. When in doubt, test. Guessing is the expensive option.
Which Vapor Barrier Materials Work Best for Hardwood?
Not every barrier does the same job, and picking the wrong one for the situation causes more problems than skipping it entirely. Here’s what’s actually on the market and where each one earns its place.
6-mil polyethylene film is the workhorse. It’s a Class I, essentially impermeable barrier, inexpensive, and the most common recommendation for hardwood over on-grade concrete. Roberts Moisture Barricade is a widely used example, marketed as a Class-1 6-mil polyethylene barrier suited to engineered and floating installations over concrete.
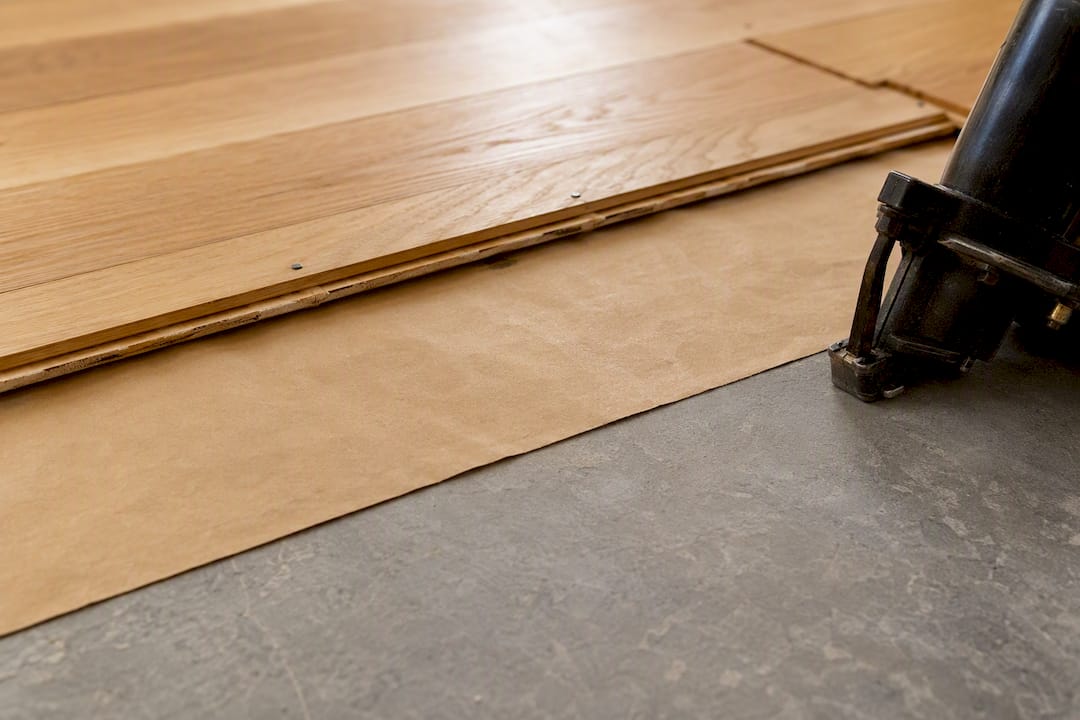
Asphalt-laminated kraft paper, sold as Aquabar, is a different animal. It’s a Class II semi-permeable retarder that doubles as a slip-sheet under nail-down floors, cutting squeaks while still allowing some drying to occur.
Liquid-applied and adhesive membranes, like Bostik Vapor-Lock, target a harder problem: slabs with elevated moisture that would fail a poly-film approach in a glue-down system. These have very low permeability and are applied per the manufacturer’s technical data sheet rather than rolled out like film.
- 6-mil poly: cheapest, widest use, no drying allowed once sealed
- Aquabar: slip-sheet plus moderate vapor reduction, good for nail-down
- Liquid/adhesive membranes: best for high-RH slabs and glue-down floors
- Integrated underlayments: convenient but check the actual perm rating before trusting the label
Pro Tip: A product labeled “moisture resistant” on the box isn’t the same as a tested vapor retarder. Always check the perm rating on the spec sheet, not the marketing copy.
How Do You Test a Subfloor for Moisture Before Installing Hardwood?
Testing isn’t optional if you’re working over concrete, and guessing based on how a slab feels or looks is how warranties get voided; a reliable garage floor moisture test can help ensure accurate assessment before coating or flooring. Two ASTM methods dominate professional practice.
- ASTM F2170 (in-situ relative humidity probes): Considered the most reliable method. Probes are inserted into the slab and read after an equilibration period, giving you the moisture condition at the depth that actually matters for flooring performance.
- ASTM F1869 (calcium chloride test): An older, validated alternative that measures moisture vapor emission from the surface over a 60 to 72-hour period. It’s less precise than probes but widely accepted.
- Surface moisture meters on wood subfloors: Useful for a quick check, but if readings run high or inconsistent, probe deeper or bring in a pin-type meter for a more accurate read.
Many flooring manufacturers expect in-slab RH below roughly 75 percent before certain installations proceed, though the exact number varies by product, so confirm the threshold in the specific flooring manufacturer’s installation manual. If results come back elevated, your options are a liquid suppressor, an adhesive membrane system, or simply waiting and retesting rather than forcing an install that’s likely to fail.
Vapor Barrier Installation Best Practices for Hardwood Floors
Getting the material right doesn’t help if the installation leaves gaps for vapor to sneak through. Seams and penetrations are where most failures start.
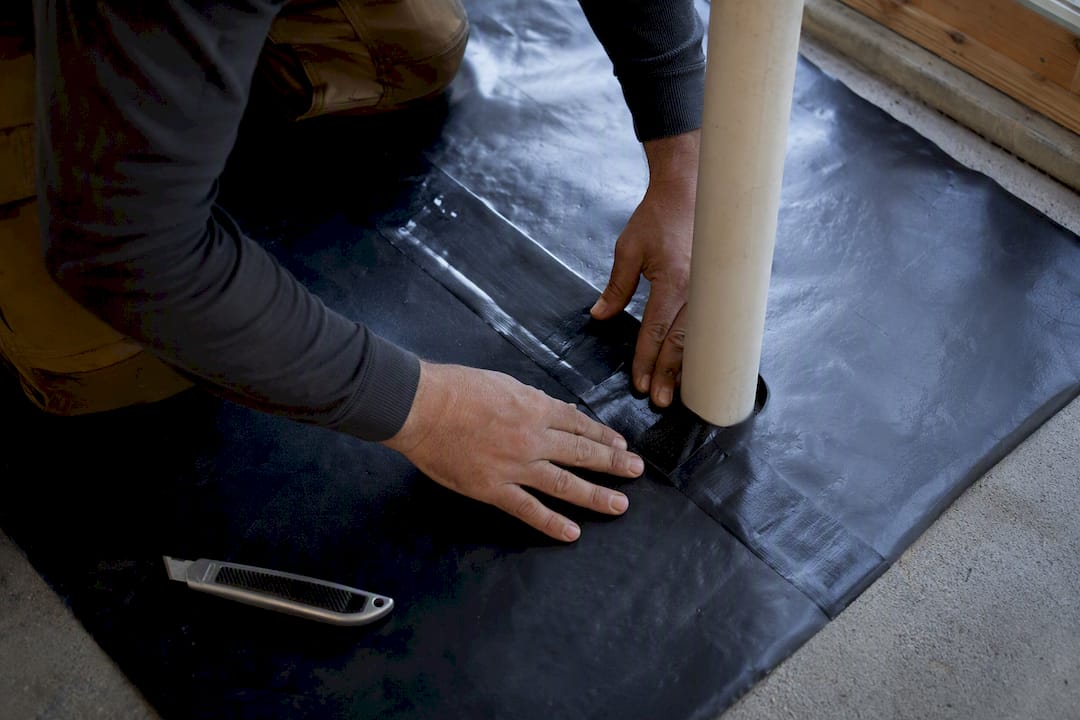
- Overlap seams by at least 6 inches, and run the overlap uphill on any sloped subfloor so moisture doesn’t pool at the seam.
- Tape seams with a manufacturer-approved seam tape rather than generic packing tape, which degrades and lifts over time.
- Seal around penetrations like pipes and posts completely. A single unsealed penetration can undercut an otherwise perfect installation.
- Run the barrier up the perimeter walls slightly and trim after the baseboard goes on, rather than stopping flush at the floor edge.
- Avoid punctures during subfloor fastening. If you’re nailing down flooring over a slip-sheet like Aquabar, keep foot traffic and tool drops to a minimum until the floor covers it.
Radiant heat systems add another layer: liquid membranes need their full cure time before the heat gets turned on, and running the system too early can compromise the membrane before it sets.
Pro Tip: Photograph every seam and penetration before you cover it with flooring. If a moisture problem shows up two years later, that documentation is the difference between a five-minute warranty claim and a drawn-out dispute.
What Perm Rating and Standards Should You Check Before Buying?
Perm rating tells you how much moisture vapor actually passes through a material, and it’s the number that determines whether a barrier does its job or just looks like one. ASTM E1745 classifies barriers into Class A, B, and C based on strength and permeance, while related standards like ASTM E1754 cover testing methods for the material itself.
- Confirm the flooring manufacturer’s required perm rating before buying anything. A barrier that’s technically Class I isn’t automatically approved for your specific product.
- Read the product’s TDS, not just the retail label, for the actual tested permeance number.
- Some adhesive and membrane systems, when installed exactly per their technical data sheet, may reduce or eliminate the need for separate slab testing, but only when substrate prep meets every listed requirement.
- The most common warranty mistake is skipping the manufacturer’s installation manual entirely and relying on general internet advice instead. Manuals often dictate whether a barrier is required and which type qualifies.
What Installers Learn the Hard Way About Vapor Protection
Slip-sheets like Aquapaper earn their reputation because they solve two problems at once: they cut down squeaks under nail-down floors and let the wood acclimate more gradually than it would sitting directly on an impermeable film. Plastic alone becomes a liability in certain wood-on-wood assemblies, where experienced installers report that trapping moisture between two tight layers causes more harm than the vapor it was meant to stop.
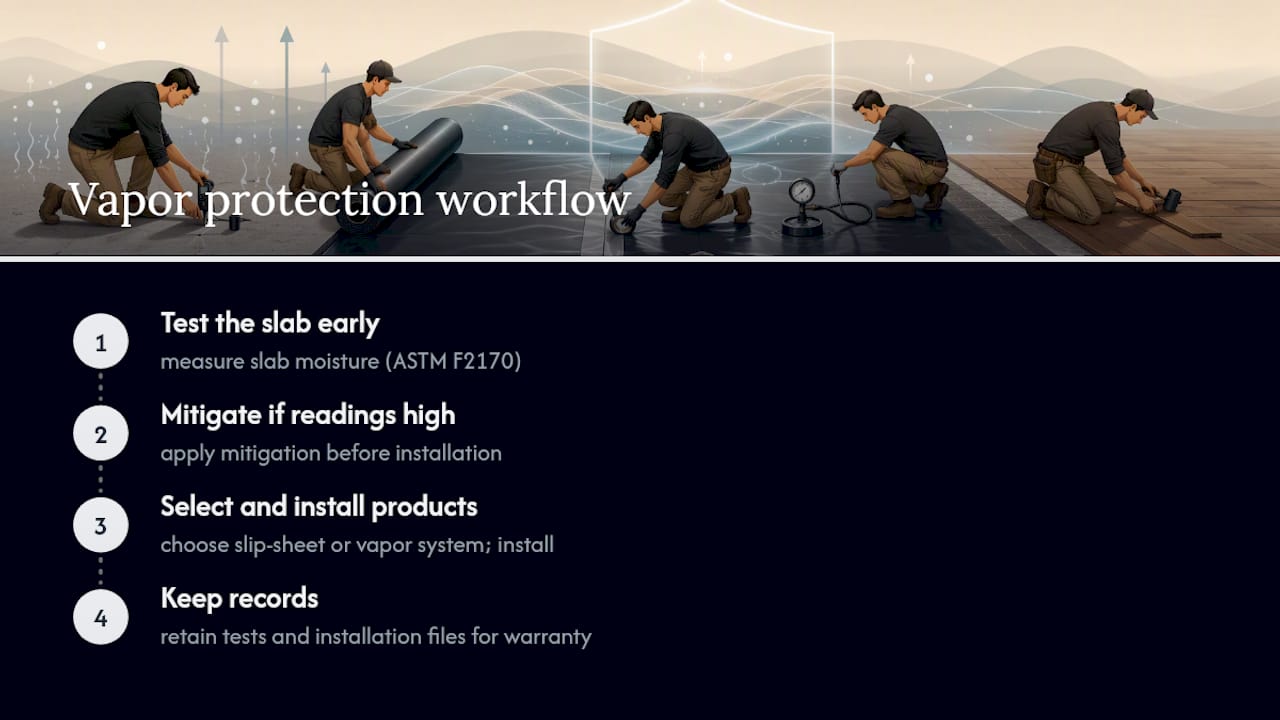
Sequence matters as much as the product choice. Test early, mitigate if the numbers come back bad, then install, and keep every test result on file. That record is what protects both the installer and the homeowner if a moisture issue surfaces down the road. If you’re weighing flooring options over a concrete slab with elevated readings, product selection support makes that decision far less stressful.
Our Take: Test First, Trust the Manual Second
Vapor barriers get treated like an afterthought, and that’s backwards. The testing comes first, the manufacturer’s manual comes second, and the product choice comes last. Most failures we hear about trace back to someone skipping step one. DIY installation over a wood subfloor with clean readings is entirely reasonable. Concrete, radiant heat, or elevated RH numbers is where you bring in a professional installer.
— Mike Solomich
Get the Right Materials Before You Install
This guide covers products such as 6-mil polyethylene film, approved underlayments, adhesives, and topical suppression membranes, which are typically stocked and available for pickup or delivery rather than special-order waits.

Perm-rating compatibility questions are common, and matching the wrong barrier to a flooring warranty is an expensive mistake to catch after installation. A knowledgeable team can help walk through your subfloor test results and recommend products that fit your flooring manufacturer’s requirements. If your project is new construction or a full tear-out, our hardwood flooring installation support for new construction page covers what that process looks like from spec to finish. Bringing moisture test results to a showroom or requesting a quote online can help ensure selection of the right vapor barrier the first time.
Sources
- Moisture Barrier guidance — IFTI / CalPoly flooring experts (2026)
- Aquabar B product specification — QEP / Fortifiber (spec sheet)
- Vapor-Lock technical data sheet — Bostik
- Roberts Moisture Barricade product guide (2025)
FAQ
Should you put a vapor barrier under hardwood floors?
Over concrete, yes, unless slab testing shows safe moisture levels. Over dry, above-grade wood subfloors, it’s often unnecessary, but a semi-permeable retarder is still a reasonable safeguard.
What is the best vapor barrier for hardwood floors?
There’s no single best option. 6-mil polyethylene works well over concrete for most installations, while asphalt-laminated kraft like Aquabar suits nail-down floors that benefit from a slip-sheet, and liquid membranes handle high-moisture slabs in glue-down systems.
When should you not use a vapor barrier?
Skip an impermeable film over dry wood subfloors with confirmed low moisture readings, and in wood-on-wood assemblies where trapping moisture between two tight layers can cause more harm than the vapor itself.
Is there a vapor barrier that can be used under a wood floor?
Yes. Asphalt-laminated kraft products like Aquabar are specifically designed as slip-sheets under wood flooring, reducing vapor migration while still allowing some drying to occur.