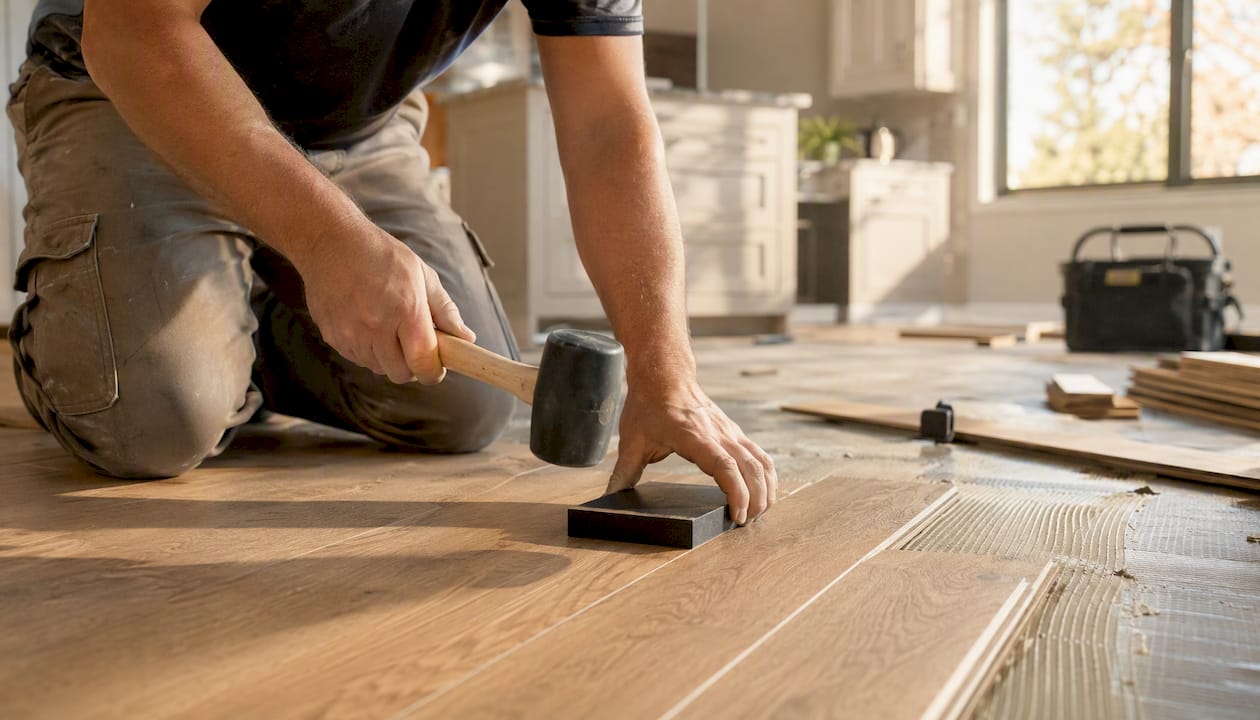
A tapping block spreads a mallet blow across a plank’s edge and keeps that force off the tongue and locking lip, so the joint seats tight without cracking or crushing the click mechanism. That’s the whole job.
Use one whenever you’re installing floating click-lock or tongue-and-groove plank flooring, on long seams and short end joints alike. For the last row against a wall, switch to a pull bar since a tapping block can’t get the angle you need there, and keep spacers in the expansion gap the entire time. Before you swing a mallet, make sure you have:
- A profiled tapping block or a matching offcut of your own flooring
- A rubber or dead-blow mallet, never a steel hammer
- Spacers to hold the expansion gap
- A pull bar for the final row
Quality Hardwoods of Michigan, Inc sees this play out on plenty of jobsites: the block is small, but skipping it is one of the fastest ways to ruin a $4,000 floor.
Key Takeaways
A tapping block works by spreading mallet force across the plank body so the locking edge seats tight without cracking the tongue or lip.
| Point | Details |
|---|---|
| Tap the groove, not the tongue | Setting the block against the tongue side is the top cause of crushed locking mechanisms. |
| Match block profile to flooring | A profiled block or matching offcut carries force into the plank body instead of the fragile lip. |
| Use a pull bar for the last row | A tapping block can’t angle into place at walls; a pull bar closes that final joint safely. |
| Check the manufacturer’s sheet first | Some angle-lock and fold-down systems warn against tapping blocks entirely because they can shear the lip. |
| Buy the right kit locally | Quality Hardwoods of Michigan, Inc supplies flooring, spacers, and tapping tools with showroom pickup or delivery across Michigan. |
Table of Contents
- Tools Checklist to Stage Before You Start
- How to Use a Tapping Block on Short and Long Edges
- Why the Tapping Block Protects Your Finished Floor
- Common Mistakes and How to Fix Them
- When to Skip the Tapping Block Entirely
- Choosing and Caring for Your Tapping Block
- An Installer’s Take on Getting It Right
- Need Supplies or Local Advice for Your Install?
- Sources
- FAQ
Tools Checklist to Stage Before You Start
Get everything laid out before the first plank goes down. Hunting for a mallet mid-row is how corners get cut and joints get rushed.
- Tapping block (profiled or a clean offcut of your flooring): matches the plank’s locking profile so force lands on the body, not the lip.
- Rubber or dead-blow mallet, 16 to 24 ounces: heavy enough to seat a joint, soft enough not to crack it.
- Spacers: hold the expansion gap along walls so the floor has room to move with humidity, which prevents crowning and cupping later.
- Pull bar: the only tool that can close the last row when there’s no room to swing a mallet.
- Shop vacuum or stiff brush: clears debris from the groove before you tap, since grit is a common reason joints won’t close flush.
- Kneepads and safety glasses: you’ll be down at floor level for hours, and mallet rebound throws debris.
Before you commit to a full row, dry-fit two or three planks by hand. That five-minute test teaches you the manufacturer’s locking angle, which varies more between brands than most people expect.
How to Use a Tapping Block on Short and Long Edges
The core move never changes: angle the plank in, set the block over the groove side, and tap lightly until the seam closes flush. Where it gets specific is the angle you use and how often you strike.
For long-edge seams (the length of the board):
- Angle the new plank in at roughly 20 to 30 degrees against the installed row.
- Set the tapping block flat against the plank face, positioned over the groove, not over the tongue.
- Give it three to four light taps with a 16-ounce rubber mallet, watching the seam close as you tap.
- Move the block roughly every 12 inches along the seam rather than pounding one spot until it seats.
- Stop the instant the gap disappears. Extra strikes after that point are what crack tongues.
For short-edge end joints:
- Align the plank’s end profile with the previous board’s end joint.
- Set the block against the end, square to the joint.
- Tap once or twice, checking the seam by eye and by running a finger across it.
- If it doesn’t close on the first light tap, stop and check for debris before hitting it again.
For the last row against a wall, there’s usually no room to angle a plank in or swing a mallet. That’s where a pull bar takes over: hook it on the plank’s outer edge, brace the flat foot against a spacer or shim to protect your baseboard, and tap the bar’s handle end to draw the plank into the joint.
Pro Tip: Keep a leftover offcut of your own flooring on hand. Its groove matches your plank’s profile exactly, so it carries the load into the plank body instead of the locking lip, which is often gentler than even a store-bought tapping block.
Keep fingers clear of the seam line while tapping, wear kneepads for the hours you’ll spend at floor level, and always strike with a rubber or nylon-faced mallet. A steel hammer directly on a plastic block will eventually crack it, and a cracked block transmits force unevenly right into your flooring.
Why the Tapping Block Protects Your Finished Floor
The mechanical reason is simple: a mallet blow concentrated on bare tongue or a thin locking lip is enough force to chip laminate cores, crush engineered wood tongues, or shear a click profile clean off. A tapping block spreads that same blow across a wider section of the plank’s edge, so the impact reaches the groove evenly instead of blasting one fragile point.

That difference shows up months later, not on install day. Joints tapped without a block tend to separate first, because a hairline crack in the lip widens every time the floor expands and contracts with the seasons. Joints tapped correctly stay tight for years.
Material matters here too. Laminate cores are brittle and chip easily under direct impact. Engineered hardwood tongues are thinner than solid wood and crush under a hard strike. LVP tolerates more abuse but still shears at the click lip if you hit it wrong. A tapping block reduces that risk across all three, working alongside spacers, which hold the expansion gap, and a pull bar, which handles the rows a block physically can’t reach.
Common Mistakes and How to Fix Them
Most tapping-block failures come down to a handful of repeat offenses, and each one has a quick fix.
- Tapping the tongue side instead of the groove side. This is the single most common error, and it’s what crushes the locking mechanism. Always set the block against the groove edge, never the tongue.
- Using a flat, generic block on an angle-lock profile. A block that doesn’t match the plank’s contour concentrates force in the wrong place. Switch to a profiled block or a matching offcut.
- Over-hitting a joint that won’t close. Repeated hard strikes usually mean debris, not a stubborn joint. Stop and check before you swing again.
- Skipping debris removal. Sawdust or grit in the groove is the top reason a seam looks like it won’t seat. A quick pass with a vacuum or brush solves most stubborn joints.
- Skipping spacers. Without them, the floor has nowhere to expand, and you’ll see buckling or cupping months down the line.
Pro Tip: A dirty joint and a crushed tongue look similar until you inspect closely. Dirt shows as a visible gap with clean edges once you vacuum it out. A crushed tongue shows splintered or flattened wood fiber right at the profile, and no amount of tapping fixes that. If you find one, pull the plank and replace it before moving forward.
If a seam still won’t close after cleaning it, re-angle the plank rather than forcing it flat, and if it’s a persistent gap issue across a section of floor, our guide to filling gaps in wood floors covers the repair side of the equation.
When to Skip the Tapping Block Entirely
A tapping block isn’t universal. Some angle-lock and fold-down locking systems explicitly warn against using one, because knocking the plank sideways with a block can shear the locking lip instead of seating it. Always check the manufacturer’s install sheet before you assume a block belongs in your workflow.
Here’s how to choose the right tool for the situation:
- Last row or against a wall: use a pull bar, not a block, since there’s no swing room for a mallet.
- Groove matches your flooring exactly: an offcut works as well as a purpose-built block, often better.
- Angle-lock or fold-down profile: follow the manufacturer’s instructions first. Many of these systems lock by hand or with light foot pressure alone.
- Glue-down or nail-down solid hardwood: these aren’t floating installs, so tapping-block technique doesn’t apply the same way as it does on click-lock systems.
Choosing and Caring for Your Tapping Block
Blocks come in a few materials, and the differences matter more than they look. Profiled plastic or nylon blocks are the standard for laminate and engineered click systems. Rubber-faced or composite blocks add cushioning for softer engineered wood. Steel-reinforced blocks show up for dense SPC and rigid-core LVP, which take more force to seat than standard laminate.

Length and channel depth matter too. A longer block covers more of the seam per tap, which speeds up field work on big rooms. The channel needs to clear the tongue completely; a shallow channel that bottoms out on the tongue defeats the entire purpose of the tool.
Check your block periodically for cracks or a worn, flattened face. Once the channel bottoms out or the edge splinters, replace it before it starts transmitting force unevenly. Pro Tip: Keep a 12-inch offcut of your actual flooring in your toolbox after the job. It’s a free, perfectly matched tapping block for future repairs or the next room you tackle.
An Installer’s Take on Getting It Right
Stage every tool before the first plank goes down, dry-fit a couple of boards to learn the locking angle, and read the manufacturer’s install sheet before you assume a tapping block belongs in your process. Keep spacers in while you’re running the pull bar on the last row, pad the bar’s hook so it doesn’t dent your baseboard, and always reach for a rubber mallet instead of anything steel-faced. None of this is complicated. It’s just the difference between a floor that stays tight for twenty years and one that starts gapping by next winter.
Need Supplies or Local Advice for Your Install?
Quality Hardwoods of Michigan, Inc stocks the flooring, spacers, and finishing supplies that make a tapping-block install go right the first time, without the markup or wait times of ordering piecemeal online. If you’re planning a floating hardwood, engineered, or LVP install and want to see profiles and locking systems in person before you buy, our showroom lets you handle the actual product and ask questions about which tapping block matches which click system.

We carry options across luxury vinyl plank and traditional hardwood, with local pickup or delivery across Michigan so your materials show up ready for install day. If you’re starting a new build or a full room replacement, our hardwood installation and new construction page walks through what materials and support are available for your project. Call ahead or stop by the showroom to get a quote and pick up the right tapping block and spacers before you start.
Sources
- Tapping Block & Pull Bar | ShunTool
- Laminate Tapping Block: How to Choose and Use One
- How to Use a Tapping Block for Hardwood Floors
- Flooring Superhero’s Arsenal: Tapping Blocks and Spacers
FAQ
What Does a Tapping Block Actually Do?
It spreads a mallet’s impact across a plank’s edge, protecting the tongue and locking lip while helping the joint seat evenly and close flush.
Can I Use a Regular Hammer Instead of a Mallet?
No. A steel hammer concentrates too much force and will crack a tapping block or damage the plank; use a rubber or dead-blow mallet instead.
When Should I Use a Pull Bar Instead of a Tapping Block?
Use a pull bar for the last row against a wall, since there’s no room to angle a plank or swing a mallet in that tight space.
Do All Click-Lock Floors Need a Tapping Block?
No. Some angle-lock and fold-down systems specifically warn against tapping blocks because sideways force can shear the locking lip, so always check the install sheet first.
What’s the Best Material for a Tapping Block?
Profiled plastic or nylon blocks work for most laminate and engineered floors, while a matching offcut of your own flooring often protects the joint even better since the groove fits exactly.
Recommended
- Wood Floor Installation Sequence: A Step-by-Step Guide — Quality Hardwoods of Michigan
- How to Nail Down Solid Hardwood Flooring the Right Way — Quality Hardwoods of Michigan
- Hardwood Flooring Subfloor Requirements: A Complete Guide — Quality Hardwoods of Michigan
- Best Adhesives for Hardwood Floor Installation: A Practical Guide — Quality Hardwoods of Michigan