
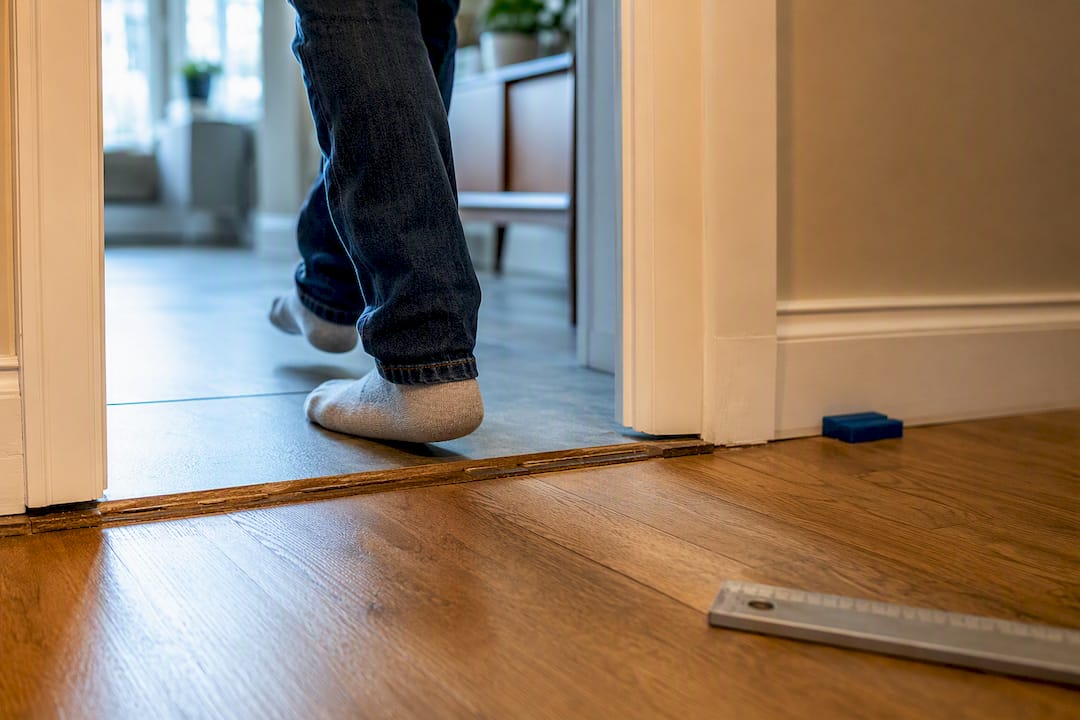
The most forgiving flooring for uneven floors is sheet vinyl, glue-down flexible LVP, or carpet over a thick pad, since all three bend with minor dips instead of cracking over them. Rigid materials like tile, click-lock laminate, and rigid-core SPC need a flat substrate, full stop. The rule that saves you money: measure your floor’s flatness before you buy anything, and level it first if the gaps exceed the manufacturer’s tolerance.
TL;DR:
- Using a straightedge or level, measure the floor’s flatness to determine if leveling is necessary before purchasing flooring materials.
- Flooring options like sheet vinyl, glue-down flexible vinyl, and carpet with a thick pad are best suited for minor or gentle unevenness.
- Rigid flooring such as tile, laminate, or click-lock vinyl requires a flat subfloor within the manufacturer’s specified tolerance to prevent damage.
- Level the floor if there are abrupt height changes or if the subfloor shows signs of softness, water damage, or significant dips exceeding the product tolerances.
- Proper measurement and preparation can prevent costly repairs and ensure your chosen flooring performs well over uneven surfaces.
Table of Contents
- How to Diagnose Floor Unevenness Before You Buy
- Which Flooring Options Handle a Wavy Subfloor Best?
- When Do You Need to Level the Floor First?
- Choosing Underlayment Without Making Things Worse
- What to Avoid on an Uneven Subfloor
- A Shop-Tested Checklist Before You Commit
- Our Take on Cost vs. Durability
- Get the Right Materials for Your Subfloor
- Sources
- FAQ
How to Diagnose Floor Unevenness Before You Buy
Not all uneven floors are the same problem, and that distinction decides whether you spend $40 on a self-leveling bag or $2,000 hiring someone to rebuild a subfloor. Homeowners tend to lump three different situations into one complaint.
- Gentle waviness: a rolling, gradual dip you barely notice by eye but can feel underfoot.
- Localized dips or steps: a sunken spot near a wall, a raised seam where two subfloor sheets meet, or a lip at a doorway threshold.
- Severe slopes: a noticeable tilt across a room, often tied to foundation settling rather than a cosmetic subfloor issue.
Grab a 6 to 10 foot straightedge (a metal level works fine) and lay it across the floor in several directions, including diagonally. Slide a tape measure or feeler gauge under it at the biggest gap. D and G Flooring notes there’s no real “fix” that skips measurement first, and most flooring manufacturers set a strict tolerance on flatness that you should check in the product instructions, though it varies by product, so check the installation instructions for whatever you’re buying.
Pro Tip: Walk the room slowly in socks before you measure anything. Your feet catch transitions a straightedge test misses, especially near old doorway thresholds and load-bearing walls.
If the gap is inside tolerance, you’re likely fine with a forgiving product and standard prep. If you’re seeing a step you can feel through your shoe, or the straightedge rocks instead of touching down evenly, plan on mechanical leveling before anything else. That single test usually takes fifteen minutes and saves a full weekend of redo work.
Which Flooring Options Handle a Wavy Subfloor Best?
Some materials are built to bend a little. Others are built to stay perfectly flat, and they’ll tell you about it later with cracks and popped joints. Here’s how the forgiving options stack up against each other.
-
Sheet vinyl. It comes in wide rolls with few seams, so it drapes over gentle waviness the way a rug does rather than fighting it. It’s a strong pick for bathrooms and laundry rooms where moisture is also a factor, and it’s among the cheapest options per square foot.
-
Glue-down flexible LVP or LVT. Bonding the plank directly to the subfloor stops it from rocking over small dips, which is exactly why Consumer Reports points to thicker constructions, generally considered more durable, as a meaningful upgrade for durability. The adhesive does double duty: it hides minor imperfections and keeps the plank from telegraphing every ripple in the subfloor below.
-
Carpet and carpet tile. A thick pad is doing most of the forgiving here, not the carpet itself. Go with a denser pad in rooms with more noticeable waviness, and carpet tiles give you the option to swap individual squares later if one section wears unevenly.
-
Cork and rubber. Less common, but worth knowing about if you want extra cushioning and sound damping on a floor that’s mildly uneven and gets heavy foot traffic, like a home gym or a kid’s playroom. Both flex more than rigid-core products without losing their shape.
-
Laminate and engineered hardwood, with a caveat. These can work over slightly uneven subfloors, but “slightly” is the operative word. The Money Pit has documented installers using laminate successfully on minor unevenness, while stressing that you check the specific product’s flatness tolerance before committing. Push past that number and you’ll get clicking joints, visible gaps, or a floor that feels hollow underfoot within a year.
Peel-and-stick vinyl belongs in that flexible category too, though it tends to show subfloor texture faster than glue-down products because there’s less mass holding it flat. If you’re shopping vinyl specifically for a floor you already know isn’t perfectly flat, ask about the wear layer thickness and whether the product has an attached pad. That pad changes your underlayment decision entirely, which the next section covers.
When Do You Need to Level the Floor First?
Certain problems can’t be masked by a forgiving product, and pretending otherwise just delays a bigger repair. Level the floor first if you see any of these:
- An abrupt height change exceeding a small threshold between adjacent subfloor sections.
- A gap under your straightedge that exceeds the flooring manufacturer’s stated tolerance.
- Any spot where the subfloor bounces, feels soft, or shows water staining, since that’s a structural issue, not a cosmetic one.
- Plans to install a rigid-core product like SPC, tile, or click laminate, all of which have far tighter flatness requirements than flexible flooring.
Once leveling is on the table, you’ve got four realistic methods, and which one fits depends on the subfloor material and how bad the dip is.
- Self-leveling compound works on concrete and some wood subfloors for broad, shallow low spots. WoodAndBeyond walks through the prep sequence: clean the surface thoroughly, prime it so the compound bonds instead of separating later, then mix and pour in sections since it starts setting fast. Most compounds are workable for DIY on smaller rooms, but large areas or multiple bags poured in sequence are where a lot of homeowners call a pro instead.
- Sanding or grinding high spots handles the opposite problem, a raised seam or a stubborn hump. An angle grinder with a masonry wheel works on concrete; a floor sander or hand plane works on wood. Wear a respirator and eye protection, and expect a genuinely dusty afternoon.
- Plywood or OSB overlay flattens wavy timber subfloors across a whole room. Use 6 mm or 9 mm exterior-grade sheets, fasten every 15 to 20 centimeters, aim screws into joists where you can reach them, and leave a small expansion gap around the room’s perimeter so the sheets don’t buckle later. Our guide on subfloor preparation covers how to tell ordinary waviness apart from damage that needs more than an overlay.
- Shims or localized patching are the right call for small, isolated dips rather than whole-room correction. It’s the cheapest fix on this list and the fastest, often an hour or two of work.
Self-leveling compound and shimming are the two most DIY-friendly options if you’re comfortable with basic tools. Grinding and full-room plywood overlays lean toward professional territory, mostly because of the mess, the physical labor, and how easy it is to get the fastening pattern wrong on your first attempt.
Choosing Underlayment Without Making Things Worse
Underlayment and leveling solve two different problems, and mixing them up is one of the more expensive mistakes homeowners make. Underlayment cushions your feet, dampens sound, and can add a moisture barrier. It does not correct flatness. Consumer Reports is direct about this: pick underlayment for comfort and moisture protection, and handle flatness problems separately, before installation day.
- Foam underlayment is the standard budget choice for laminate and floating LVP, offering light cushioning and minor sound reduction.
- Cork underlayment adds better sound dampening and a bit more give, useful in upstairs rooms or condos with noise restrictions.
- Rubber underlayment holds up well under heavy furniture and high traffic, and it resists compression over time better than foam.
- Moisture barrier sheeting is non-negotiable over concrete slabs, particularly below-grade basements, regardless of which flooring you choose on top.
For glue-down vinyl, spread adhesive evenly with the recommended trowel notch size and work in manageable sections so it doesn’t skin over before the plank goes down. A rushed adhesive job leaves hollow spots that show up as soft, springy areas months later. Always run a concrete moisture test before installing anything with a moisture barrier requirement, and let wood flooring acclimate in the room for the timeframe the manufacturer specifies, typically 48 to 72 hours.
Pro Tip: If your vinyl or laminate comes with an attached foam pad, skip a separate underlayment layer entirely. Doubling up padding under a floating floor can actually make joints flex more, not less.
What to Avoid on an Uneven Subfloor
A handful of choices consistently cause callbacks and warranty disputes, and they’re worth ruling out before you fall in love with a sample in the showroom.
- Ceramic or stone tile over anything but a rigid, flat substrate. Grout has almost no flex, and tiles crack along the same lines where the subfloor moves.
- Rigid-core SPC and some click laminate spanning dips larger than their rated tolerance. The downsides of floating LVP show up fastest at the joints, where repeated flex eventually causes clicking, separation, or a visible gap.
- Floating installations over large hollows. The panel bridges the low spot instead of following it, and that bridge fails under foot traffic faster than most people expect.
- Skipping the manufacturer’s flatness spec entirely. Most warranties are voided outright if the installed subfloor didn’t meet the stated tolerance, regardless of how the floor was installed.
A Shop-Tested Checklist Before You Commit
Quality Hardwoods of Michigan, Inc has spent more than 40 years helping Michigan homeowners and contractors match flooring to the subfloor they’re actually working with, not the one they wish they had. That kind of repetition teaches you where corners get cut.
Before you purchase anything, run through this sequence: measure flatness with a straightedge across multiple directions, photograph any problem spots for reference, decide between a forgiving product or a leveling plan based on that measurement, and cross-check the product’s spec sheet against your actual numbers. Homeowners who skip the photo step often forget where the worst dip was by the time installation day arrives, and end up re-measuring from scratch.

Our Take on Cost vs. Durability
Chasing the cheapest flooring for a badly uneven floor almost always costs more later, once cracked grout or popped laminate joints force a redo within a couple of years. The decision rule is simple: measure first, and if the unevenness is minor waviness within tolerance, a forgiving product like glue-down vinyl or carpet over a thick pad is a legitimate long-term answer, not a compromise. If you’re seeing abrupt height changes or you want a rigid finish like tile or engineered hardwood, level first. Spend the extra day and the extra $200 to $500 in materials before flooring goes down, not after.
— Mike Solomich
Get the Right Materials for Your Subfloor
Once you know whether your floor needs leveling or a forgiving product, the harder part is finding materials that actually match what your subfloor can handle, and that’s where a generic big-box aisle falls short on selection and guidance. Quality Hardwoods of Michigan, Inc stocks the full range this article just walked through: vinyl flooring in glue-down and sheet formats, luxury vinyl plank in thicker constructions built for durability, laminate for floors within tolerance, and both unfinished and prefinished hardwood for projects that call for a leveled, rigid-ready subfloor.

Our team can walk you through spec sheets, tolerance numbers, and underlayment choices before you buy a single box, either over the phone or during a showroom visit. If your project involves a bathroom or another wet area with subfloor concerns, a resource like this bathroom subfloor replacement guide is worth reading alongside your material choice. Ready to move forward? Browse our flooring products or request a subfloor consult, and we’ll help you land on the right product the first time.
Sources
- Flooring buying guide - Consumer Reports
- Laying hard flooring on uneven floors - WoodAndBeyond
- Laminate flooring for uneven floors - The Money Pit
- Flexible flooring for uneven floors - D and G Flooring
FAQ
What Type of Flooring Is Best for Uneven Floors?
Sheet vinyl, glue-down flexible LVP, and carpet with a thick pad handle minor unevenness best because they flex instead of bridging gaps. Rigid materials like tile and click laminate need a flat substrate within the manufacturer’s tolerance.
What Is the Cheapest Way to Level an Uneven Floor?
Shimming or localized patching is the cheapest fix for small, isolated dips, often costing the least in materials for a single spot. Broader waviness across a whole room usually calls for self-leveling compound instead.
Can I Install Vinyl Plank Flooring on an Uneven Floor?
Glue-down vinyl plank tolerates minor dips because the adhesive bond prevents rocking, but it still needs to meet the product’s flatness tolerance listed in the installation instructions. Floating rigid-core vinyl plank is far less forgiving and can develop joint problems over the same dips.
Is Vinyl Plank or Laminate Better for Uneven Floors?
Flexible glue-down vinyl plank generally outperforms laminate on uneven floors since laminate’s rigid click joints are more prone to gapping and separation over dips. Laminate can still work within its manufacturer’s stated tolerance, but that tolerance is usually tighter than what flexible vinyl allows.