
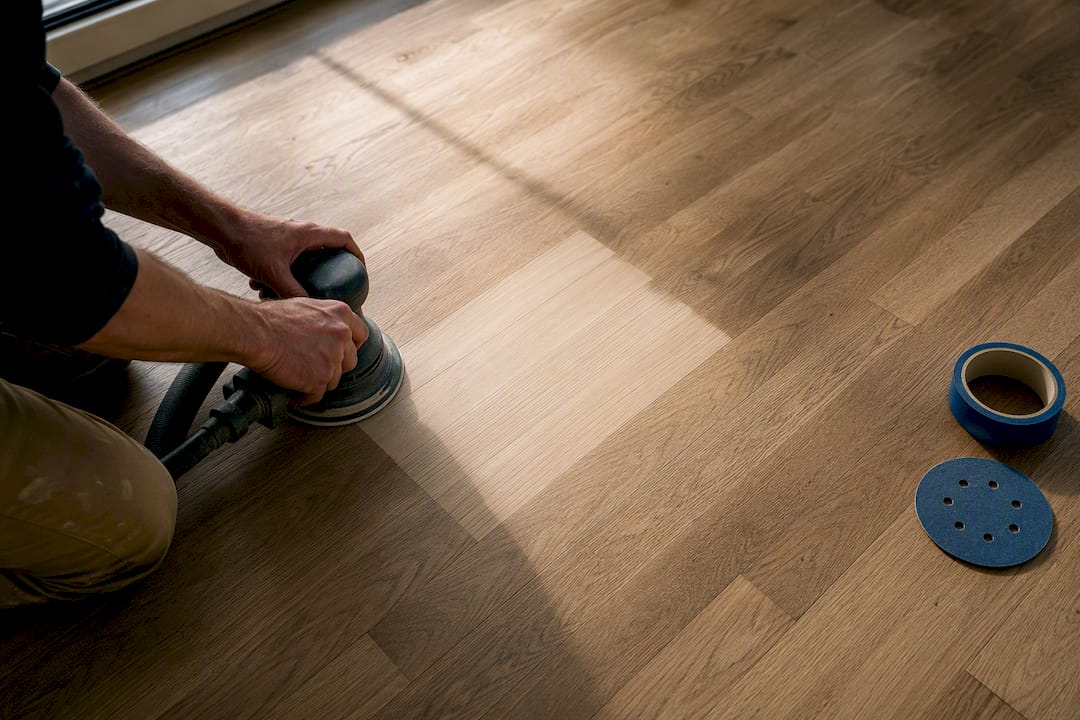
Run a three or four step progression from coarse to fine, and never skip a step in between. For a normal refinish, that means 36 → 60 → 80 → 100, with a buffer pass at 120 to 150 before staining or clear coat, exactly what Bona recommends for most residential jobs. Before you commit to a starting grit, run a test patch in the worst-looking corner of the room, check it under low-angle light, and only drop to a coarser grit if that test patch refuses to cut.
TL;DR:
- Starting with the correct grit depends on the existing finish, ranging from 24 for heavy buildup to 60 for light wear or bare wood.
- Running a test patch on the worst area ensures the chosen grit adequately removes old finish without over-sanding or damaging the floor.
- Using a grit sequence that includes medium (36 or 60) before fine (80 or 100) is crucial to avoid scratches showing up after staining.
- Matching the edger’s grit to the drum sander’s with a finer grit prevents visible picture framing around the edges.
- Selecting abrasives with the right mineral type and backing improves durability and finish quality, with ceramic grains best for tough jobs despite higher cost.
Table of Contents
- Quick-Reference Floor Sanding Grit Sequences and Sheet Budgets
- Why Skipping A Grit Wrecks A Stain Job
- How To Choose Your Starting Grit Without Guessing
- Getting The Edges Right Without A Picture Frame
- Sandpaper, Mesh Screens, And The Minerals That Matter
- Mistakes That Show Up After The Finish Goes On
- What Field Experience Teaches About Preserving Your Floor
- When To Sand It Yourself And When To Call In Help
- Get The Right Abrasives And Advice Before You Rent A Sander
- Sources
- FAQ
Quick-Reference Floor Sanding Grit Sequences and Sheet Budgets
The standard three-pass sequence exists because each grit has one job: remove the layer of damage left by the grit before it. Coarse grit strips old finish and levels the wood. Medium grit erases the coarse scratches. Fine grit erases the medium scratches and preps the surface to accept stain or finish evenly. Skip one, and you’re asking a fine grit to do a medium grit’s job, which it can’t.
Your starting point depends on what’s already on the floor. Bare or lightly worn wood can often start at 60 grit. A standard refinish over an existing finish usually starts at 36. Heavy polyurethane buildup, paint, or a floor that hasn’t been touched in decades sometimes needs a 24-grit opening pass, according to Bona’s sanding guidance. Engineered floors with a thin wear layer are the exception to all of this: start as fine as the finish will allow, since conservative grit selection preserves the wear layer and keeps the floor sandable again down the road.
Before finish goes down, a buffer or screen pass matters more than people expect:
- For staining, buffer at 100 to 120 grit; going finer can close the wood’s pores and cause the stain to sit unevenly.
- For clear coat over natural wood, a 120 to 150 buffer grit gives a smoother base without over-polishing.
- Between coats of finish, a fine screen (150 to 220 mesh) knocks down dust nibs without cutting into the wood.
On sheet counts, Bona’s guidance puts it at roughly 3 to 4 drum sheets per grit for a 200 square foot room starting on bare wood, and 4 to 6 sheets per grit when you’re grinding through old polyurethane. Order a couple extra of your starting grit specifically. That’s the one that loads up fastest and the one you’ll regret running short on mid-room.
Why Skipping A Grit Wrecks A Stain Job
Each grit stage leaves its own scratch pattern in the wood, invisible to the naked eye but very visible once stain hits it. Jump from 36 straight to 100, and the deep 36-grit scratches never get erased. They just sit there until stain pools into them and turns them into dark streaks you can’t sand out without starting the whole floor over.
The three-pass sequence of coarse, medium, fine exists precisely because each pass’s only job is erasing the scratches the previous pass left behind. Skip the middle step and you’re forcing your finest grit to do a medium grit’s workload, which it physically can’t do in one pass.
Finish chemistry adds another wrinkle. Oil-modified polyurethanes need some texture to bite into. Sand your drum finer than 100 to 120 grit and adhesion can actually suffer because the surface gets too smooth for the finish to grip. Water-based finishes are a little more forgiving but still perform best when you follow the coating manufacturer’s stated sanding profile rather than guessing.
How do you confirm a grit actually did its job before moving on? Get a work light down low, almost parallel to the floor, and rake it across the boards. Every scratch shows up as a shadow at that angle. Pros also drag a damp rag across a test section since water raises the grain and reveals hidden scratch lines that dry inspection misses entirely.
Two things separate a floor that takes stain evenly from one that looks blotchy:
- No visible cross-grain scratches under low-angle light after your fine pass.
- A consistent, even scratch pattern running with the grain across the whole field, not just the center of the boards.
How To Choose Your Starting Grit Without Guessing
The test patch is the single most useful five minutes you’ll spend on this whole project. Here’s how to run it correctly.
- Pick the worst spot in the room. A high-traffic path, a spot with visible finish buildup, or wherever the old floor looks roughest. If your test grit handles the worst area, it’ll handle everything else.
- Run one pass with your suspected starting grit. Use the same drum sander and pressure you plan to use for the whole job, not a random orbital sander.
- Stop and inspect under low-angle light. Old finish should be gone or nearly gone, and the wood underneath should look consistent.
- Evaluate honestly. If the grit glides without cutting, or the paper loads up and glazes over almost immediately, you’re too fine. Move one step coarser and retest.
- Only escalate as far as necessary. Starting with the finest grit that will actually cut preserves wood and cuts your sheet costs.
Run through this checklist before you fire up the rental sander:
- Bare or new wood: start at 60, test to confirm.
- Light wear, existing finish mostly intact: start at 60 to 80.
- Standard refinish with moderate finish buildup: start at 36.
- Heavy poly, paint, or ancient shellac: start at 24, but confirm with a test patch first since not every old floor needs the most aggressive option.
- Cupped, crowned, or wildly uneven boards: stop and address the underlying moisture or subfloor issue before sanding at all. Sanding over cupped boards flattens the surface unevenly and can expose more of the problem than it fixes.
Engineered floors deserve their own line of caution. The wear layer is often just a couple of millimeters of solid wood over a plywood core, and a conservative approach that starts finer and uses fewer coarse passes is the difference between a floor you can refinish again in ten years and one you sand straight through to the core.
Pro Tip: If your test patch shows deep, dark discoloration that doesn’t lighten as you sand, or you find layers of what might be old asbestos-backed tile adhesive under the wood, stop and call a professional. Some hazards aren’t worth troubleshooting solo.
Getting The Edges Right Without A Picture Frame
Nothing ruins a refinished floor faster than a visible band around the perimeter where the edger’s scratch pattern doesn’t match the drum sander’s work in the field. It’s the single most common giveaway of an amateur job, and it’s completely avoidable.
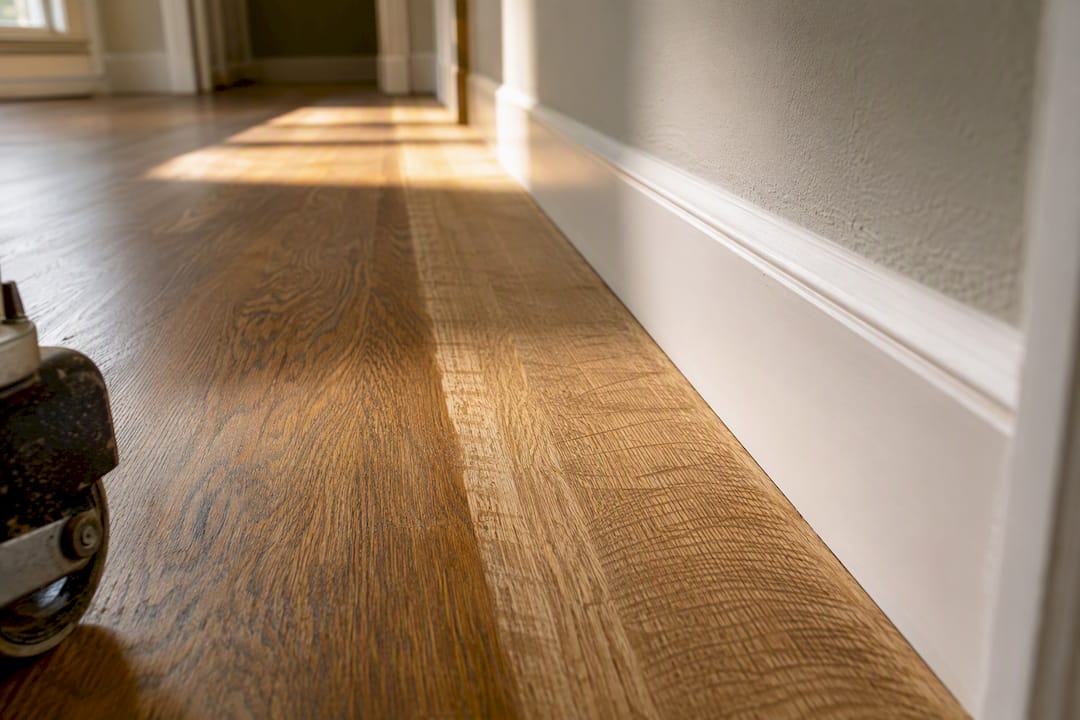
The fix is a simple rule of thumb: run your edger one grit finer than your drum for every pass. If the drum is on 60, the edger runs 80. Edgers cut in a tight circular motion instead of the drum’s back-and-forth linear pattern, so they remove material faster and leave a different scratch texture. Matching the numeric grit without accounting for that difference in cutting action is how picture-framing happens.
A few practical notes for the tight spots:
- Corners and against baseboards: a detail sander or hand block with the same grit as your edger’s current pass.
- Around radiators, vents, and door thresholds: hand-sand with the grain, always, even when it’s tempting to angle the block for easier access.
- Under closet door tracks and tight jambs: a folded sheet of the correct grit, worked patiently, beats trying to force a machine into a space it doesn’t fit.
Run your final buffer or screen pass across the whole floor, field and edges together, in one continuous session. That’s what blends the two scratch patterns into something that reads as one uniform surface once stain or finish goes on.
Sandpaper, Mesh Screens, And The Minerals That Matter
Solid sandpaper and open-mesh sanding screens aren’t interchangeable, even though people often treat them that way. Sandpaper handles aggressive initial removal better because its solid backing holds up under heavy pressure and thick old finish. Mesh screens shine in the middle and late stages, and especially between coats of finish, because their open weave lets dust pass through instead of clogging the abrasive.
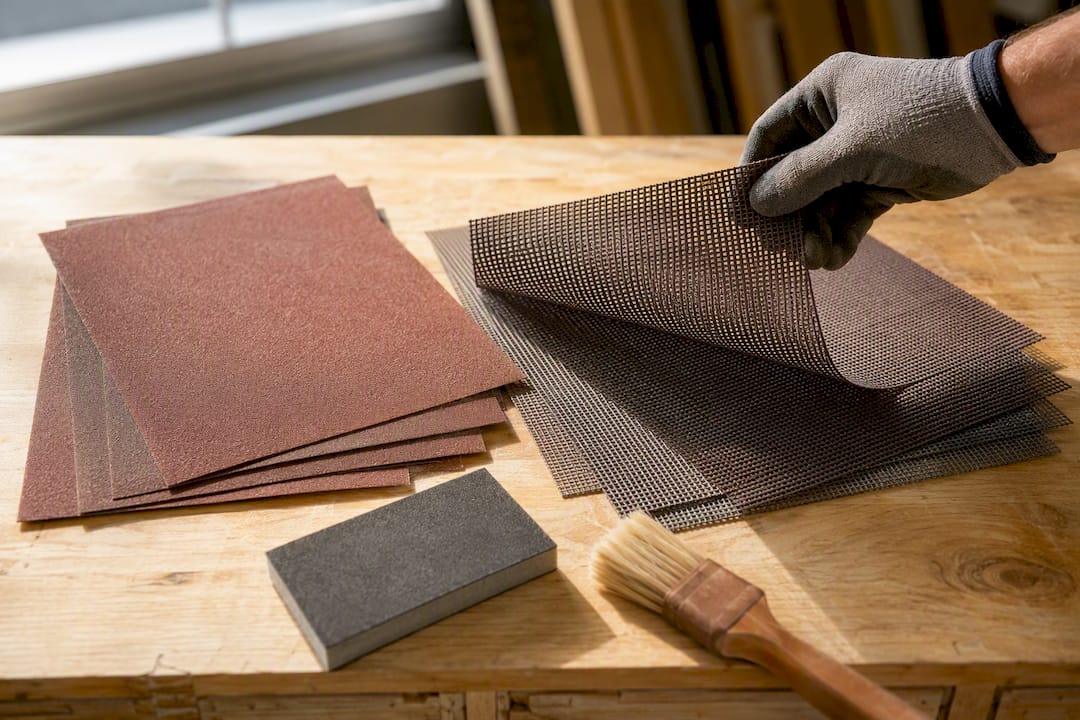
That clogging difference is bigger than it sounds. Mesh discs paired with active dust collection stay sharp far longer than solid paper doing the same job, which means fewer changeovers and less wasted material over a full room.
On mineral type, three options dominate the floor sanding world:
- Aluminum oxide is the standard, affordable, and reliable choice for most drum and edger work.
- Zirconia cuts more aggressively and holds an edge longer on hardwoods, useful for that first coarse pass on a tough old finish.
- Ceramic grain lasts longest under heavy use but costs more, generally worth it for larger jobs or dense species like oak.
Check compatibility before you buy: drum belts, edger discs, and buffer screens each use a different attachment format, and manufacturers list which minerals and backings work on which machines. A breakdown of common abrasive options is worth a look before you place an order, since the wrong backing on a rental machine either won’t seat correctly or won’t last the room.
Mistakes That Show Up After The Finish Goes On
Most refinishing disasters aren’t visible until stain hits the floor, which is exactly why they’re so frustrating to fix.
- Skipping medium grit entirely. Jump from 36 to 100 and the deep scratches never disappear. Catch this before finish goes down by checking under low-angle light and dragging a damp rag across a test section. Water raises hidden scratch lines that dry eyes miss completely.
- Sanding cross-grain instead of with it. Cross-grain marks are stubborn, and they show up badly once stain settles into them. Always run the drum with the grain, full stop.
- Over-sanding thin engineered wear layers. Watch for color changes or a slightly different grain pattern emerging mid-sand. That’s often the plywood substrate telling you to stop immediately.
- Belt tracking and chatter marks. A wobbling or crooked belt leaves gouges; a sander left running in one spot burns a shiny, glazed patch into the wood. Both need feathering out with a slightly coarser grit before you can move forward again.
Pro Tip: Never run a drum sander finer than 100 grit as your final pass on the drum itself. Save anything finer for the buffer, where the orbital action blends the scratch pattern instead of burnishing a hard, closed surface that resists stain absorption.
What Field Experience Teaches About Preserving Your Floor
The conservative rule holds up every time: start as fine as the job allows, and only step down in grit when a real test patch proves you have to. Every coarse pass removes wood you don’t get back, and on a 3/4 inch solid floor that margin might be the difference between refinishing again in fifteen years or sanding through to the tongue and groove.
On budgeting, order slightly more of your starting grit than the room math suggests. Most rental counters will accept unused, unopened sheets back, so overordering costs you nothing but a return trip.
Following the finish manufacturer’s sanding profile isn’t a suggestion you can skip if the floor looks smooth enough. Sand too fine before an oil-modified polyurethane, and the surface can get too polished for the finish to properly grip, leading to peeling or uneven cure months later.
- Start fine, escalate only after a failed test patch.
- Order 10 to 15 percent extra of your opening grit.
- Match your final drum grit to what your chosen finish actually specifies, not what feels smoothest by hand.
When To Sand It Yourself And When To Call In Help
Most single rooms with a solid existing finish, no serious cupping, and no deep gouges are reasonable DIY territory if you’re willing to run the test patch and respect the sequence. Where I’d draw the line: floors with heavy cupping or crowning that need leveling, anything suspected to carry old asbestos-based adhesives under the finish, and engineered floors where you genuinely can’t tell how much wear layer remains. Those jobs call for a professional set of eyes before a sander ever touches the boards. Some local distributors field these questions from DIYers regularly and can point you toward the right abrasive, finish, or a referral when a job is bigger than a weekend project.
— Mike Solomich
Get The Right Abrasives And Advice Before You Rent A Sander
Renting a drum sander for a weekend only pays off if you walk in with the right grits already picked out, and that’s where a lot of DIYers waste money buying the wrong sheets on a rushed guess. Some flooring suppliers stock the abrasives, buffer screens, stains, and finishes you’ll actually need for the sequence in this guide, with staff knowledgeable about which grit combination fits your specific floor.

Bring a photo of your test patch, or better yet a small sample piece, into the showroom before you commit to a rental. We’ll help you confirm your starting grit, match a finish to your wood species, and figure out how many sheets to actually order so you’re not making a second trip mid-project. If the scope looks bigger than a weekend job once we talk it through, our hardwood floor sanding services and refinishing team can take it from there. It’s wise to consult and obtain a quote before spending on rental equipment.
Sources
- How to sand a wood floor — Bona
- Hardwood floor sanding screen vs sandpaper — Novogrit
- Which sandpaper grit for floor sanding — HSS DIY
- Floor sanding grit sequence — Floor Chem Depot
FAQ
Can I go straight from 24 grit to 60 grit on a floor sander?
No. Jumping from 24 to 60 skips the medium stage that erases 24-grit scratches, leaving deep marks that show up as dark streaks once stain hits the wood. Run 24 to 36 to 60 instead, and 24 to 36 to 60 to 80 to 100 for a full sequence.
What do the numbers on sandpaper actually mean?
The grit number refers to how many abrasive particles fit per square inch of backing. Lower numbers like 36 mean fewer, coarser particles for aggressive material removal, while higher numbers like 120 mean finer particles for smoothing.
Is 80 grit fine enough to finish a hardwood floor?
It depends on the finish. Many water-based finishes go down fine over an 80 to 100 grit surface, but oil-modified polyurethanes often need at least a light buffer pass, and going past 100 to 120 on the drum can hurt adhesion for some coating systems. Always check your specific finish manufacturer’s recommendation before finalizing your last grit.
Should you sand hardwood floors with or against the grain?
Always sand with the grain, running the length of the boards. Cross-grain scratches are difficult to remove and tend to show through stain even after later, finer passes.
How much does floor refinishing cost if I hire a professional instead?
Professional floor refinishing generally runs $3 to $8 per square foot, while spot repair and refinish work on smaller areas typically falls between $200 and $600 per area, according to current Quality Hardwoods of Michigan pricing.