
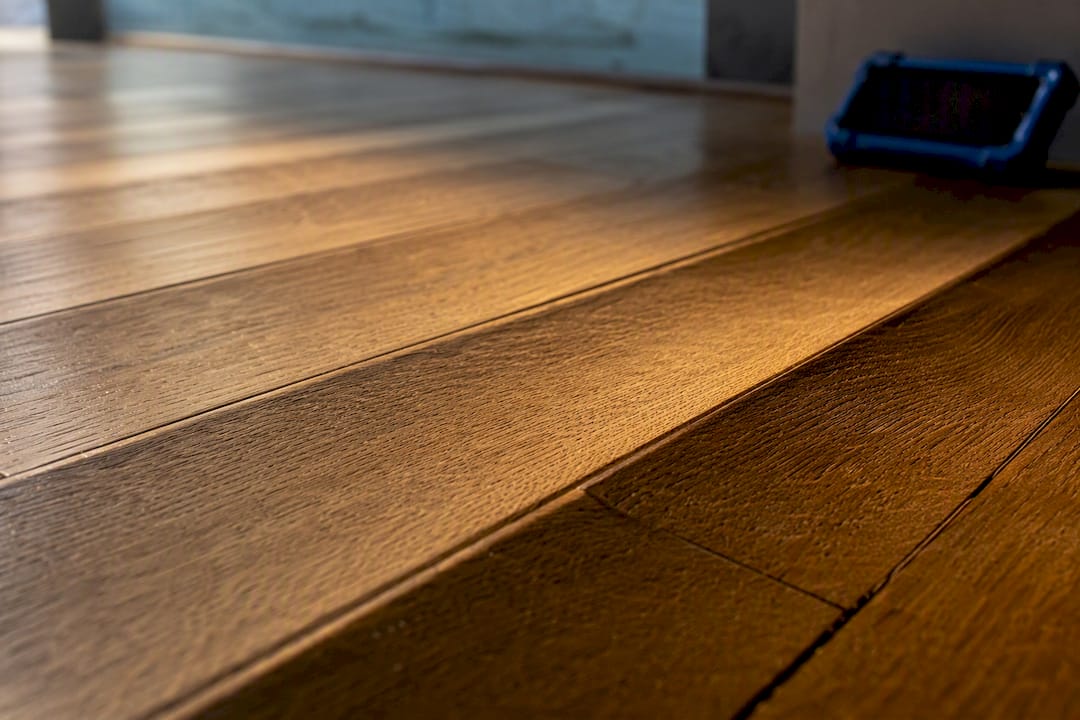
Cupping happens when the edges of your hardwood boards rise higher than their centers, and it almost always means the underside of the wood is holding more moisture than the top. Before you touch a sander, find the moisture source and stop it, then let the floor dry and stabilize. Sanding a wet, cupped floor is the single most common mistake that turns a fixable problem into a permanent one.
TL;DR:
- Fixing cupping hardwood floors requires addressing the underlying moisture source before attempting any drying or repair measures.
- Moisture testing should compare affected boards to unaffected ones and include slab humidity measurements to confirm active moisture intrusion.
- Fully drying the space and stabilizing humidity levels for several weeks or months is critical before sanding or replacing boards, to prevent future cupping.
- Localized cupping from leaks can resolve quickly once the leak is fixed, but whole-house cases often stem from structural or environmental issues requiring professional intervention.
- Proper installation, acclimation, and maintenance practices are key to preventing cupping and ensuring long-term stability of hardwood flooring.
Table of Contents
- What Does Cupping Hardwood Floors Look Like?
- What Causes Hardwood Floor Cupping?
- How Do You Test for Moisture in Cupped Floors?
- Can Cupped Hardwood Floors Be Fixed, and in What Order?
- How Do You Prevent Cupping During Installation and Ownership?
- When Should You Call a Flooring Professional?
- Why Quality Hardwoods of Michigan Is a Resource Worth Using
- A Flooring Pro’s Take on Cupped Floors
- Sources
- FAQ
What Does Cupping Hardwood Floors Look Like?
Cupping gives each board a shallow U shape when you look at it in cross section. The two long edges sit noticeably higher than the middle of the plank, and if you run your hand across the floor, you’ll feel a series of low troughs. It’s easy to confuse with two other kinds of movement, so it’s worth knowing the difference before you diagnose anything.
Crowning is the opposite: the center of the board rises above the edges, usually because a floor was sanded flat while it was still cupped and wet, and then dried out afterward, forcing the middle up. Buckling is far more dramatic. Boards actually lift off the subfloor entirely, sometimes several inches, and it typically follows a major flood or a burst pipe rather than gradual humidity creep.
Here’s how to confirm you’re looking at true cupping:
- Hold a flashlight at a low angle across the floor. Cupped boards throw a visible shadow line along each seam because the edges catch the light while the centers dip away from it.
- Run a fingernail or a coin across a few boards. You should feel a smooth, shallow dish shape rather than a sharp lip or crack.
- Check for a musty smell near the affected area, which often points to trapped moisture underneath rather than surface spills.
- Look at where the cupping is worst. If it’s concentrated on a kitchen sink, bathroom, exterior wall, or laundry room, you’re likely dealing with a localized leak or condensation source.
- If cupping shows up evenly across an entire room or the whole house, especially worse in winter or during humid stretches, seasonal humidity swings or a chronically damp crawl space or basement are more likely culprits.
That distinction between localized and whole-house patterns matters more than most homeowners realize. A cupped patch of three or four boards next to a dishwasher points you toward a specific, fixable leak. Cupping that runs wall to wall in every room on the first floor points toward something structural, like a crawl space with no vapor barrier or a slab that’s still releasing construction moisture years after the pour. Contractors who skip this step often chase the wrong fix, resurfacing boards near a window when the real problem is subfloor moisture coming up from below the entire structure.
What Causes Hardwood Floor Cupping?
Every cause of cupping traces back to one mechanism: the bottom face of a board absorbs more moisture than the top face, so it expands more, and the board bows upward at the edges to relieve the stress. Where that extra moisture comes from is the real question, and it usually falls into one of four categories.
- Subfloor and crawl-space moisture. A crawl space or basement without a proper vapor barrier pushes humidity upward into the subfloor around the clock, even when nothing looks visibly wet. This is one of the most persistent causes because it never lets the wood fully dry between exposures, and foundation-level vapor pressure tends to keep reintroducing moisture until the source itself gets sealed or ventilated.
- Plumbing leaks and appliance failures. A slow leak under a dishwasher, a dripping supply line behind a washing machine, or a failed wax ring under a toilet can soak a subfloor for months before anyone notices a stain. These leaks tend to produce sharply localized cupping, often in a tight cluster of boards rather than across a whole room.
- Failed membranes and adhesives. On slab installations, a moisture barrier that wasn’t applied correctly, or an adhesive that wasn’t rated for the slab’s vapor emission rate, lets ground moisture migrate straight into the wood from below. This is an installation defect as much as an environmental one, and it often shows up within the first year or two.
- High indoor humidity and HVAC mismanagement. High relative humidity for extended stretches, oversized air conditioners that short cycle without pulling out humidity, or homes where the HVAC gets shut off for weeks during a vacancy all create the same slow, even swelling. Industry guidance from Bona points to indoor RH in the 30% to 50% range as the target band for keeping wood flooring dimensionally stable.
A fifth cause deserves its own mention because it’s entirely preventable: improper installation. Boards installed without adequate acclimation to the home’s humidity, floors laid over concrete without a vapor retarder, or planks nailed down with the wrong fastener schedule and no room to expand, all set up cupping before the floor has even seen its first humid summer.
Once you’ve narrowed down which category you’re dealing with, trace it systematically rather than guessing:
- Walk the perimeter of the affected area and note whether cupping follows a wall, a plumbing fixture, or an exterior-facing side of the house.
- Check under sinks, behind appliances, and around toilet bases for staining, softness, or a musty smell in the subfloor.
- If there’s a crawl space or basement below, inspect for standing water, exposed dirt without a vapor barrier, or condensation on ductwork and pipes.
- Pull a humidity reading from a household hygrometer in the affected room and compare it against readings from an unaffected room in the same house.
- Review the installation date and method if the home is newer or the floor was recently replaced. Cupping within the first two years often points to acclimation or vapor-barrier problems rather than a new leak.
How Do You Test for Moisture in Cupped Floors?
Diagnosis starts with numbers, not guesswork. Pin-type moisture meters insert two small probes into the wood and measure resistance between them, giving a reading at a specific depth, which makes them useful for checking whether moisture is concentrated near the surface or deeper in the plank. Pinless meters, like the Wagner Meters Orion, use electromagnetic sensors to scan moisture content without puncturing the finish, which makes them the better choice on floors you don’t want to mark up, especially prefinished or engineered wood.
For slab-on-grade installations, moisture testing needs to go a step further. In-situ relative humidity probes get inserted into small drilled holes in the concrete to measure vapor emission from within the slab itself, while surface-level tests like calcium chloride or plastic-sheet checks give a faster but less precise read on what’s escaping at the top. Contractors documenting a warranty claim or an insurance dispute generally want both wood moisture content and slab RH data, not just one or the other.
Here’s how a thorough diagnostic pass should run:
- Take wood moisture content readings on at least three boards in the affected area and three in an unaffected area for comparison.
- Record readings at multiple points across each board, not just one spot, since moisture rarely distributes evenly across a plank.
- Log indoor relative humidity daily for at least a week using a basic hygrometer, noting HVAC settings and weather conditions alongside each reading.
- If a slab is involved, run an in-situ RH probe test rather than relying on a surface calcium chloride test alone, since surface tests tend to underestimate deep slab moisture.
- Keep every reading time-stamped in a simple log. Time-stamped RH logs and moisture readings are exactly what most manufacturers and installers want to see before approving a warranty claim.
Pro Tip: A single moisture reading tells you almost nothing on its own. What matters is the differential between a cupped board and a healthy one in the same room. A gap of just a few percentage points in moisture content between the wet and dry areas is usually enough to confirm you’re dealing with active moisture intrusion rather than normal seasonal variation.
As a target range, most flooring manufacturers and installers work toward indoor relative humidity between 30% and 50% year-round. Readings that sit consistently above typical recommended humidity levels, especially paired with a moisture content differential between affected and unaffected boards, tell you the floor still has an active moisture source feeding it.
Can Cupped Hardwood Floors Be Fixed, and in What Order?
Cupping can often reverse on its own once the moisture source is gone and the wood is given time to dry evenly, but the order you tackle the problem in determines whether it actually stays fixed. Skip a step, or do them out of sequence, and you risk turning a temporary cosmetic issue into permanent board damage.
1. Stop the moisture source first, before anything else. Fix the leaking supply line, reroute the downspout away from the foundation, seal the crawl-space vapor barrier, or repair the failed slab membrane. Nothing downstream of this step matters if the source is still active. A dehumidifier running in a room with an unfixed roof leak is just buying time, not solving the problem.
2. Dry and stabilize the environment. A standard household dehumidifier can handle mild, whole-room humidity issues, but severe cases, particularly crawl spaces, flooded basements, or slabs with high vapor emission, usually call for a commercial-grade low-grain-refrigerant (LGR) unit. Restoration guidance from RapidRepair notes that household units often can’t pull enough moisture out of the air fast enough when the source has been saturating a space for weeks. Pair dehumidification with active airflow, box fans or an HVAC system running continuously, to help the wood release moisture evenly rather than drying from the top down while the bottom stays wet.
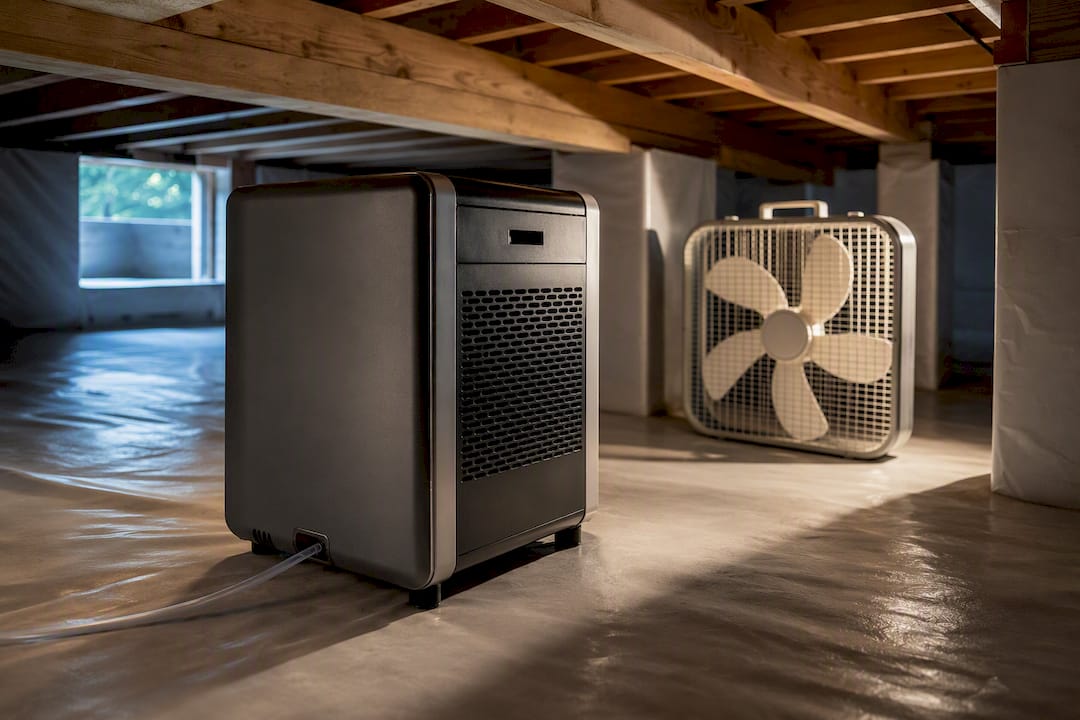
3. Verify with repeat readings before doing anything mechanical. This step gets skipped constantly, and it’s the single biggest reason cupping repairs fail. Take moisture content readings every few days and watch for the differential between affected and unaffected boards to close. Depending on severity, this can take anywhere from a couple of weeks for minor seasonal cupping to several months for a floor that sat over a saturated slab. Don’t move to sanding until readings on the affected boards are within a point or two of the rest of the room, and stay stable across at least two consecutive checks a few days apart.
4. Repair only once the readings are stable. Once moisture content has leveled out, light sanding and refinishing can address minor cupping that hasn’t fully flattened on its own. Boards with permanent cell damage, deep staining, or structural softness need full replacement rather than resurfacing. If the subfloor itself was compromised, it has to be repaired or replaced before new boards go down, or you’re just setting up the next round of cupping.
The mistake to watch for above all others: sanding a cupped floor while it’s still wet. Once the surface gets sanded flat and the board later finishes drying out, the edges shrink back down while the middle stays swollen, producing crowning, which is often harder to fix than the original cupping. A cosmetic-only approach, sanding and refinishing without ever finding and stopping the moisture source, almost guarantees the problem returns within a season or two, often worse than before.
How Do You Prevent Cupping During Installation and Ownership?
Most cupping cases trace back to decisions made before the first board ever went down. Getting acclimation and moisture protection right at installation prevents the majority of the problems homeowners deal with years later.
Acclimation means letting new hardwood sit in the space it’ll be installed in, ideally for several days to a couple of weeks, so it can equalize toward the room’s expected moisture content before anyone nails or glues it down. Skipping this step, or rushing it in a home with active drywall mudding or fresh concrete still curing, is one of the most common causes of cupping within the first year of a new floor.
On concrete slabs, a proper moisture barrier matters as much as the wood itself. Professional installers commonly apply a one-component roll-on primer as a vapor barrier, then use a flexible, silane-based adhesive combined with a nail-glue-assist technique to both anchor the boards and give them room to move without pulling moisture up from below. This combination handles the reality that slabs, even ones poured years ago, keep releasing trace vapor almost indefinitely.
A few installation and maintenance habits go a long way toward keeping a floor stable for decades:
- Leave a proper expansion gap, typically a quarter to a half inch, around the perimeter of the room so boards have room to swell without buckling against a wall.
- Stagger seams according to manufacturer specs rather than lining them up, which spreads stress across the floor instead of concentrating it.
- Keep indoor relative humidity in the 30% to 50% range year-round with a hygrometer, not a guess, and adjust your HVAC or a whole-home humidifier or dehumidifier accordingly.
- Avoid steam mops entirely on hardwood. They push moisture directly into seams and finish lines in a way a damp cloth never will.
- Wipe up spills immediately, especially near sinks, exterior doors, and pet bowls, rather than letting water sit on the finish for hours.
Pro Tip: If you live somewhere with big seasonal humidity swings, don’t panic over a little seasonal gapping in winter or slight cupping in a humid August. A small amount of movement is normal wood behavior. What you’re watching for is movement that doesn’t reverse once the season changes or the humidity stabilizes.
When Should You Call a Flooring Professional?
Minor cupping tied to a single humid week or a small, already-fixed leak is often something you can monitor and let resolve on its own. A few situations call for bringing in a professional instead of waiting it out.
- Cupping that covers most of a room or spans multiple rooms, rather than a small localized patch.
- Cupping that keeps coming back season after season despite reasonable humidity control.
- Any sign the subfloor itself is soft, spongy, or visibly damaged when you check underneath a pulled board.
- A crawl space or basement with standing water, no vapor barrier, or visible mold growth.
- Uncertainty about whether a slab’s vapor emission rate is within an acceptable range for the flooring installed over it.
Professional remedies typically include industrial-grade dehumidification equipment that outpaces anything sold for home use, full crawl-space encapsulation with a sealed vapor barrier and dedicated ventilation, slab vapor mitigation coatings for chronic emission problems, and, when boards are too far gone, selective replacement paired with a full refinish to blend new wood into the existing floor.
Cost swings widely based on a few factors: how much square footage is affected, how accessible the crawl space or subfloor is, whether the fix is purely environmental (a dehumidifier and sealed vapor barrier) or requires tearing out and replacing boards and subfloor material, and how much specialized equipment the job needs. A localized repair near one leaky appliance costs far less than a whole-house crawl-space encapsulation project. NWFA maintains certification standards that most reputable installers follow, and their certified professional directory is a solid starting point for finding someone qualified to diagnose and quote the job properly.
Why Quality Hardwoods of Michigan Is a Resource Worth Using
Quality Hardwoods of Michigan, Inc has spent more than 40 years supplying hardwood, engineered wood, and moisture-control products to contractors and homeowners across the state, and cupping calls are a recurring reason people walk into the showroom. That kind of repeat exposure to real moisture failures, not just product catalogs, is what informs the guidance on this page.
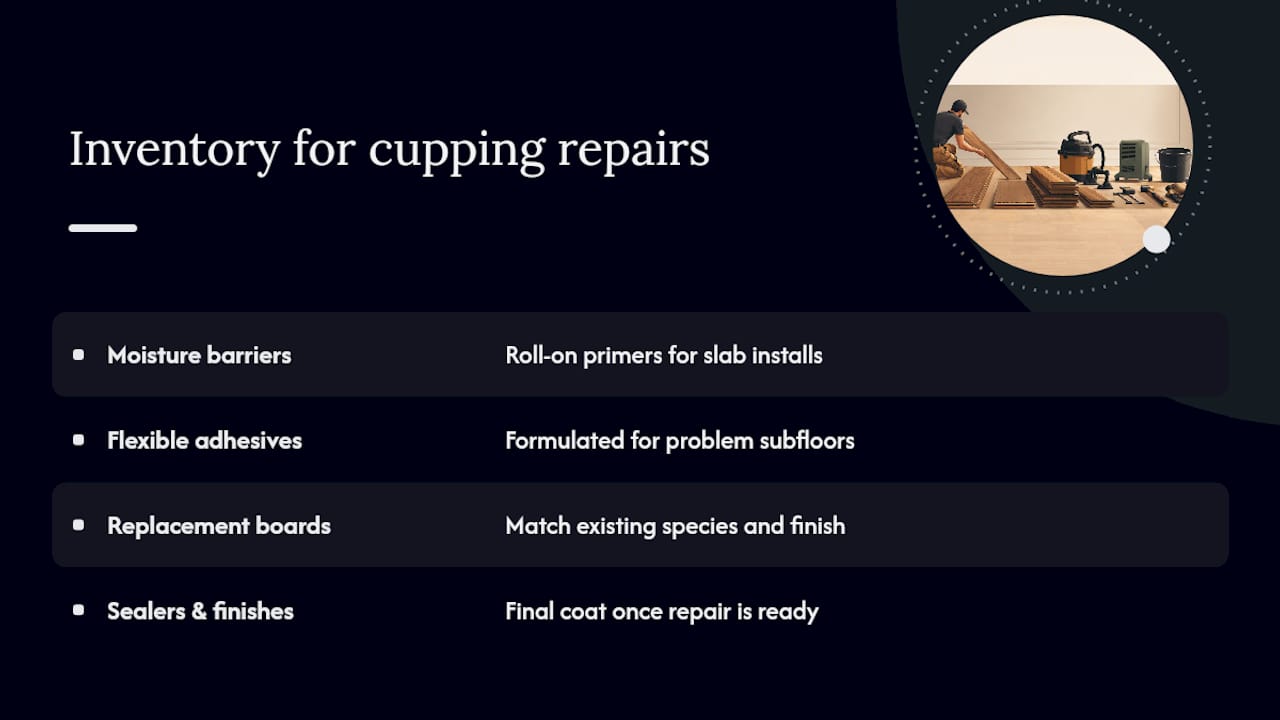
The inventory that matters most for cupping remediation and prevention sits in a few specific categories: moisture barriers and roll-on primers for slab installations, flexible adhesives suited to problem subfloors, replacement boards matched to existing floors by species and finish, and the sealers and finishes needed once a repair is ready for the final coat. Anyone rebuilding a section of cupped flooring needs boards that match the existing installation closely enough that the repair doesn’t stand out, which is where a supplier with deep, varied stock makes a real difference over a single big-box aisle.
For readers documenting a claim or planning a repair, the subfloor requirements guide and the maintenance checklist cover the groundwork in more depth than a single article can.
A Flooring Pro’s Take on Cupped Floors
Cupping panics people because it looks like the whole floor is failing, when usually it’s just wood doing exactly what wood does when one side gets wetter than the other. The lesson that actually matters isn’t a trick or a product. It’s sequence: diagnose before you touch anything, document what you find with real readings, dry the space out completely, and only then decide whether sanding or replacement is even necessary.
Skip the documentation step and you’ll have a hard time getting a warranty claim honored later, because “it looked wet” doesn’t hold up the way a logged moisture reading does. If you’re staring at a cupped floor right now and need boards, finish, or a straight answer about whether a repair is realistic, reach out to Quality Hardwoods of Michigan, Inc and bring your moisture readings with you.
— Mike Solomich
Sources
- Helping with Wood Floor Cupping — Bona
- Can Wood Floor Cupping Be Fixed? — Wagner Meters
- Rapidrepair
- NWFA — National Wood Flooring Association
FAQ
How Do You Fix a Hardwood Floor That’s Cupping?
Find and stop the moisture source first, then dry the space with a dehumidifier and airflow until moisture readings on the cupped boards match unaffected boards nearby. Only after readings stabilize should you consider sanding or replacing boards.
Will Cupped Hardwood Floors Go Away on Their Own?
Minor, seasonal cupping often flattens out once relative humidity returns to a normal range without any intervention. More severe or long-standing cupping usually needs the moisture source actively identified and stopped before the wood can fully recover.
Can Cupping in Hardwood Floors Be Reversed?
Yes, in many cases, if the moisture source gets fixed and the floor is given time, sometimes weeks, sometimes several months, to dry out slowly and evenly. Wood that’s been saturated for a long period or suffered structural cell damage may not fully flatten and could need replacement instead.
How Long Does It Take for Cupped Floors to Flatten Out?
It depends on severity and how the drying is handled. Minor seasonal cupping can resolve within a few weeks once humidity normalizes, while floors affected by a slab or crawl-space moisture problem can take several months, especially without professional-grade dehumidification.
What’s the Difference Between Cupping and Warping?
Cupping is a specific type of warping where the edges of a board rise above its center, forming a U shape, caused by the underside absorbing more moisture than the top. Warping is a broader term that also covers crowning, where the center rises above the edges, and buckling, where entire boards lift off the subfloor.