
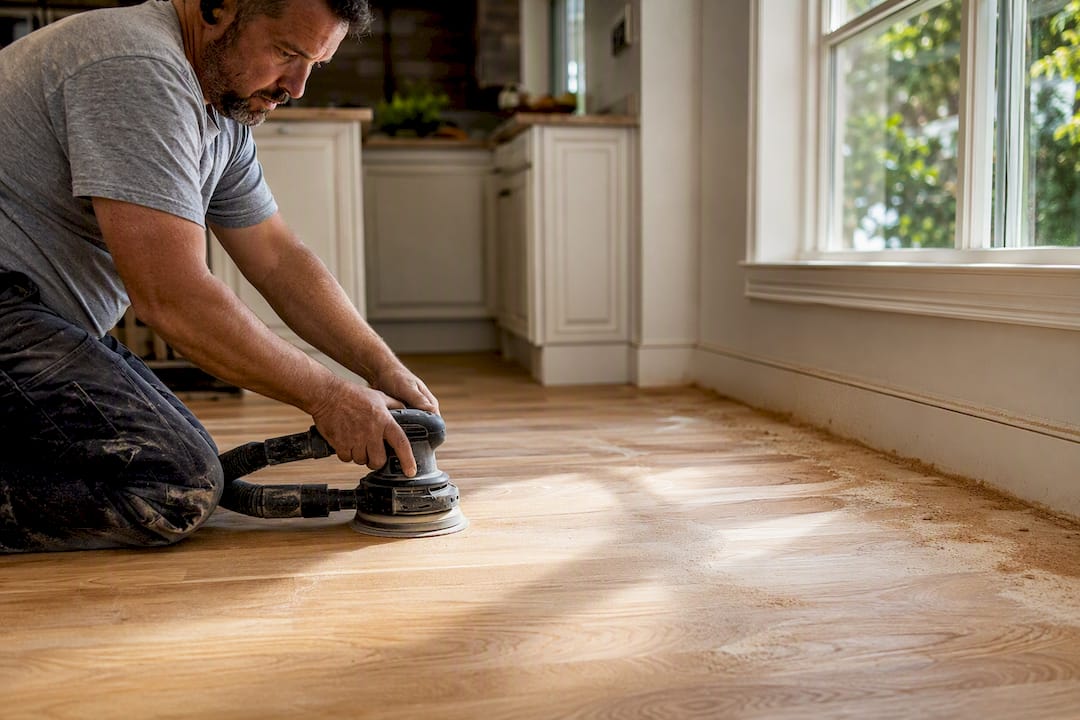
Yes, you can sand and finish unfinished hardwood yourself if you follow a progressive grit sequence, control dust at every step, and pick a finish that matches how you actually live in the room. Solid unfinished hardwood forgives a lot when the process is right. Here’s the fast version before we get into the details:
- DIY it if the floor is solid wood, the room is under 500 square feet, and you’re comfortable running power tools for a weekend.
- Hire a pro if you’ve got deep gouges, water damage, or more than one story of flooring to cover.
- First move: order or rent a random-orbit floor sander and grab 60, 80, and 100-120 grit sandpaper before anything else.
Budget a full weekend for a small room, three to five days for a whole floor, and pick up a NIOSH-rated organic vapor respirator if you’re going anywhere near oil-based finish. Quality Hardwoods of Michigan, Inc keeps the abrasives and finishes on hand if you’d rather see grit and sheen in person before you buy.
Key Takeaways
Sanding and finishing unfinished hardwood succeeds when you follow a coarse-to-fine grit sequence, control dust at every stage, and match your finish choice to how the room gets used.
| Point | Details |
|---|---|
| Grit sequence matters most | Progress through 60, 80, and 100-120 grit without skipping a step to avoid visible scratches. |
| Dust control prevents finish failure | Vacuum between every pass and finish with a barely damp tack-cloth pass before finishing. |
| Finish choice is a tradeoff | Water-based poly dries faster with less odor; oil-based ambers over time but needs fewer coats. |
| Budget realistically | DIY materials run roughly $700 for a mid-size home versus about $4 per square foot for pro labor. |
| Buy from a specialist | Quality Hardwoods of Michigan, Inc supplies unfinished hardwood, finishes, abrasives, and applicators in one Michigan showroom. |
Table of Contents
- Tools and Safety Gear for Sanding and Finishing Hardwood
- What’s the Right Grit Progression for Sanding Hardwood?
- How Do You Prep and Repair the Floor Before Sanding?
- How Do You Keep Sanding Dust From Ruining the Finish?
- Water-Based or Oil-Based Polyurethane: Which Should You Choose?
- How Do You Apply Stain and Polyurethane the Right Way?
- How Long Does It Take and What Does It Cost to Sand and Finish Hardwood?
- What Are the Most Common DIY Sanding and Finishing Mistakes?
- Where Can You Get Materials and Expert Guidance?
- Is Sanding and Finishing Hardwood a Good DIY Project?
- Get the Right Materials for Your Sanding and Finishing Project
- Sources
- FAQ
Tools and Safety Gear for Sanding and Finishing Hardwood
The equipment list is shorter than most first-timers expect. You need a random-orbit sander for the field of the room, a palm or detail sander for corners, and possibly a drum sander if the floor has serious cupping or old finish to strip. This Old House recommends random-orbit floor sanders for DIYers specifically because they’re far less likely to gouge the wood than a drum sander, which removes material fast in the hands of someone who hasn’t run one before.
Here’s what to have on hand:
- Random-orbit floor sander (rent or buy)
- Palm/detail sander for corners and tight edges
- Drum sander, rental only, for heavy stripping or badly cupped boards
- Edger for perimeter work
- HEPA-capable shop vacuum
- Tack cloths, lambswool applicator, high-density foam roller
PPE matters as much as the sander choice. Wear a NIOSH-approved organic vapor respirator when applying oil-based finish, and switch to an N95 or better dust mask while sanding. Add hearing protection, safety glasses, and gloves.
Pro Tip: Keep the sander moving the instant it touches the floor. A random-orbit sander left running in one spot for even a few seconds will burn a visible low spot into the wood that no amount of finish will hide.
Sanding mistakes are visible and permanent in a way most home projects aren’t. Renting the right machine for your floor’s condition, and wearing the right respirator for your finish, is what separates a smooth floor from an expensive redo.
What’s the Right Grit Progression for Sanding Hardwood?
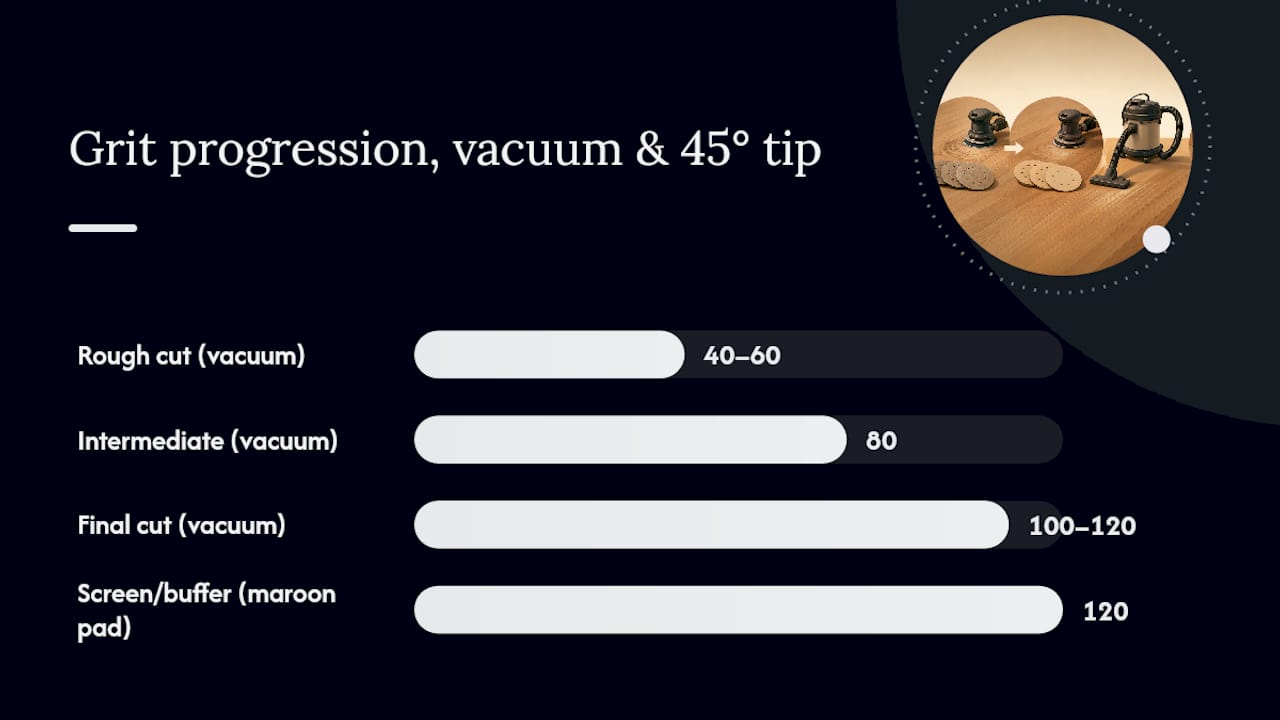
Skipping a grit is the single most common DIY mistake, and it shows up as fine scratches once the finish goes on and catches the light. The standard approach for unfinished floors in decent shape is 60 to 80 to 100-120 grit. Floors with heavy mill marks or old adhesive residue sometimes need a 40-grit starting pass before working up through 60, 80, and 120.
- First cut (60 grit): Removes mill marks and levels the boards. Work with the grain, overlapping each pass by about a third.
- Second cut (80 grit): Erases the scratch pattern left by the 60 grit.
- Final cut (100-120 grit): Prepares the surface for stain and finish, leaving a smooth, even scratch pattern.
- Edge and detail work: Use the edger for the perimeter and a detail sander for corners the edger can’t reach, matching the same grit sequence.
| Pass | Grit | Purpose |
|---|---|---|
| Rough cut | 60 (or 40 if heavily worn) | Levels boards, removes mill marks |
| Intermediate cut | 80 | Removes rough-grit scratches |
| Final cut | 100-120 | Preps surface for stain/finish |
| Screen/buffer | 120 or maroon pad | Final smoothing before finish |
Vacuum thoroughly between every cut. The NOFMA sanding manual treats this as non-negotiable, since leftover grit from the previous pass will scratch the next one. Where the edger leaves swirl marks the field sander missed, a quick hand-sand with the same grit blends the transition.
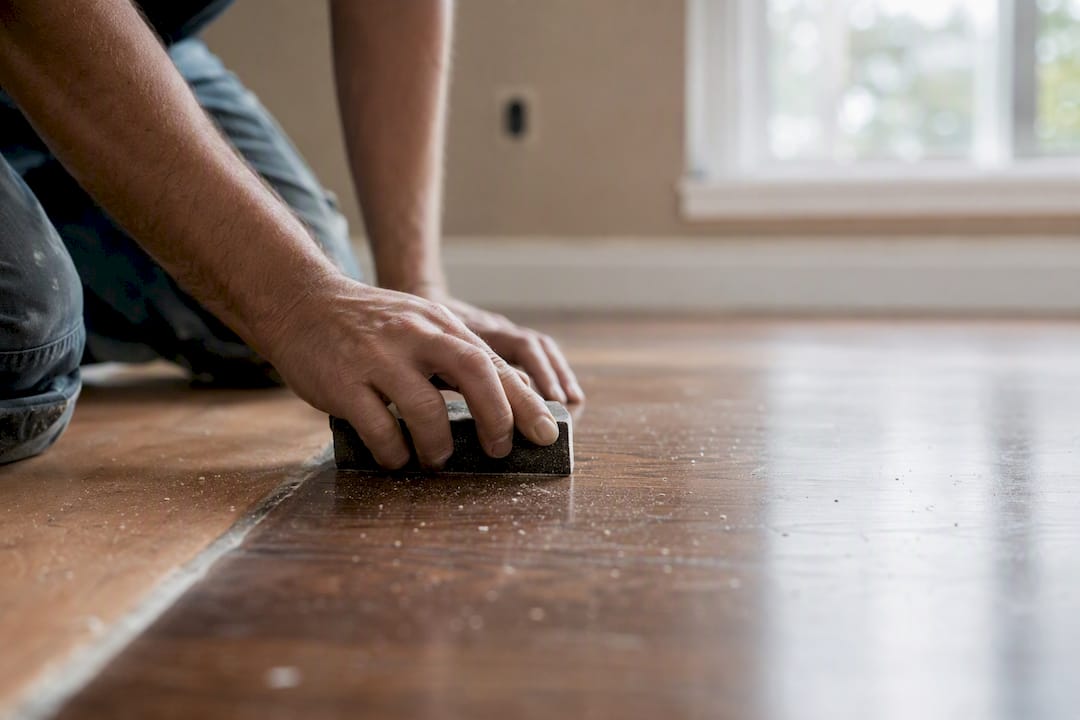
Pro Tip: Angle your final orbital passes slightly, roughly 45 degrees to the board seams on the very last pass, to catch any low spots the straight passes missed. Finish with a pass parallel to the grain so the sheen reads even under lamp light.
How Do You Prep and Repair the Floor Before Sanding?
Clear the room completely, pull the base shoe molding, and remove floor vents and any hardware in the sander’s path. Walk the entire floor and set any popped nail heads below the surface with a nail set, since a proud nail head will tear a sanding belt or gouge the drum.
- Fill gaps, gouges, and old nail holes with stainable wood filler that matches your intended stain color.
- Replace any board that’s cracked, cupped beyond repair, or water-stained through the grain.
- Let unfinished flooring acclimate in the room for one to three weeks before sanding, per NOFMA guidance, so the wood settles to the home’s actual humidity.
- Run a stain test on a scrap piece or a closet corner to check absorption and catch blotchiness before it’s on the whole floor.
Pro Tip: Wood filler dries a shade lighter than the surrounding stain once it’s sealed. Mix a small test batch, apply it to a scrap, and let the finish go over it before you commit to filling the whole floor.
How Do You Keep Sanding Dust From Ruining the Finish?
Fine dust is the enemy of a smooth finish, and it’s invisible until it’s baked into the poly as a gritty texture. Set up containment before the first pass, not after.
- Tape plastic sheeting over doorways leading to the rest of the house and run a box fan exhausting through a window to pull dust outward.
- Vacuum with a HEPA-capable shop vac after every sanding pass, then wipe with a tack cloth before moving to the next grit.
- Before finish goes down, use the technique pros rely on: a push broom wrapped in a barely damp, lint-free cloth, dragged across the whole floor. HardwoodInfo notes this final tack stage catches fine dust a vacuum alone leaves behind, and skipping it is a leading cause of gritty, dull-looking finish coats.
Pro Tip: If you’re transporting a rental drum sander in your own vehicle, empty its dust bag before you load it. A full bag can spill fine wood dust throughout your car on every turn. Homeowners dealing with dust from adjacent renovation work, like a low-dust door replacement, will recognize the same containment logic applies here.
Water-Based or Oil-Based Polyurethane: Which Should You Choose?
Neither finish is universally better. Water-based polyurethane dries fast, usually recoatable within two to three hours, and stays clear for decades, which matters if you want the natural color of the wood to show. Oil-based poly takes longer between coats, often eight to ten hours, but lays down a warmer amber tone that many homeowners actually prefer for traditional interiors.
- Water-based poly: Faster dry time, lower odor, more coats needed for the same protection, stays clear rather than ambering.
- Oil-based poly: Fewer coats needed for equivalent build, classic amber look, longer dry time, and noticeably higher VOCs.
- Hardwax oils and penetrating oils: Matte, low-sheen look with easier spot repairs, but they need more frequent reapplication than a film finish.
Architectural Digest confirms this tradeoff directly: water-based options dry quickly and resist scuffs well, but oil-based finishes yellow with age and carry more fumes during application.
If you’re staining first, test it on an inconspicuous section of the actual floor, not a scrap board, since grain density varies board to board and can throw off how evenly the color takes.
Always check the finish manufacturer’s specific drying and recoat windows before your second coat. Humidity and temperature in your home will shift those numbers more than the label suggests. Quality Hardwoods of Michigan, Inc’s finish guide breaks down sheen options and product-specific recoat times if you want a closer look before deciding.
How Do You Apply Stain and Polyurethane the Right Way?
Work in this order: optional sealer, then stain if you’re using one, then your finish coats. Each layer needs its own full dry time before the next goes on, so don’t rush ahead because the surface looks dry to the touch.
- Apply sealer or stain with a rag or foam applicator, wiping with the grain and working in sections you can reach before it starts to set.
- Cut in edges and corners with a brush first, then fill the field with a lambswool applicator (oil-based) or a high-density foam roller (water-based).
- Maintain a wet edge as you move across the room. Stopping mid-board and restarting is what causes visible lap marks.
- Let each coat cure fully, then screen with 220 to 320 grit or a maroon pad, vacuum, and tack-wipe before the next coat.
Most floors need at least three coats of polyurethane for real durability. Water-based systems usually mean three thin coats; oil-based often gets by with two to three heavier ones, according to D&G Flooring’s refinishing guide. Aim for a room temperature between 65 and 75 degrees Fahrenheit and humidity between 35 and 55 percent while finishing. Cold or overly humid conditions slow cure time and can cause the finish to stay tacky or trap bubbles.
How Long Does It Take and What Does It Cost to Sand and Finish Hardwood?
A single room typically runs one full weekend: a day for sanding, a day for stain and the first coats, and another day or two of cure time before furniture goes back. A whole-house project can stretch to a full week once you count dry time between coats.
- DIY cost: Sander rental, abrasives, finish, and PPE for a mid-size home often lands around $700 in materials, per BobVila’s refinishing breakdown, plus several days of your own labor.
- Professional cost: Expect roughly $4 per square foot or more for a full sand, stain, and poly job done by a contractor.
- When a pro makes sense: large square footage, tight timelines, or floors with damage severe enough that a sanding mistake would mean replacing boards.
If the math is close for your square footage, Quality Hardwoods of Michigan, Inc’s cost breakdown for Michigan homeowners is worth a look before you commit either way.
What Are the Most Common DIY Sanding and Finishing Mistakes?
Most failures trace back to one of a handful of repeatable errors, and nearly all of them are fixable if you catch them early.
- Skipping a grit leaves visible scratch patterns once the finish is on. Fix: screen back with the missed grit and refinish that section.
- Dust nibs in the finish come from inadequate tack-cloth cleaning. Fix: lightly sand with 320 grit, wipe clean, and recoat.
- Lap marks and bubbles happen when the applicator loses its wet edge or gets overworked. Fix: sand the affected area smooth, then reapply a thin, even coat.
- Blotchy stain usually means the wood wasn’t sanded evenly or a test patch was skipped. Fix: on light blotching, a toner coat can even things out; heavy blotching may need to be sanded back to bare wood.
- Finish applied too thick causes runs and extends cure time dramatically. Fix: let it cure fully, then screen and add a thinner corrective coat.
Pro Tip: Small mistakes rarely mean starting over. Spot-sand the problem area, feather the edges into the surrounding finish, and recoat just that section, most repairs blend in once the full floor gets its final coat.
Where Can You Get Materials and Expert Guidance?
Quality Hardwoods of Michigan, Inc has spent more than 40 years supplying unfinished hardwood, stains, finishes, and abrasives to contractors and homeowners across Michigan, and the showroom is set up for exactly this kind of project research.
- Bring room measurements and a photo of your current floor if you’re shopping for stain or finish match.
- Ask to see finish sheens and grit samples in person before buying, since photos rarely capture true gloss level.
- If wear-layer depth or board condition looks questionable, request a referral to a local installer rather than guessing.
Homeowners tackling their first sand-and-finish project get the most value out of a five-minute conversation at the counter, seeing grit and sheen side by side saves a return trip.
Is Sanding and Finishing Hardwood a Good DIY Project?
For most solid hardwood floors in reasonable condition, this is one of the more rewarding weekend projects a homeowner can take on. The skill ceiling is lower than people assume. Patience with dry times matters more than talent with a sander.
Where I’d draw the line: floors with wear layers thin enough to question, deep water staining, or square footage over 1,000 feet in one continuous run. Those situations carry real risk of an irreversible mistake. Run your stain test, respect the dry times, and don’t rush the last coat.
Get the Right Materials for Your Sanding and Finishing Project
If you’ve read this far, you already know the tools matter as much as the technique, and that’s exactly where a specialty distributor beats a big-box aisle. Quality Hardwoods of Michigan, Inc stocks unfinished hardwood, water- and oil-based finishes, stainable wood fillers, abrasives across every grit in the progression, and the applicators to put it all down evenly, all in one Michigan showroom instead of three separate stores.

Whether you’re starting from bare subfloor or refinishing boards that have been down for decades, the showroom staff can walk you through sheen samples, grit selection, and which finish fits your household’s traffic and timeline. If your project involves new construction or a full room build-out, check their hardwood flooring options for new construction to see what’s available before you order. Stop by, bring your room dimensions, and leave with a materials list built for your specific floor.
Sources
Always follow the specific instructions printed on your finish and abrasive product labels, drying times and application methods vary by manufacturer and formula.
FAQ
Can You Really Sand and Finish Unfinished Hardwood Yourself?
Yes, most solid unfinished hardwood floors in decent condition are sandable and finishable by a careful DIYer using a random-orbit sander and a proper grit progression.
What Grit Should You Start With When Sanding Hardwood?
Start with 60 grit for floors in reasonable condition, or 40 grit if there’s heavy milling residue or old adhesive, then move through 80 and finish at 100-120.
Is Water-Based or Oil-Based Polyurethane Better for Floors?
Neither is universally better: water-based dries faster with less odor but needs more coats, while oil-based needs fewer coats but ambers over time and has stronger fumes.
How Long Does a DIY Hardwood Sanding Project Take?
A single room usually takes a full weekend, while a whole-house project can run five to seven days once you count dry time between coats.
How Much Does It Cost to Sand and Finish Hardwood Yourself?
DIY materials for a mid-size home run around $700 including rental and finish costs, compared to roughly $4 per square foot or more for professional labor.
Where Can You Buy Sanding and Finishing Supplies in Michigan?
Quality Hardwoods of Michigan, Inc stocks unfinished hardwood, water- and oil-based finishes, stainable wood filler, abrasives, and applicators for DIY and professional projects alike.
Recommended
- Installing Unfinished Hardwood Floors: Complete DIY Guide | Quality Hardwoods of Michigan
- Hardwood Floor Finishes | Quality Hardwoods of Michigan
- Wood Floor Installation Sequence: A Step-by-Step Guide — Quality Hardwoods of Michigan
- Wholesale Unfinished Hardwood Flooring: Complete Buyer’s Guide | Quality Hardwoods of Michigan