
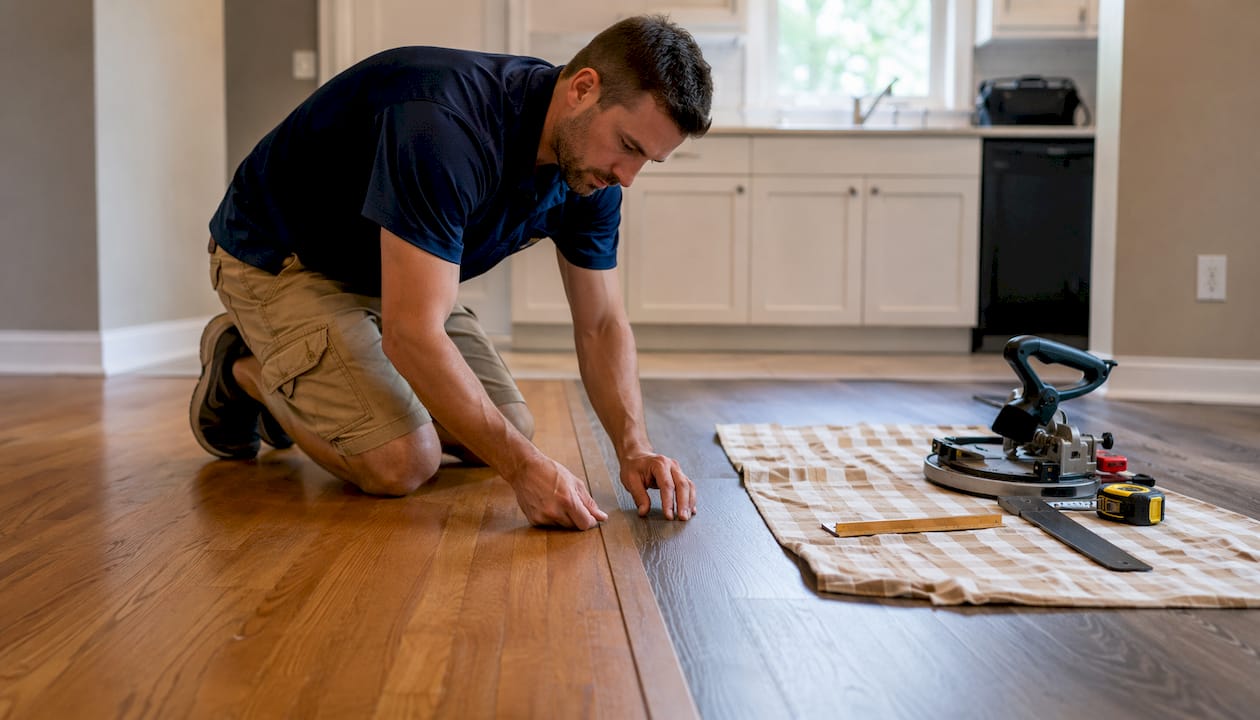
Flooring transition strips are narrow profiles installed at the seam between two floor surfaces to protect exposed edges, conceal expansion gaps, and prevent trip hazards. The most common types you’ll encounter on any project are: T-molding, reducer, threshold, end cap/square nose, stair nose, carpet trim (Z-bar), quarter-round/shoe molding, expansion joint covers, and flexible/curved strips.
Here’s what transition strips actually do: they protect vulnerable floor edges from fraying and chipping, mask expansion gaps that would otherwise collect debris, and create a visible, safe signal that the floor surface is about to change.
TL;DR: Need to pick a type? Jump to the complete catalogue below. Choosing materials for a wet area? Go straight to the materials section. Ready to order? The sizing and selection checklist near the end will walk you through it.
- T-molding: same-height floors meeting in a doorway
- Reducer: one floor higher than the other, commonly used for moderate height differences
- Threshold: exterior doors and wet-area entries
- End cap/square nose: floor ending at a wall, hearth, or step
- Stair nose: leading edge of each stair tread
- Carpet trim / Z-bar: carpet meeting a hard surface
- Quarter-round / shoe molding: floor meeting a baseboard or wall
- Expansion joint covers: large rooms or building movement joints
- Flexible/curved strips: curved or irregular floor junctions
Table of Contents
- What are the main types of transitions for flooring projects?
- Which material should you choose for your transition strips?
- What do you need to know before installing transition strips?
- How do you measure and order the right transition strips?
- How do you clean and repair transition strips?
- What are the alternatives to standard transition strips?
- How do you choose the right transition for your project?
- Key Takeaways
- The case for manufacturer-matched transitions
- Quality Hardwoods of Michigan, Inc has the transitions your project needs
- Useful sources
- FAQ
What are the main types of transitions for flooring projects?
Every transition profile solves a specific problem. Using the wrong one creates gaps, trip hazards, or buckling. Here’s a full breakdown of each type, with install notes so you can identify what your project actually needs.
T-molding
T-molding has a T-shaped cross section with a flat top rail and a center stem that drops into the gap between two floors. It’s designed for floors of equal or nearly equal height meeting in a doorway or open passage. Common pairings: hardwood to hardwood, laminate to laminate, or LVP to LVP in adjacent rooms.
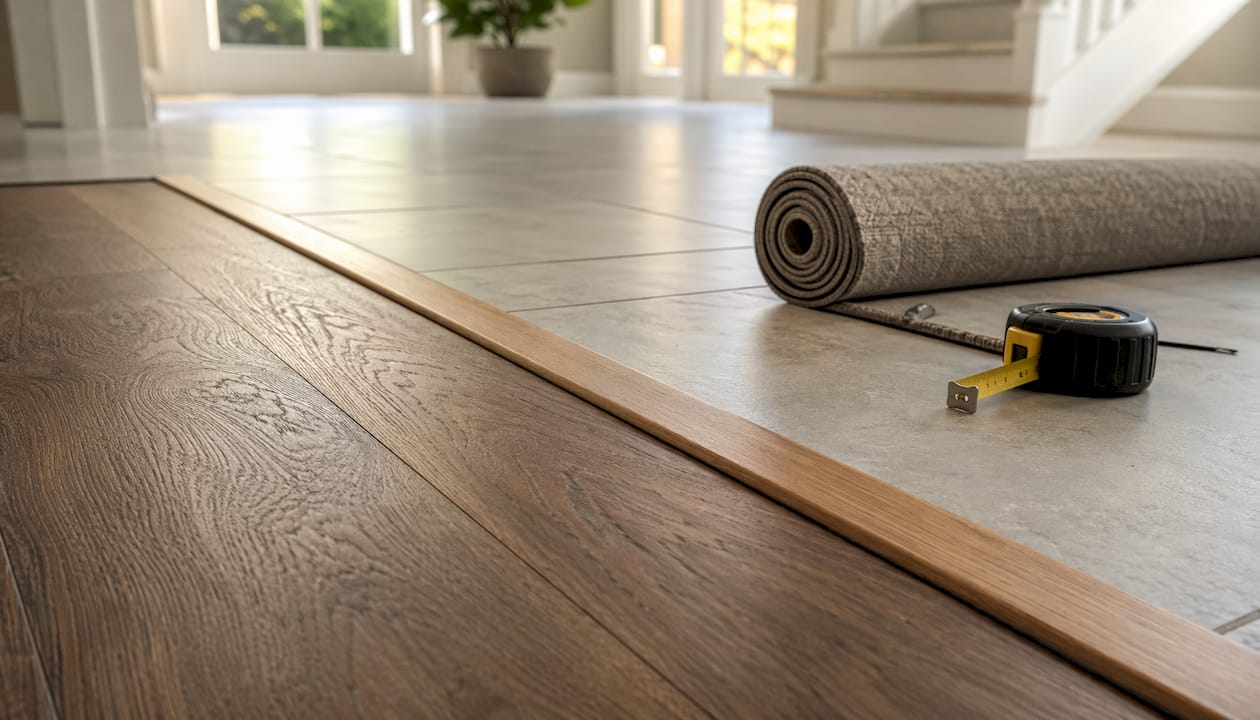
The stem requires expansion gaps on both sides of the flooring. Skip those gaps and the floors press against the stem as they expand, which causes buckling. Installation typically uses a metal track screwed to the subfloor; the T-molding snaps or slides into the track.
Reducer
A reducer has one thin edge and one thick edge, creating a tapered ramp from the higher floor down to the lower one. Reducer strips commonly bridge height differences from about 3/8 inch to 1/2 inch, with some models accommodating up to 5/8 inch. You’ll see them most often where 3/4" hardwood meets thinner LVP or vinyl tile.
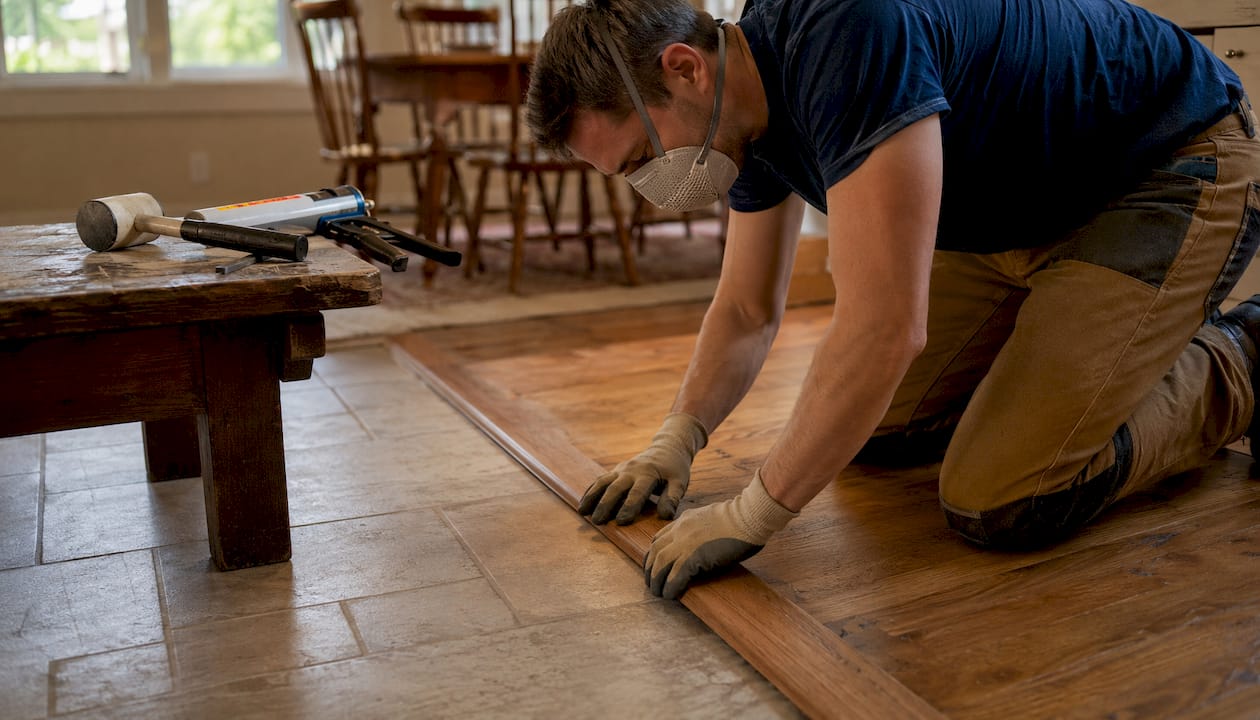
Install with a track system or adhesive, depending on the manufacturer. The thick edge sits against the higher floor; the thin edge feathers down to the lower surface.
Threshold
Thresholds are installed at exterior doorways and wet-area entries. They create a sealed, finished edge and can span moderate height differences. Common materials are aluminum and hardwood; aluminum is the better call for exterior use since it handles moisture and temperature swings without warping.
Installation is usually mechanical: screws through the threshold body into the subfloor or door frame sill.
End cap / square nose
An end cap finishes a floor that terminates at a wall, fireplace hearth, sliding door track, or step. It covers the raw edge of the flooring on one side only, with no flooring on the other side to transition to. Also called a square nose or floor vent trim when used around floor registers.
Fastening is typically adhesive or a track, depending on the profile.
Stair nose
Stair nosing covers and protects the leading edge of each stair tread. It overhangs the riser slightly, giving the step a finished look and adding a degree of traction. Stair nosing must be mechanically fastened into the subfloor or stair tread rather than relying solely on adhesive. Adhesive-only installations are a common cause of nosing failure and create a genuine trip hazard.
Available in wood, metal, and composite. For exterior stairs or high-traffic commercial steps, look for profiles with a non-slip surface insert.
Carpet trim / Z-bar
When carpet meets a hard floor, a Z-bar (also called a carpet bar or carpet reducer) is the standard solution. The metal bar has a tack-strip edge that grips the carpet fibers and a flat cap that folds over the raw carpet edge, covering the junction cleanly. The hard floor butts up against the bar without attaching to it.
For a more finished look in higher-end projects, a carpet reducer with a wood top cap achieves the same function with better aesthetics.
Quarter-round / shoe molding
Quarter-round is a small, curved profile that runs along the base of a wall where the floor meets the baseboard. It’s not technically a transition between two floor surfaces, but it covers the expansion gap between the floor and the wall. Fasten it to the baseboard or wall, never to the floor itself, so the floor can move freely underneath.
Expansion joint covers
In large open-plan rooms or commercial spaces, expansion joints run across the floor to allow the building structure to move independently. Expansion joint covers bridge these joints with a profile that allows movement in multiple directions. They’re also used where two different subfloor sections meet. Aluminum and rubber-insert profiles are most common.
Flexible / curved strips
Standard rigid profiles can’t follow a curved or irregular floor junction. Flexible transition strips are made from PVC or rubber and can be bent to follow arched doorways, curved walls, or irregular tile layouts. They’re a niche product but the right tool when the geometry demands it.
Transition type comparison
| Transition type | Best for (use case) | Height difference handled | Material options / moisture suitability | Installation method / difficulty | Aesthetic match |
|---|---|---|---|---|---|
| T-molding | Same-height floors, open doorways | None (equal height) | Wood, laminate, vinyl, aluminum / dry areas | Track + snap, easy | Flush, low-profile |
| Reducer | Different-height hard floors | 3/8"–1/2" (some up to 5/8") | Wood, vinyl, metal / moderate moisture | Track or adhesive, easy–moderate | Visible ramp |
| Threshold | Exterior doors, wet-area entries | Moderate | Aluminum, hardwood, brass / good for exterior | Mechanical screws, easy | Visible, finished edge |
| End cap / square nose | Floor ending at wall or fixed feature | Variable | Wood, vinyl, metal / dry–moderate | Adhesive or track, easy | Clean termination |
| Stair nose | Stair tread leading edge | N/A (edge cover) | Wood, metal, composite / dry–moderate | Mechanical fastening, moderate | Flush to tread |
| Carpet trim / Z-bar | Carpet to hard surface | Low–moderate | Metal (aluminum/zinc) / dry areas | Tack strip + fold, moderate | Clean metal reveal |
| Quarter-round / shoe | Floor-to-wall gap | N/A (gap cover) | Wood, PVC / dry areas | Nailed to baseboard, easy | Subtle, painted match |
| Expansion joint cover | Large rooms, building joints | Variable | Aluminum, rubber / all areas | Track or screw, moderate | Functional reveal |
| Flexible / curved | Curved or irregular junctions | Low–moderate | PVC, rubber / moderate moisture | Adhesive, easy | Follows curve |
Pro Tip: Photograph the existing floor edge and the adjacent surface before shopping. A picture of the actual profile and height difference saves a lot of back-and-forth at the counter.
Which material should you choose for your transition strips?
Material choice comes down to three factors: moisture exposure, traffic load, and how well the finish needs to match the floor.
Solid hardwood and veneered MDF
Solid hardwood transitions look premium and can be stained to match almost any wood floor. Veneered MDF is less expensive and works well in dry interior spaces. Neither belongs in a bathroom, laundry room, or basement. Wood swells with moisture, which causes the profile to lift, crack, or press against the flooring and cause buckling.
Aluminum, stainless, and brass
In wet areas and below-grade installations, metal extrusions are the right call. Aluminum is the most common: lightweight, corrosion-resistant, and available in anodized finishes that mimic wood grain or brushed metal. Brass and stainless are heavier and more expensive but suit high-end or commercial applications where durability and appearance both matter. Metal profiles are also the standard for tile-edge transitions, where a Schluter-style metal reveal protects the tile edge and provides a clean, modern finish.
PVC and vinyl
PVC transitions are flexible, moisture-proof, and inexpensive. They work well in basements, bathrooms, and utility areas where appearance is secondary to function. Vinyl-look finishes have improved, but they still don’t replicate the depth of a real wood stain.
Rubber
Rubber profiles are common in commercial and institutional settings: gyms, schools, hospitals. They absorb impact, resist moisture, and provide a non-slip edge. For residential use, rubber is mostly limited to stair nosing with anti-slip inserts.
Materials data table
| Material | Best use case | Moisture suitability | Durability | Typical finish options |
|---|---|---|---|---|
| Solid hardwood | Interior dry rooms, wood floors | Low | High (if dry) | Stained, painted, natural |
| Veneered MDF | Interior dry rooms, budget projects | Low | Moderate | Factory color, painted |
| Aluminum | Wet areas, exterior, commercial | Excellent | Very high | Anodized, wood-look, brushed |
| Stainless / brass | High-end, commercial, tile edges | Excellent | Very high | Polished, brushed, matte |
| PVC / vinyl | Basements, bathrooms, utility | Excellent | Moderate | Solid color, wood-look |
| Rubber | Commercial, stairs, gyms | Very good | High | Solid color, textured |
Pro Tip: For a bathroom or laundry room threshold, skip the wood entirely even if the adjacent floor is hardwood. An anodized aluminum profile in a matching tone looks sharp and won’t fail when the floor gets wet.
What do you need to know before installing transition strips?
Correct fastening and anchoring are what separate a transition that lasts from one that lifts, rattles, or causes a trip hazard within a year.
The single most important rule: anchor transitions to the subfloor, not to the floating planks. When you fasten a transition to a floating floor, the floor can’t move independently. That movement has to go somewhere, and it usually goes into a buckled seam or a popped plank.
Pro Tip: Plan your transition locations before you start laying flooring. Leaving transitions as an afterthought risks future buckling or binding because the expansion gaps weren’t sized correctly from the start.
Fastening methods by profile type
- Track systems: Most T-molding, reducers, and end caps use a metal or plastic track screwed to the subfloor. The profile snaps or slides into the track. This is the most DIY-friendly method.
- Mechanical screws or nails: Thresholds and some heavier profiles are screwed directly through the body into the subfloor. Stair nosing always requires mechanical fastening into the tread or subfloor.
- Adhesive: Used for some lightweight profiles on concrete subfloors where drilling isn’t practical. Not appropriate for stair nosing or any profile subject to lateral stress.
Stair nosing: no shortcuts
Stair nosing is the one profile where adhesive-only installation is genuinely dangerous. Foot traffic applies a forward shear force to the nosing on every step. Adhesive alone can’t hold against that force over time. Mechanical fastening into the tread is the standard, and it’s what the International Building Code and International Residential Code reference when addressing stair edge protection. If you’re unsure whether your installation meets local code, check with your building department before finishing the stairs.
Tile transitions: plan the track first
For tile-to-hard-floor transitions using a metal track profile, set the track before grouting the tile. The track edge sits flush with the tile surface; grouting over or around it after the fact creates an uneven edge and a weak bond. Measure the track length, cut it with a metal saw or angle grinder, and fasten it to the subfloor before the tile goes in.
Tools you’ll need
A miter saw or oscillating tool for cutting profiles to length, a drill for track screws, a rubber mallet for snapping profiles into track, and a tape measure. For metal profiles, a metal-cutting blade is worth having. For installing hardwood or LVP flooring alongside transitions, the same tool kit applies.
How do you measure and order the right transition strips?
Measure the opening width from wall to wall (or from the edge of one floor to the edge of the other), then add a small allowance for cutting to fit. Most transition strips are sold in standard lengths of 6 feet or 12 feet; you cut them down on site.
For doorways, one 6-foot strip is usually enough. For longer runs, like a hallway or an open-plan seam, calculate total linear footage and order with a 10% overage for cuts and waste.
Finish matching
Buying transitions from the same manufacturer as the flooring is the most reliable way to get a color match. Manufacturers engineer their transition profiles to match the flooring’s thickness, locking system, and expansion behavior. A third-party strip might be close in color but slightly off in profile height, which creates a visible lip.
When an exact match isn’t available, unfinished wood transitions can be stained on site to match. This takes more time but gives you precise color control. For laminate flooring and LVP, factory-finished transitions in the same product line are almost always the better choice since the surface layer can’t be sanded or refinished.
Pro Tip: Order a color sample of the transition strip alongside your flooring sample before committing. Under store lighting, two “matching” products can look noticeably different. Check them both under the actual lighting conditions of the room.
Custom profiles and lead times
Standard stock profiles ship quickly. Custom extrusions, custom stain colors, or wide saddle transitions can take several weeks. If your project has a hard completion date, order custom transitions at the same time as the flooring, not after.
How do you clean and repair transition strips?
Most transitions need very little attention once installed. The maintenance that matters is catching problems early before a loose fastener becomes a lifted strip and a trip hazard.
Cleaning by material:
- Wood: Wipe with a barely damp cloth. Standing water or wet mopping will cause wood transitions to swell and lift. Use the same cleaner you’d use on the wood floor itself.
- Metal: Mild dish soap and water. Avoid abrasive scrubbers on anodized finishes; they scratch the coating and expose bare aluminum.
- PVC/vinyl: Any vinyl-safe floor cleaner works. Avoid solvent-based cleaners, which can soften the material.
- Rubber: Mild detergent and water. Rubber is forgiving, but petroleum-based cleaners will degrade it over time.
Repair and replacement steps:
- Check whether the strip is loose at the track or the track is loose from the subfloor. A rattling strip usually means the track screws have backed out.
- If the track is secure, snap the profile out, re-examine the track, and snap a new profile in.
- If the track has pulled free, remove the old track, fill the old screw holes with wood filler or a suitable anchor, and re-fasten the track to the subfloor with new screws.
- Cut the replacement profile to length, test the fit, then snap or screw it into place.
- For wood transitions that have swelled or discolored, sanding and refinishing is possible if the profile is solid wood. Veneered or factory-finished profiles usually need full replacement.
When to call a pro: Damaged stair nosing should always be replaced by someone who can verify the mechanical fastening is correct. Complex custom profiles, transitions over in-floor radiant heat, or situations where the floor itself has moved significantly are also worth a professional assessment. For tips on related gap issues, the guide on filling gaps in wood floors covers causes and fixes in detail.
Pro Tip: Check every transition strip in the house once a year. Press down on each one and listen for a hollow rattle. A loose strip caught early is a five-minute fix; the same strip ignored for a year can damage the floor edge underneath.
What are the alternatives to standard transition strips?
Not every junction needs a traditional strip. For design-driven projects or very small height differences, several alternatives work well, though each comes with real tradeoffs.
- Flush-cut inlay transitions: A routed channel in the subfloor accepts a wood or tile inlay that sits flush with both surfaces. Zero visible profile, clean look. Requires precise subfloor work and is not suitable for floating floors, which need room to move.
- Grout or caulked seams: Where tile meets tile at the same height, a grout joint or flexible caulk line can serve as the transition. Works only when both surfaces are fully bonded (not floating) and the height difference is negligible.
- Decorative metal profiles: Schluter-style metal tile-edge profiles have moved well beyond utility. Designers now use them as intentional accent lines, choosing brushed brass or matte black to contrast with the tile. Metal Schluter-style profiles protect tile edges and provide a clean reveal that reads as a design feature rather than a cover-up.
- Custom wood inlays: A routed wood strip, often in a contrasting species, creates a decorative border between two floor areas. Common in high-end custom homes. Requires a skilled installer and is incompatible with floating floors.
- Patterned tile inlays: A row of mosaic or decorative tile at the junction between two hard surfaces. Visually striking and fully bonded, but requires both floors to be at the same height and fully adhered.
For rooms where the visual transition between spaces is part of the design intent, coordinating paint colors across rooms can reinforce or soften the effect of a floor junction.
Accessibility note: Any alternative that creates even a small lip or an abrupt edge raises ADA and trip-hazard concerns. The general threshold for a change in floor level without a ramp is 1/4 inch or less. Above that, a beveled or ramped transition is required in accessible spaces. Flush inlays and grout seams handle this well; decorative inlays with any raised edge do not.
Current trends lean toward minimalist flush transitions in open-plan spaces, metal accent profiles in contemporary kitchens and bathrooms, and wider use of custom wood inlays in high-end residential projects. The visible transition as a design element, rather than something to hide, has become a mainstream choice.
How do you choose the right transition for your project?
Match the profile to the height differential first, then factor in movement, moisture, and finish. Here’s an ordered checklist to work through before you order anything.
- What are the exact floor heights? Measure both surfaces. A difference of zero or less than 1/8" points to T-molding. A difference of 3/8"–1/2" (some up to 5/8") points to a reducer. Larger differences may need a threshold or ramp profile.
- Is either floor floating? If yes, anchor the transition to the subfloor, not to the planks, and confirm the expansion gap is sized per the flooring manufacturer’s spec.
- Is there moisture exposure? Bathroom, laundry, basement, or exterior door? Choose metal or PVC. Dry interior room? Wood or vinyl are fine.
- Do you need a color or finish match? If yes, check whether the flooring manufacturer sells matching transitions. Buying from the same product line is the most reliable path to a correct fit and finish.
- What fastening method will be used? Track systems work for most profiles. Stair nosing requires mechanical fastening. Adhesive-only is acceptable only for lightweight profiles on concrete where drilling isn’t possible.
- What are the lead times and costs? Stock profiles are available quickly. Custom stain or custom extrusion adds weeks. Factor that into your project timeline.
Quick decision rules for common pairings:
- Hardwood to hardwood, same height, doorway → T-molding
- Hardwood to LVP with height difference → reducer
- Any floor to exterior door → aluminum threshold
- Carpet to hardwood or tile → Z-bar carpet trim
- Floor ending at a wall or hearth → end cap
- Stair tread leading edge → mechanically fastened stair nose
- Large open-plan seam → expansion joint cover
Buying transitions from the same manufacturer as the flooring also protects your warranty. Many flooring manufacturers void the warranty if a third-party transition causes edge damage or restricts movement. Check the warranty terms before substituting a generic profile. For a deeper look at how flooring types affect transition choices, the vinyl, laminate, and hardwood comparison guide at Quality Hardwoods of Michigan, Inc covers thickness and compatibility in detail.
Key Takeaways
Matching the transition profile to the height differential, movement type, and moisture environment is the single decision that determines whether a strip lasts or fails.
| Point | Details |
|---|---|
| Match profile to height | T-molding for equal heights; reducer for 3/8"–1/2" differences (some up to 5/8"); threshold or ramp for larger gaps. |
| Avoid wood in wet areas | Use aluminum, stainless, brass, or PVC for bathrooms, laundry rooms, and below-grade spaces. |
| Anchor to the subfloor | Always fasten transitions to the subfloor, not to floating planks, so the floor can move independently. |
| Buy manufacturer-matched trims | Same-manufacturer transitions ensure correct profile height, finish match, and warranty compliance. |
| Quality Hardwoods of Michigan, Inc | Stocks common transition profiles and can source matching trims for hardwood, LVP, and laminate floors. |
The case for manufacturer-matched transitions
Here’s something most guides skip: the profile geometry of a transition strip matters as much as the color. A strip engineered for a specific flooring line accounts for that product’s exact thickness, the locking system’s edge profile, and the expansion gap the manufacturer requires. A generic strip that’s 1/16" too tall creates a lip. One that’s slightly too narrow leaves a visible gap. Neither is a disaster, but both are avoidable.
After 40+ years of working with flooring products at Quality Hardwoods of Michigan, Inc, the pattern is consistent: the projects that look cleanest and hold up longest are the ones where the transitions were ordered from the same manufacturer as the floor, at the same time as the floor. Not as an afterthought, not from a different supplier to save a few dollars. The expansion gap is sized correctly, the color is a genuine match, and the profile sits exactly where it should.
There’s also a practical warranty angle. Several major flooring manufacturers tie their warranty to the use of their own transition profiles. A third-party strip that restricts movement or damages the edge can void coverage on the entire floor. That’s a risk worth avoiding.
If you’re planning a project and want to get the transitions right from the start, the showroom is the place to work through it. Bring your flooring samples and the measurements of every junction in the project.
Quality Hardwoods of Michigan, Inc has the transitions your project needs
Picking the right transition strip is straightforward once you know the height difference, the moisture environment, and the flooring product. What’s harder is finding the matching profile in the right finish without a long wait or a trip to three different suppliers.

Quality Hardwoods of Michigan, Inc stocks a broad range of transition profiles for hardwood, luxury vinyl plank, and laminate flooring, including T-molding, reducers, stair nosing, thresholds, and end caps. For custom stain colors or specialty profiles, the team can source them and advise on lead times. Whether you’re a homeowner finishing a single doorway or a contractor managing a whole-house install, the process is the same: bring your measurements and your flooring product details, and the team will match you to the right profile.
Call for a quote, request color samples, or stop by the showroom to see profiles in person alongside the flooring they’re designed to match.
Useful sources
- D & G Flooring: Floor Transition Strips Guide — Best for reducer sizing, threshold types, moisture guidance, and installation overview.
- Family Handyman: How to Install a Floor Transition Strip — Best for step-by-step installation instructions and manufacturer-matching advice.
- National Flooring Authority: Flooring Transitions and Trim — Best for subfloor anchoring rules, floating floor movement standards, and tile-edge profiles.
- Angi: Floor Transition Strips Guide — Good overview of functional roles and edge protection.
- Ark of Flooring: Flooring Trims, Transitions & Moldings — Useful visual reference for profile types and stair trim details.
FAQ
What are the different types of transition strips?
The main types are T-molding, reducer, threshold, end cap/square nose, stair nose, carpet trim (Z-bar), quarter-round, expansion joint covers, and flexible strips. Each is designed for a specific height difference, location, and flooring pairing.
How do you transition two different types of flooring?
Match the profile to the height difference: use a T-molding when both floors are the same height, a reducer when one floor is higher by 3/8"–1/2" (some up to 5/8"), and a threshold or ramp profile for larger gaps or exterior doorways.
What can you use instead of transition strips?
Flush-cut wood or tile inlays, grout seams, decorative metal profiles, and custom wood inlays are all alternatives, but they work only on fully bonded (non-floating) floors with minimal height differences and require more precise installation.
What are the latest trends in floor transitions?
Minimalist flush transitions, brushed metal accent profiles (especially in kitchens and bathrooms), and custom wood inlays in contrasting species are the dominant trends, with designers increasingly treating the junction as a visible design feature rather than something to conceal.
Recommended
- Flooring Articles & Expert Guides — Hardwood, LVP & More | Quality Hardwoods of Michigan
- Replacing Carpet Stairs with Hardwood: A Complete Guide | Quality Hardwoods of Michigan
- Common Flooring Shopping Mistakes to Avoid in 2026 — Quality Hardwoods of Michigan
- Top 10 Flooring Questions | Quality Hardwoods of Michigan