
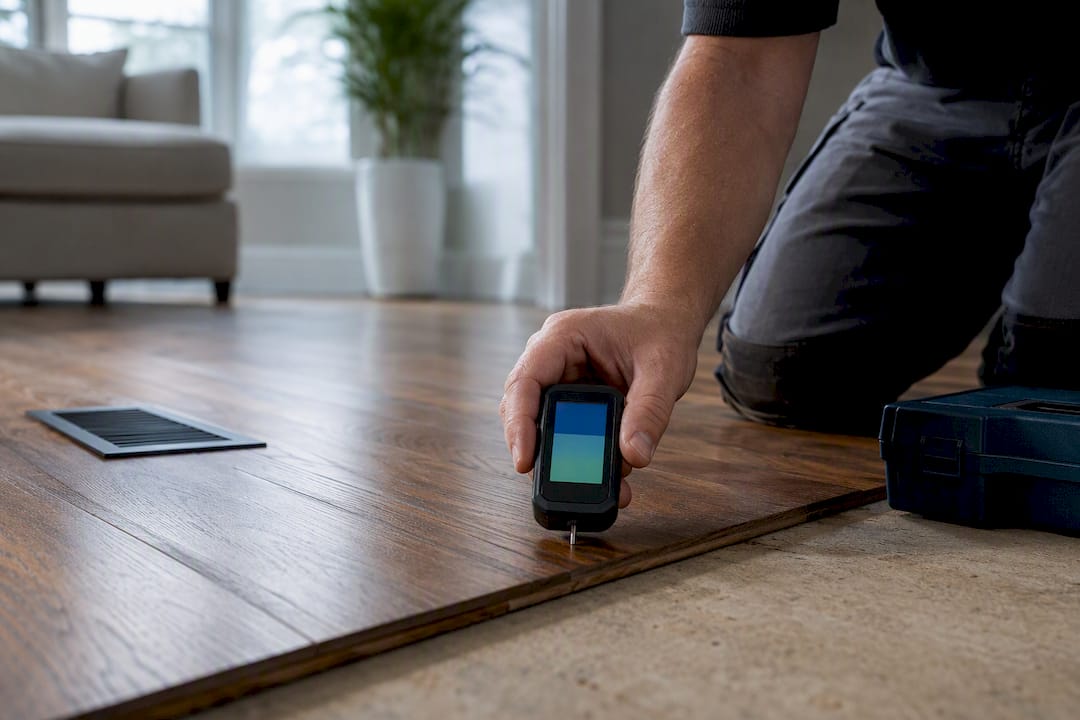
Keep indoor relative humidity between 30% and 50%, with temperature steady between 60°F and 80°F, before and after installing hardwood. If a hygrometer or moisture meter reading falls outside that band, hold off on installation and correct conditions first. A single good reading is not the goal. Year-round stability is what actually protects the floor.
TL;DR:
- Maintaining indoor humidity between 30% and 50% and temperature between 60°F and 80°F is essential for stable wood moisture content and avoiding damage.
- Rapid fluctuations in humidity, especially sudden jumps from 30% to 70%, cause the most damage, such as cupping, crowning, or finish crazing.
- Acclimation times vary: 3 to 10 days for solid hardwood, 48 to 72 hours for engineered, and up to 14 days for exotic species, with precise moisture levels key prior to installation.
- Proper measurement with calibrated pinless moisture meters at floor level and monitoring in multiple room points outweigh guesswork and prevent warranty issues.
- Continuous humidity control via whole-house HVAC with humidifiers and dehumidifiers is the most reliable way to prevent seasonal swings and moisture-related damage.
Table of Contents
- What Humidity and Temperature Should You Target for Hardwood?
- How Does Humidity Actually Damage Hardwood?
- How Long Should You Acclimate Hardwood Before Installing?
- How Do You Measure Humidity and Wood Moisture Correctly?
- How Do You Keep Indoor Humidity Stable All Year?
- When Should You Worry About Humidity Damage or Mold?
- What Should You Check in the 48 to 72 Hours Before Installing?
- Practical Field Tips
- Why Measurement Beats Guesswork on Every Job
- Sources
- FAQ
What Humidity and Temperature Should You Target for Hardwood?
The National Wood Flooring Association sets the baseline: interior relative humidity between roughly 30% and 50%, with temperature held roughly between 60°F and 80°F. Some installers work a tighter practical band, closer to 35% to 55%, especially during active installation and monitoring, according to Onset’s installation guidance. Others recommend 40% to 60% specifically to protect finish integrity, per Condair. These ranges are not contradictory. They reflect different priorities: NWFA’s band is the wood-science floor, while the tighter bands are conservative operating targets.
Temperature and humidity together determine equilibrium moisture content, or EMC, the moisture level wood settles into at a given climate. A few things shift how much tolerance you actually have:
- Wide planks (5 inches or wider) move more per percentage point of MC change than strip flooring.
- Species matters. Brazilian cherry and hickory expand and contract more aggressively than white oak.
- Radiant heat systems demand tighter RH control, often the upper-30s to mid-40s, because they dry wood from below.
How Does Humidity Actually Damage Hardwood?
Wood is hygroscopic. It absorbs moisture from humid air and releases it into dry air, expanding and shrinking as it does. That is not a defect. It is how the material behaves, and it is predictable once you understand the pattern.
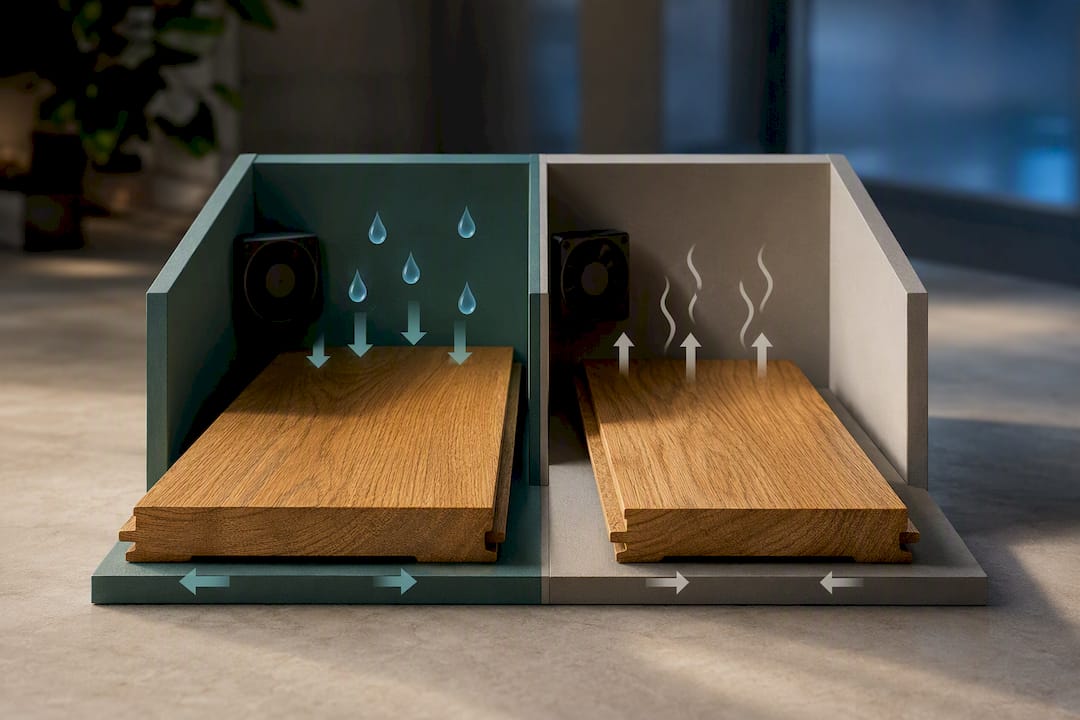
What causes real damage is the speed of the swing, not just the direction. A gradual seasonal shift from 45% RH in summer to 32% in winter is normal and largely reversible. A jump from 30% to 70% over a few days, from a flooded basement or a broken dehumidifier, is what triggers permanent damage. Industry monitoring practice consistently points to rapid fluctuation, not the seasonal baseline, as the bigger threat to installed floors.
Common failure patterns map directly to humidity behavior:
- Cupping (edges higher than the center) usually points to excess moisture from below, often a wet crawlspace or subfloor.
- Crowning (center higher than edges) often follows a cupped floor that dried out too fast, or moisture trapped after a refinish.
- Gapping shows up in winter when RH drops and boards shrink.
- Finish crazing or popping can follow extreme, sustained low humidity that over-dries the wood surface.
How Long Should You Acclimate Hardwood Before Installing?
Acclimation is not a calendar exercise. It ends when moisture meter readings show the flooring has reached equilibrium with the room it will live in, not on a fixed day count. That said, typical windows give you a planning baseline.
- Solid hardwood: plan on 3 to 10 days, checking MC daily until readings stop changing.
- Engineered hardwood: usually 48 to 72 hours, since the plywood core is more dimensionally stable than solid stock.
- Exotic species (Brazilian cherry, tigerwood, others): budget up to 14 days, since these woods are denser and slower to equalize.
- Confirm the differential: flooring MC should sit within 2% to 3% of the subfloor’s MC before you install, according to Weyerhaeuser’s moisture guidance.
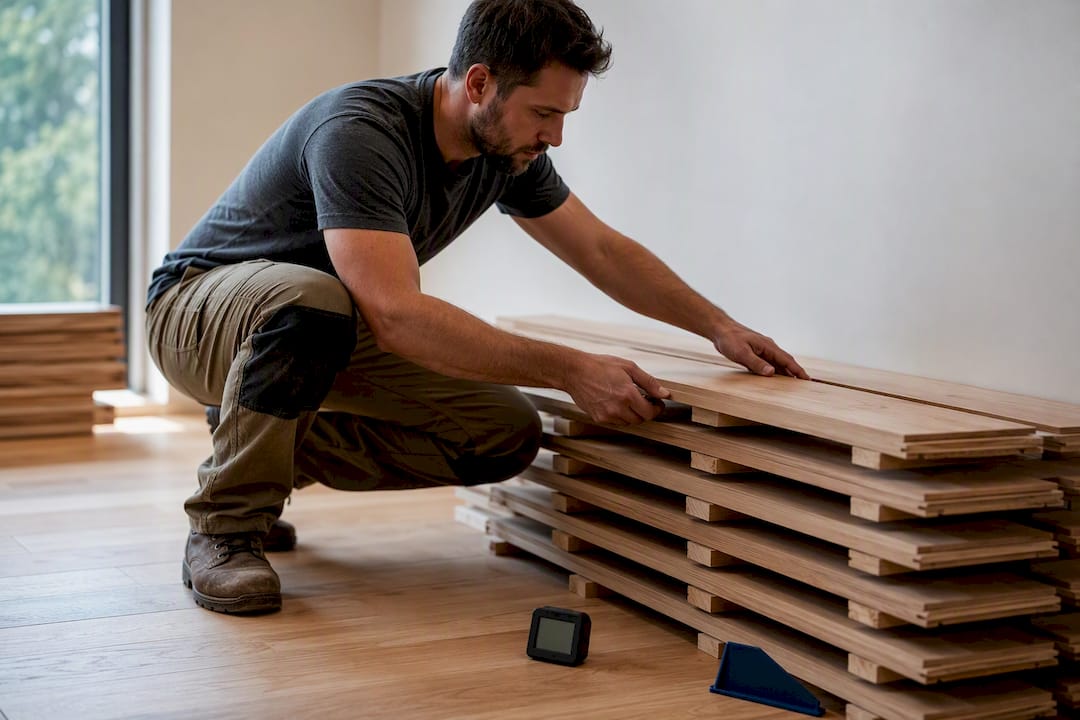
Store flooring in the room where it will be installed, cross-stacked with spacers between rows so air can move around each board. If HVAC is not yet running consistently in the space, or the building was recently drywalled or wet-finished, extend the acclimation window rather than guessing that it is ready.
Pro Tip: Keep a written log of daily MC readings during acclimation. If a warranty dispute ever comes up, that log is your best evidence the flooring was installed under proper conditions.
How Do You Measure Humidity and Wood Moisture Correctly?
A cheap hygrometer gives you a number, but placement and calibration determine whether that number means anything. Set hygrometers at roughly floor height in multiple rooms, away from exterior doors, vents, and direct sunlight, and check calibration against a known reference periodically.
- Pin meters puncture the wood surface slightly and read moisture at a set depth, useful for checking subfloor MC.
- Pinless meters use electromagnetic signals and won’t mark finished flooring, making them the better everyday tool for installers.
- Test both the flooring and the subfloor in several spots per room, not just one corner.
- For concrete subfloors, run a calcium chloride test or an in-situ RH probe test; Preverco’s acclimation guidance notes that concrete has its own pass thresholds separate from ambient RH, and installation should wait until concrete tests clear. Engineered products going over slab carry their own ASTM moisture rules worth reviewing before ordering material.
How Do You Keep Indoor Humidity Stable All Year?
A whole-house HVAC system with a built-in humidifier and dehumidifier is the most reliable fix for larger homes, since it treats the whole envelope instead of one room. Onset’s trade guidance notes that portable units tend to work better as spot solutions, in basements or single problem rooms, than as a whole-house strategy.
If you’re running a portable humidifier for wood floors, placement matters more than most people think:
- Keep the unit off wood surfaces entirely and several feet from trim or flooring edges.
- Use a drip tray under the unit and check it regularly for overflow.
- Pair it with an auto-shutoff hygrostat set to cut off around 55% to 60% RH so it can’t overshoot into mold territory.
- Spot-check the floor near the humidifier with a moisture meter every few weeks during heavy use.
Indoor plants can nudge humidity up modestly in dry months as a low-tech supplement, though they won’t replace mechanical control in a house with a real moisture problem, as Greenspace Plants explains. If a bathroom or laundry room keeps pushing moisture into adjacent flooring, a properly sealed interior door can slow that transfer.
Pro Tip: If your RH swings more than 10 to 15 points between seasons even with a humidifier running, that’s usually an HVAC balancing issue, not a device problem. Call an HVAC technician before buying a bigger humidifier.
When Should You Worry About Humidity Damage or Mold?
Match the symptom to the likely cause before reaching for a fix:
- Gaps between boards: RH has likely dropped below 30% for an extended stretch. Run a humidifier and raise levels gradually, not overnight.
- Cupping: check for a moisture source below the floor first. Raising humidifier settings won’t fix a plumbing leak or damp crawlspace.
- Buckling (boards lifting from the subfloor): almost always severe, sustained moisture exposure. Stop any water source immediately and get a professional inspection.
- Finish popping or crazing: often chronic low humidity combined with UV exposure.
Correct gradually. Swinging a dehumidifier hard for a day or two just trades one rapid-change problem for another. If cupping or buckling appears after any standing water event, get a professional water damage inspection rather than waiting to see if it dries out on its own.
What Should You Check in the 48 to 72 Hours Before Installing?
- Record ambient RH and temperature at three or more points in the room, including near exterior walls and any radiant heat zones.
- Measure MC of the flooring stock and the subfloor, confirming the differential sits within 2% to 3%.
- Verify HVAC is running and has conditioned the space for at least several days, not just switched on the morning of installation.
- If any reading fails, delay installation and schedule dehumidification, humidification, or subfloor drying as needed.
- Keep a written log of every reading with dates, since this becomes your documentation if a warranty question ever comes up.
Anyone unsure where to start should walk through a full pre-installation home preparation checklist before material even arrives on site.
Practical Field Tips
Most warranty disputes trace back to missing documentation, not bad flooring. Record hygrometer and moisture meter readings before, during, and after acclimation, and note where the flooring was stored. That record is worth more than memory if a manufacturer ever questions installation conditions.
A few habits separate careful installers from rushed ones: cross-stack flooring with airflow gaps rather than stacking it flat against a wall, keep material in the actual room it will be installed in rather than a garage or truck, and place hygrometers at floor level rather than eye level, since humidity readings can vary noticeably by height in a room. Walking contractors and homeowners through this process regularly is recommended, and guides on how to acclimate hardwood flooring cover the step-by-step version in more depth.
Why Measurement Beats Guesswork on Every Job
The flooring industry has spent decades publishing humidity ranges, EMC charts, and acclimation windows, yet most floor failures I’ve seen discussed in trade literature still trace back to skipped measurement, not bad information. Installers know the numbers. They just don’t always take the reading.
Conventional advice tends to treat acclimation as a countdown: wait three days, wait a week, move on. That framing misses the point. A moisture meter reading that hasn’t stabilized after ten days means the room isn’t ready, regardless of what the calendar says. A reading that stabilizes in 36 hours on an engineered product means you’re clear to proceed. The clock is a proxy. The meter is the truth.
If I had to pick one habit that prevents the most callbacks, it’s this: measure before you commit to a schedule, not after a problem shows up. Buy the hygrometer. Buy the moisture meter. Write the numbers down. NWFA’s ranges and Weyerhaeuser’s acclimation windows only protect a floor when someone actually checks them against reality on the specific jobsite, in the specific season, with the specific HVAC system running or not running that day.
— Mike Solomich
Sources
The numeric thresholds referenced throughout this guide come from a small set of trade authorities: the NWFA’s relative humidity summary, Weyerhaeuser’s moisture management guidance, Onset’s monitoring best practices, and Condair’s humidity control guidance. Each addresses a slightly different angle of the same core problem: keeping wood inside its intended moisture range.
- Relative humidity & wood - NWFA (summary)
- How Monitoring Humidity Can Protect Flooring Installations | Onset
- Protecting hardwood flooring with proper humidity control | Condair
FAQ
What Humidity Level Is Too High for Hardwood Floors?
Sustained relative humidity above 60% raises the risk of cupping and mold growth on and around hardwood, according to trade guidance from Condair. Occasional short spikes matter less than humidity that stays elevated for days or weeks.
Is 70% Humidity Too High for a House With Hardwood Floors?
Yes. At 70% RH, hardwood is well outside the recommended 30% to 50% NWFA range and at meaningful risk of cupping, and a dehumidifier should run until levels come back down. Sustained readings that high also raise mold risk on wood surfaces and trim.
How Do You Pull Excess Moisture Out of Hardwood Floors?
Run a dehumidifier to gradually lower ambient RH rather than trying to dry the wood directly, and identify and stop whatever moisture source caused the problem, whether that’s a leak, a damp crawlspace, or over-humidification. Sudden, aggressive drying can cause its own damage, so bring RH down gradually over days, not hours.